Showing posts with label American Food. Show all posts

Monday, February 10, 2025

PAN DE ELOTE (usando Polenta) - POLENTA CORNBREAD.- Super easy, hardy, lovely!

 My family has always loved Cornbread and we usually find, when we're out, pretty good examples of it. Plus we make it at home too, like today, made it for an afternoon treat before dinner... 

This recipe was made using Polenta since regular Corn Flour (the US type) wasn't available where I live (central MX), so used what I had and the result was great.

This recipe makes a compact and heavy cake, kind of like Corn Bars. Depending if you want your bread/cake sweeter or not, go up or down on the sugar quantity or use honey instead. I always like to add frozen corn kernels into the mix of batter, but I've also added Poblano Chile Strips cut small, grilled onion, Red Pepper in small squares, etc.

Give this very easy recipe a try, you'll see how well it turns out. To make this, you will need:
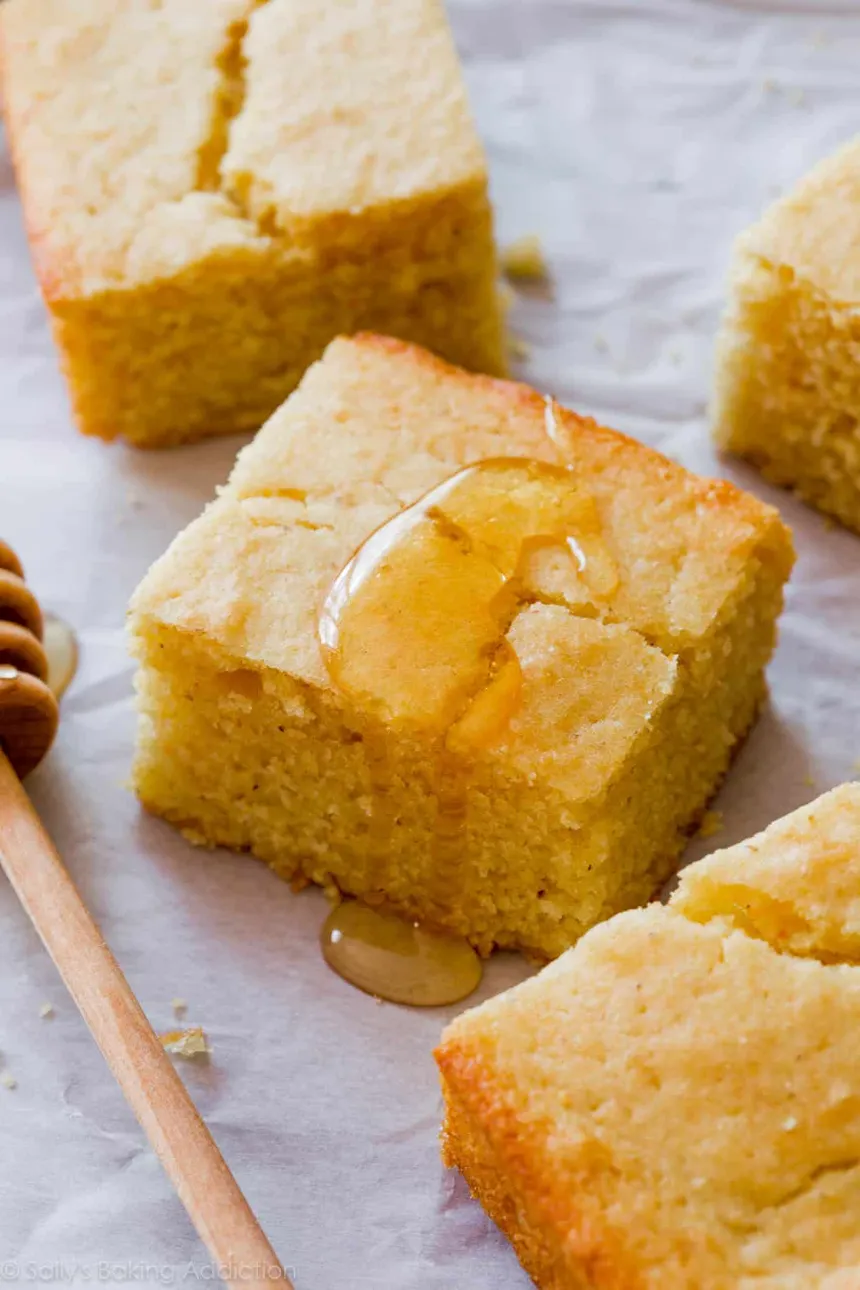

POLENTA CORNBREAD.-

  • 1 cup buttermilk
  • 1/4 cup melted butter                             
  • 2 large eggs
  • 1 cup polenta
  • 1 cup all-purpose flour
  • ⅓ cup sugar
  • 1 tablespoon baking powder
  • 1 teaspoon salt


Preheat oven to 400F.  Grease bottom of a 9×9 pan with butter or cooking spray. In a large bowl, beat buttermilk, butter, and eggs with a wire whisk.

Stir in remaining ingredients just until flour is moistened (batter will have lumps). Pour batter into prepared pan and bake 20-25 minutes or until golden brown and toothpick inserted in the center comes out clean. Serve warm.

Note:  You can also use regular Corn Flour

Saturday, September 16, 2023

Shepherd's Pie .- Lamb or Beef, just as good!!...


Shepherd's Pie:  Whether you prefer Lamb or Beef... Shepherd's or Cottage Pie is a wonderful dish, easy to prepare, looks amazing and tastes great!

Now this was not my original menu selection as I made a celebratory Mexican dish, Chiles en Nogada so had made a "Picadillo Compuesto" as the filling and had some leftover and it was too good to not recycle, and recycle I did!

To make this you'll need:

  • 3-4 garlic cloves, from garlic press
  • 1 lb potatoes, cut in small cubes
  • 2 cups beef broth
  • 3 oz bacon, sliced fine (optional)
  • ½ onion, chopped
  • 1.5 lbs ground beef or ground lamb
  • 2 carrots
  • 1/2 cup corn frozen or canned
  • 1/2 cup peas frozen
  • 1.5 tablespoon Worcestershire Sauce
  • ½ cup flour

Spice Blend

  • 1 teaspoon sea salt or Kosher
  • ½ teaspoon pepper, to taste
  • ½ teaspoon rosemary dried, crushed leaves
  • 1 teaspoon Thyme dried

For the Mashed Potatoes    

  • ½ teaspoon sea salt fine grind
  • ¼ cup butter salted
  • ¼ cup heavy whipping cream
  • ½ bulb garlic roasted, or from press

Cheese Topping

  • 1/2 cup cheddar cheese / sharp / Swiss white, grated
  • 1/2 cup Grana Padano, Parmessano Regiano 
  • your choice

Instructions

  • Chop up the bacon and, peel and slice the carrots, and dice the onion. Shred the cheese if not using pre-shredded. 
  • Peel and chop the potatoes into medium sized pieces. I recommend putting the potatoes in the 3 cups of beef stock to keep from browning.
  • Mix up your seasoning mix. 
  • Add the potatoes and beef broth to the inner pot of the Ninja Foodi and set to high pressure for 10 minutes. Make sure to turn the valve to seal. When done, immediate release and strain the potatoes in a colander. Reserve the beef broth. Gently break apart the potato chunks to allow the steam to escape. Set aside. NOTE: You can also cook in a pot in either broth or salted water. The entire dish can be prepared in any pot.
  • Turn the Ninja Foodi on and set to high saute. Allow to heat up for a minute or two and add bacon and diced onions. Saute, stirring occasionally, until the bacon starts to render its fat and the onions begin to cook.
  • Add in the ground beef, seasoning blend, ½ of the bulb of roasted garlic, and the Worcestershire sauce. Continue to saute until ¾ of the way done, breaking the meat up as you stir. 
  • Add Sliced Carrots. Continue to cook meat mixture for about 5 minutes or until carrots are just becoming soft.
  • Add in Frozen Peas and Frozen Corn. Stir to combine.
  • Sprinkle on ¼ cup of flour and stir to incorporate. Repeat with the remaining ¼ cup of flour and cook for about 2 minutes.
  • Slowly add in the beef stock, about 1 cup at a time. Stir until the flour has absorbed most of the stock before adding the next cup. Repeat until all cups are used. Be sure to scrape the bottom of the Ninja Foodi to remove the browned bits (called fond), they add tons of flavor to the sauce.
  • Reduce the heat to medium saute and cook until thickened. While that is happening, mash your potatoes. Keep an eye on the ground beef mixture and if it is boiling, reduce the heat to low. 
  • Mash the potatoes either by and or with a hand mixer. Add remaining ½ bulb of roasted garlic and ¼ cup of heavy cream, ¼ cup of butter and ½ teaspoon salt.
  • Turn the Ninja Foodi off. Layer the mashed potatoes on top of the ground beef mixture. Top with shredded cheese.
  • Air Crisp on 360° F for 10-15 minutes or until the cheese is melted and bubbly. Serve and Enjoy! 

Monday, September 11, 2023

Press-Inn Pie Crust - Easy, easy good


Press In Pie Crust


Servings: 8 (makes one 9-inch crust)
  • 8 tablespoons (113 grams/1 stick) unsalted butter, at room temperature
  • 1/4 cup (50 grams) granulated sugar
  • 1 large egg yolk
  • 1 teaspoon vanilla extract (optional)
  • 1 3/4 cups (218 grams) all-purpose flour
  • 1/2 teaspoon fine sea salt
  • 1 tablespoon water

Directions


  1. Step 1

    In the bowl of a stand mixer fitted with the paddle attachment, beat the butter and sugar on medium-low speed until smooth, 2 to 3 minutes.


  2. Step 2

    Raise the mixer speed to medium, add the egg yolk and vanilla, if using, and mix to combine. Stop the mixer and scrape the bowl down thoroughly. Add the flour and salt and mix on low speed until fully incorporated, 45 seconds to 1 minute. Add the water and mix just until the dough is smooth, 1 minute more.


  3. Step 3

    Turn out the dough and use your fingers to press it into a 9-inch pie plate, working up the sides. Wrap in plastic wrap and refrigerate for at least 30 minutes and up to overnight. (For the most pristine look, dock the crust all over with a fork, though feel free to skip this step entirely, as the crust will bake up nicely without docking.


  4. Step 4

    The crust can now be filled and baked, or par-/blind-baked for filling later. When ready to bake, position a rack in the center of the oven and preheat to 350 degrees.


  5. Step 5

    To use with fruit filling(s): Pour the cooled fruit filling into the unbaked, assembled pie crust and bake for about 35 minutes, or until the filling appears a bit matte on the surface. If needed, cover the crust edges with foil to prevent over-browning.


  6. Step 6

    To use with pudding filling(s): Blind-bake the crust before filling, for 20 to 22 minutes, or until evenly golden brown. Cool completely on a wire rack before adding the filling.


  7. Step 7

    Variations: Oatmeal Press-In Cookie Crust: Replace the granulated sugar with 1/4 cup (53 grams) of light brown sugar. Replace 1/4 cup (31 grams) of the flour with 3/4 cup (74 grams) of rolled oats.


  8. Step 8

    Spiced Press-In Cookie Crust: Add 1 to 3 teaspoons of ground spices — either one or a combination, such as cinnamon, turmeric or a mixture of equal parts cinnamon, ginger and clove.


SHORTBREAD COOKIE PIE CRUST,- 

  • 1 cup unsalted butter, 2 sticks
  • 2 cups flour
  • 1/2 cup confectioners sugar
  • 1 teaspoon vanilla extract
  • 1/4 teaspoon baking powder

  • In a mixing bowl or food processor, beat the butter until fluffy, and add in the sugar.
  • Then, add in the flour and lightly mix with the paddle attachment or your hands. Add in the vanilla extract and baking powder and mix until the mixture is crumbly.
  • Roll the dough or press it into a pie dish, up the sides and make a nice crust, and bake in a preheated 350 degree oven for 10 to 15 minutes.
  • Let the crust cool before adding the filling.
  • Proceed with the pie filling instructions for whatever pie you’re making.

Sunday, September 25, 2022

Lemon Curd Souffle Tart.- This is set to become a classic for us!!


 Lemon Curd Souffle Tart.-  Who doesn't like Lemon Curd? We love it! A strong citrus flavor yet not so strong as to shock. Such a lovely texture in this tart, a truly eye opening one, different from a "regular" curd (which we also love) but the lightness, the crumbly crust is a real surprise!

This tart is also wonderfully flexible since you can choose the flavor, think of it all the flexibility. I can see myself making a blackberry curd. What is a curd? Isn't it just another pudding or pie filling? Well, yes, kind of, but if you consider them all you can see the possibilities... Curds are usually associated with citrus fruit: lemon, lime, orange, grapefruit, tangerine, mandarin, passion fruit, mango and all berries! But I get way outside the box with other flavors like coffee, chocolate, etc.

Now if you make jam you know that you can make it without any thickener, just letting it thicken naturally with their own pectin. I don't like to add thickeners to anything if it can be done alone but sometimes you'll need some cornstarch, a roux or any of many thickeners. Get to know them so you can decide which is the best for your project.

Okay, let's get down to our Lemon Curd Souffle Tart. To make this, you'll need:

Crust1 Stick butter, room temperature   2 Tbls sugar1/2 tsp salt1 large egg yolk 1 cup all-purpose flour, plus some more for dusting
  • Directions
Instructions Checklist
  • Crust: In the bowl of a stand mixer fitted with the paddle attachment, beat together butter, sugar, and salt on medium-high speed until light and fluffy, 2 to 3 minutes. Beat in egg yolk until smooth. Reduce speed to medium-low and beat in flour until smooth. Shape dough into a flat disk, tightly wrap in plastic, and refrigerate until firm, at least 45 minutes and up to 2 days.

  • Preheat oven to 375°F. Let chilled dough rest at room temperature to warm slightly, about 15 minutes. On a lightly floured surface, roll out dough to a larger size than your pan and allow for sides  (if dough cracks, press back together and let stand a few minutes to warm and soften more). Transfer to a 9-by-1-inch fluted tart pan with removable bottom, pressing into edges and trimming excess dough. Freeze until firm, about 15 minutes. Place on a rimmed baking sheet, line dough with parchment, and fill with dried beans or pie weights.

  • Bake until dough is set and dry on the bottom, 30 to 35 minutes. Remove parchment and weights and continue baking until golden on the bottom, 5 to 7 minutes more. Let cool completely on a wire rack.

  • Filling: In a medium saucepan, whisk together egg yolks, 1/3 cup granulated sugar, lemon zest and juice, and salt until smooth. Add butter to saucepan. Cook over medium heat, stirring constantly, until mixture is thick enough to coat the back of a wooden spoon, about 5 minutes. Strain through a fine-mesh sieve into a large bowl. Cover surface of curd with plastic wrap to prevent a skin from forming. Refrigerate until cool and set, at least 30 minutes and up to 2 days.

  • In a mixer bowl, whisk egg whites on medium speed until frothy. Increase speed to high and gradually add remaining 3 tablespoons granulated sugar, beating until mixture forms stiff, glossy peaks, 5 to 7 minutes. Stir 1/3 of egg-white mixture into curd to loosen. Gently fold in remaining egg-white mixture just until no streaks remain (do not overmix). Transfer filling to tart shell, gently smoothing top.

  • Bake until puffed and golden brown, 18 to 22 minutes. Let cool completely on a wire rack, about 30 minutes. Carefully remove tart ring and dust with confectioners' sugar to serve. 

Cook's Notes

The tart can be served at room temperature or loosely covered and refrigerated up to 1 day. If making ahead, dust with confectioners' sugar just before serving.

Note: From recipe collection of Martha Stewart.