Showing posts with label Cheese. Show all posts

Tuesday, March 11, 2025

Egg Bites .- A handy, flavorful, nutritious and low-carb snack or quick breakfast!


   EGG BITES .- We've all seen them in bakeries or coffee shops, in all kind of flavors too, they're a great idea for a quick breakfast or take along snack. Full of protein and low-carb too. So go ahead and try this, you'll be glad you did!

Easily customizable to fit into your lifestyle depending on the ingredients chosen plus almost anything is ok. It's also a great fridge clean out project, when you use all those little things that have been almost forgotten in your fridge, come up with your own amazing combination!

To make these, you'll need: 

6 eggs
3 Tablespoons milk (I used Crema Mexicana)
3/4 cup grated cheese, your choice
1 cup protein (ham, bacon, chicken, sausage, etc. if using)
3/4 cup Bell Pepper, your choice of color(s)
1/4 cup red onion
1/4 cup green onion, or other green cilantro, basil, etc
1/2 Tablespoon Olive Oil
Salt, pepper, Crushed Red Chile, Serrano or ?
 
DIRECTIONS .-
 
NOTES:   Make sure all ingredients are cut / chopped into smallish pieces, like a bite size for easier eating
                If you want your egg bites to be fluffier and tender, use a whisk for blending eggs, but if you want a denser firmer egg bite then use a fork to blend it all together.
 
1.-    Preheat oven to 350 F / 190 C. Spray muffin tin very well with non-stick spray or fat plus flour to prevent sticking. You can use paper muffin cups if you like
2.-    Preheat your pan for a minute, add the oil then add the protein, spices, onion and bell pepper. Saute for about 4-5 minutes on med-high heat until tender. Turn of the heat and allow to cool while you prepare the egg mix.
3.-    In a separate bowl add the eggs and milk and combine. Then add the green onions and cheese and anything additional you've chosen.
4.-    Now add the now cooled protein in your pan to the bowl and incorporate it well.
5.-    Pour your mixture into the prepared muffin tin or paper cups carefully to avoid spills since they might burn in the oven. Bake for about 14-15 minutes or until golden brown. You can test for done with a toothpick or thin knife.
6.-    Allow to cool on a rack for about 5 minutes then remove from the tin. Serve.
 
I hope you will try these, in many combinations, and see how practical they can be and how customizable so they exactly match your family's tastes. Enjoy 


Wednesday, August 16, 2023

Leek, Bacon & Edam Cheese Quiche - Come away with me....


 Leek, Bacon & Edam Cheese Quiche .-  What can I tell you about this? It's a lovely lunch, brunch or light dinner dish that somehow has fallen out of favor... but not at my house! I still make and love Quiche!... All kinds of Quiche and this recipe can be used as a great base recipe to base yours from... It's also a great fridge cleaner-outer since you can use all those little leftovers you might have rumbling around in there, so pretty practical too.

Eminently flexible since you can add or change the ingredients. Maybe no bacon, all veggie or chicken? No Edam? How about Emmenthaler, Gouda, Swiss, Sharp Cheddar? Your choice... It's also great cold, easy to carry-out for lunch or picnic, or a quick lunch or even a lovely dinner, with a green salad and a glass of wine... 

To make this you will need:

Pie Dough (this makes 2 - 9" pie doughs

2½ cups (375 g) all-purpose flour 1 Tbsp (12 g) granulated sugar 1 tsp fine sea salt 3 Tbsp (45 mL) vegetable oil 1 cup (225 g) cool unsalted butter, cut into pieces (does not have to be ice cold) ¼ cup (60 mL) cool water 2 tsp white vinegar or fresh lemon juice 1 egg white, for brushing the baked quiche shell Quiche Filling: 2- 3 large leeks 3 - 4 slices of Bacon, chopped into fine batons 3 Tbsp (45 g) butter

½ cup (125 mL) dry white wine ½ tsp fine salt ¼ tsp ground black pepper ¼ tsp ground nutmeg 2 large eggs ½ cup (125 mL) whipping cream (I used 3/4 cup heavy cream, no half & half) ⅓ cup (80 mL) half-&-half cream 1 ½ cup (165 g) coarsely grated Gruyere cheese or your choice

Directions • 1. Combine the dry ingredients by stirring the flour, sugar and salt in a large bowl. Add the oil. Using a pastry cutter, electric beaters or a mixer fitted with the paddle attachment, blend until the flour looks evenly crumbly. NOTE: I used my Kitchenaid and done before you know it, pay attention to the texture. Some baking wisdom! Adding a little vegetable oil to the flour before adding the butter is another secret for tender and flaky pie dough. The oil coats the flour so that it won’t overhydrate when the water is added. Too much water develops the protein in the flour, which is why a crust becomes tough or shrinks when it bakes. 2. Add the butter and cut in until the dough is rough and crumbly but small pieces of butter are still visible. 3. Add the liquids. Place the water and vinegar (or lemon juice) in a small bowl, stir together and then add a little at a time to the flour mixture, mixing just until the dough comes together. Shape it into two discs, wrap well and chill until firm, at least 1 hour. If you are not making a pie immediately, refrigerate the dough, well wrapped, for up to 2 days, or freeze it for up to 3 months. Thaw it overnight in the fridge before rolling. You will need only one disc of dough for the quiche. NOTE: This makes 2 pie doughs, you only need 1 for this Quiche so you can freeze the other one. 4. Roll out the pie dough on a lightly floured surface into a circle just under ¼ inch (6 mm) thick. Trim away any large pieces of dough from the edge and tuck and pinch the edges in a pattern. Alternatively, trim the pastry to the outside edge of the pie plate and press in place. Cut out shapes from the excess pastry, moisten with water and press gently along the top edge of the pastry. Dock the bottom of the pie shell with a fork. Chill the pastry shell for at least 30 minutes (up to a day). 5. Preheat the oven to 375°F (190°C). 6. Weight the pie shell. Place two sheets of aluminum foil over the pie shell, gently covering the outside trim. Use pie weights, dried rice or dried beans (about 2 cups/500 mL) and pour these on top of the foil, spreading them out to the edges. 7. Bake the pie for 20 minutes. Carefully remove the foil together with the pie weights (this is why you double up on the foil). Return the pan to the oven to bake for 10 minutes more, until the edges of the pastry are light brown and the bottom of the pastry appears dry but still pale. 8. Brush the pie shell, hot from the oven, with lightly whisked egg white. Cool the pie shell in its pan on a rack before filling. 9. Prepare the leeks. Trim away the ends and dark green parts of the leeks. Cut each leek in half lengthwise, then cut into ¼-inch (6 mm) slices. Place in a colander and rinse and drain well. 10. Cook the leek filling. Add the bacon. Melt the butter in a large sauté pan over medium heat and add the leeks. Cook, stirring often, until softened completely, about 15 minutes. Add the white wine and continue to cook until all liquid has evaporated. Remove the pan from the heat and stir in the salt, pepper and nutmeg. Let the mixture cool for 15 minutes. 11. Preheat the oven to 400°F (200°C) and place a 9-inch (23 cm) your baked pie shell on a baking tray 12. Whisk the eggs well and then whisk in the whipping and half-&-half creams. 13. Assemble the quiche. Line a baking tray with parchment paper and place the partially blind-baked pastry shell on top. Sprinkle the cooled leeks over the bottom of the pie shell, then sprinkle with the cheese. Carefully pour the eggs into the pastry, giving them time to cascade and fill in between the leeks and cheese. The quiche will not be filled to the top of the pan, but the eggs will expand as the quiche bakes. 14. Bake the quiche for 15 minutes, then reduce the oven temperature to 350°F (180°C) and continue to bake for about 20 minutes more, until the quiche is set and golden brown. 15. Cool the quiche in its pan on a rack for at least 15 minutes before slicing to serve warm.


Wednesday, March 15, 2023

Cuaresma: Deliciosa, ligera, flexible y muy sabrosa!...

En Mexico la Cuaresma es realmente observada como la recuerdo de hace muchos años. De chica, en mi casa no se celebraba pero cuando fui a vivir a Puerto Vallarta, a Merida y hasta en la CDMX, vi las costumbres clasicas de Cuaresma fielmente practicadas, me dio gusto e incorpore muchos de estos platillos dentro de los menus para mi familia y hasta en nuestros changarros aparecian durante la Cuaresma.

La Comida Mexicana se presta para esta epoca del año al ser tan variada y con tanto sabor que se antoja durante el resto del año o si necesitas ahorrar en tu presupuesto. 

Aqui hay algunas sugerencias:

1.-    Tortitas de Atun con Papa:    


3 papas medianas cocidas y peladas 1 huevo, batido con tenedor 1 cdta sal 1/4 cdta oregano 1/4 cebolla, finamente picada 1 lata de atún (lata grande) 1 taza pan molido (empanizador o lo que tengas) 1/2 taza cilantro Salsa Estilo Chileña: 1/4 aceite oliva 1 cda vinagre manzana 1 limón 1/2 manojo de cilantro 2 a 4 chiles serranos (mas o menos, cualquier chile sirve) 1/4 cebolla 2 dientes de ajo

1 -2 Aguacates

Preparacion: Se pueden usar guantes si se desea

1-    Las papas ya enfriadas se ponen e un tazon oara machacarlas y queden sin grumos. Se agrega el huevo batido, el atun, la sal, la cebolla y el cilantro. Se amaza muy bien y cuando se vea integrado todo se le agrega la mitad del pan molido, se amaza y despues el resto del pan, finalmente otra amazada para que quede parejo y se deja reposar.

2-    Con un poco de aceite en las manos se empiezan a formar las tortitas. Que no sean muy gruesas para que se cocinen facilmente.

3-    En un sarten con unas cucharadas de aceite sobre fuego medio se deja calentar, cuando este listo se empiezan a freir las tortitas, dandoles vuelta para asegurar el color deseado, hasta que se doren. Se ponen en un plato con papel absorbente hasta terminar.

SALSAS QUE ACOMPAñAN:

1-    En el sarten que quedo de las tortitas, que tenga un poco de aceite se pone el aceite, chiles, ajos y cebollas sobre fuego mediano, se sancochan hasta que se doren ligeramente y que no se quemen los ajos.

2,-    Ahora en la licuadora se pondran los chiles y demas, aceite, vinagre, el judo del limon y cilantro.con cualquier aceite que haya sobrado en el sarten y un aguacate. Se licua suavemente para que todo se integre, se le puede ayudar con unas gotitas de agua o mas limon pero debe de ser una salsa espesa.

3.-    Se prueba la salsa para decidir si añadir mas aguacate (no es guacamole sino salsa), limon, aceite de oliva, sal y pimienta.

TORTITAS DE BROCOLI:

3 tazas de brocoli cocido (es mejor a vapor) 1 taza queso mozarella (se puede omitir) 3 huevos 2 cdas cilantro 1/4 cebolla blanca 1 cdta ajo en polvo 1 cdta sal 1 cdta oregano seco 1 taza empanizador

Preparacion: Si no se quiere usar queso, de nuevo se puede usar papa, arroz o un bechamel espeso tipo croqueta. Se puede sustituir por cualquier otro queso que se derrita. Para sustituir el empanizador o pan molido se pueden usar galletas molidas (fijate si contienen sal)

1.-    El brocoli debe quedar con tallos suaves pues se machaca con un tenedor una vez cocido en pequeños pedacitos.

2.-    Cuando el brocoli este listo se agrega el resto de los ingredientes y se procede amazar todo hasta que queden muy bien integrados.

3.-    Se procede a formar las tortitas y se ponen en un plato espolvoreado con un poco de pan molido y se le pone un poco de mas pan molido por arriva tambien, esto ayudara al freir.

4.-    Una vez doradas las tortitas se ponen sobre papel absorbente.

SALSA PARA ACOMPAñAR:

ADEREZO DE SALSA: Se puede usar picante o no.

1/2 - 1 taza Mayonesa (puede ser 1/2 yogurt y 1/2 mayonesa)

1/4 taza de Salsa Mexicana o cualquiera que tengas

1 cucharadita de azucar

Sal y pimienta al gusto

Se mezcla todo muy bien, probando hasta que quede de tu gusto.

ADEREZO DE YOGURT:

1 taza de yogurt PLAIN o Griego

jugo de 1/2 limon

1 diente de ajo picado finamente

6 - 8 hojitas de hiervabuena, finamente picadas

2 - 3 cucharadas soperas de cilantro finamente picado

NOTA: Este aderezo se le pueden agregar pepinos rebanados finamente y/o tomate sin semillas, cortado en cuadritos. A probar para asegurar el nivel de sal.

Se mezcla todo muy bien para que quede cremoso.


Thursday, June 30, 2022

Stuffed Potato Waffles.- A great change for an old favorite!...


Stuffed Potato Waffles.-  Great recipe for a change of pace on an old favorite. Whether you go ahead and stuff them or have them without stuffing, you'll appreciate the flavor difference, so go ahead and play with your food! Get creative!

We love it with my fresh homemade Ranch Dressing (on this blog put "ranch" in the search field or click on this link https://peoplewhoeatwithspoons.blogspot.com/search?q=ranch) it's amazing! But Sour Cream, Chipotle Mayo or Salsa are great on it too... 

These ingredients make 2 double waffles. To make this recipe you will need:


400 g Potatoes

125 g Flour

5 g     Baking Powder

Salt and Pepper to taste

1         Egg

3-4      Cebolla Verde

120 ml Leche

Additional items (optional):  Ham, Cheeses, Bacon, etc. Of course you can also use toppings if you like so the choices are endless...

NOTE: I like to add Paprika and Chili Powder but you can add to your taste or omit altogether.

1.-    Peel potatoes and cut in chunks. In a large pot with salted water, bring to a boil and cook potatoes until they are tender, about 15-20 minutes. Once done, drain and mash fine, you can use a masher or ricer (my choice) or your choice just get it smooth.

2.-    To the potatoes add the rest of the ingredients and mix well. Again, this can be done by hand or I used a mixer with a dough hook. Don't overmix, it will be thick and lumpy.

3.-    Prepare your waffle maker by putting some oil, butter or spray on both waffle plates. Warm up.  Once the machine is ready, put some of the batter into the plate carefully, not too thick so you allow for stuffing. Place your chosen stuff on the batter but leave a space all around the edge of the batter so it will seal when you cover it. Don't overdo it. Once they are ready to finish, put some batter on top of your stuff carefully, don't drag it, use the batter to seal with the bottom batter so you don't see any stuffing anymore. Again, not thick, ok?

4.-    Close waffle maker and allow to cook until done according to your machine. It might take a little longer since it's stuffed, just keep an eye on it once the sensor lights up.

I'm sure you will think of your own variations, these are very flexible. 

Enjoy!

Saturday, June 11, 2022

Cornbread or Pan de Elote.- Very tasty and comforting....


Cornbread or Pan de Elote.-  A cozy and comforting recipe, great with Chili Beans or a salad. Slightly sweet and you can add all sorts of extras, bacon, corn, Poblano Chile Strips, Salsa Fresca, shrimp you name it.... 

Very easy to make, just follow the steps and you'll be done. To make this you will need:

1/2 cup butter or 1 stick

2/3 cup sugar

2 eggs, slightly beaten

1/2 tsp Baking Powder

1 cup Buttermilk

1 cup AP Flour

1 cup Cornmeal

1/2 tsp salt


Here are the steps to prepare it:

1.-    Preheat your oven to 375 F or 190 C

2.-    I use a Cast Iron Pan so nothing is needed but if you use a glass baking pan or another type of oven pan, be sure you butter and flour it so it doesn't stick.

3.-    Melt butter over low heat in a skillet. You can prepare in a skillet and transfer to a pan later.

4.-    Stir in the 2/3 cup of the sugar and blend really well.

5.-    Stir the 2 beaten eggs into the butter sugar mix in the skillet and incorporate well.

6.-    Now add the buttermilk and baking powder and blend well. NOTE: Don't have buttermilk, you can substitute with 1 cup heavy cream with 2 Tbls White Vinegar or Lemon Juice, stir well and give it 5 minutes to thicken up; You can also use Sour Cream or Greek Yogurt, just put 1/3 cup milk in a large measuring cup then add the yogurt or sour cream to make 1 cup. Stir these well so they have the consistency of buttermilk.

7.-    In a bowl put the cornmeal, flour and salt, mix well to get a smooth batter.

8.-    You can bake it right in the skillet as I am doing (Cast Iron Skillet) or another as long as you can use in the oven, otherwise you can pour into a prepared 9" oven pan or Pyrex type rectangular pan.

9.-    Bake in the oven for about 35-40 minutes, insure it's done once a toothpick comes out clean. You can add more bake time as necessary and it will get a beautiful golden color!

Enjoy!!

NOTE: There is no limit on what you can incorporate into this cornbread: Bacon, Cheese, Chorizo, Veggies, protein, I added sweet corn and Poblano Chile Strips, a favorite! But think of your favorites...

Wednesday, May 18, 2022

Pink Sauce and/or Vodka Sauce.- You'll never believe the flavor you get from so few ingredients!!


Pink Sauce and/or Vodka Sauce.-   Just by leaving the Vodka out of the recipe you'll get Pink Sauce and they're both amazingly tasty. Incredible that so few ingredients can give you the flavor you'll find! Super easy, quick and everyone will love it!

I've served this sauce as it appears in the recipe or added my own variations: Basil Leaves or melting cheese or chicken or salmon or shrimp or peas or crushed red pepper flakes.... You can adapt to your own family's preferences.

To prepare this sauce you will need:

1 medium onion, finely chopped (I've used shallots or left them out completely)

4 garlic cloves, finely chopped (you can add more if you like)

2 Tbls Olive Oil plus more for finishing topping

4 oz Parmesan Cheese (I've varied this type of cheese to melting cheese)

1 can 4oz Tomato Paste or tube of paste

1/2 tsp or pinch of crushed Red Pepper Flakes


1-2 oz Vodka (you can omit if you like)

1/2 cup heavy Whipping Cream

1 lb Pasta (can be Spaghetti, Rigatoni, any type you like)

Basil Leaves for serving

Directions.-

1.    Put a large pot with water on high heat. Put a generous amount of salt into the pot and           bring to a boil while you prepare the rest of the ingredients.

2.    Peel and chop the onion. Peel and chop the garlic cloves.

3.    If your cheese is not grated, grate the cheese.

4.    In a heavy pot over medium heat, add the olive oil to the pot to heat. It's easier to place            this pot next to the boiling water one to make it easy later. Once the oil is hot add the                onion and garlic, stir constantly until the onion turns golden, about 4-5 minutes.

5.    Now put the tomato paste into the pot and stir to cover the onion and garlic well,                        continually stir for about 5 minutes. You'll see the bottom of the pot slightly brown from the        tomato paste.

6.    Add the vodka, if using, otherwise you can deglaze the pot with water or stock. Scrape the        bottom of the pot, scraping the bottom. Reduce the heat to low.

7.    In a heatproof measuring cup add the 3/4 cup of cream and then add 1/4 cup of the                  boiling water in the pasta pot. Stir to combine. Add the heavy cream mixture to the pot              with the sauce and mix well to combine until a smooth sauce forms. Turn off  the heat.

8.    Add the pasta to the pot with the boiling water. Cook the pasta until al dente. With a                  heatproof measuring cup take about 1 cup of the boiling water and reserve. Once the               pasta is ready, turn the heat under the sauce to low.

9.    With a wire spider, transfer the pasta into the sauce. It doesn't matter if some of the water        comes along with the pasta. Combine.

10.  Now pour the reserved water onto the pasta and the half the parmesan cheese. Mix so           the cheese melts and the sauce becomes smooth and coats the pasta really well. You              can add a teaspoon or so of more water so you have a thinner sauce if you like. Add salt        to the sauce.

11.   Serve the pasta, top with some of the leftover cheese and Basil leaves, drizzle with a little         Olive Oil for finishing. Enjoy!

I hope you will try this recipe so you can see how easy it is to prepare and how much your family enjoys it. 


Monday, March 21, 2022

QUICHE LORRAINE .- A wonderful recipe!! Bacon, Leeks and Cheese!!


Quiche Lorraine.-  Or in other words: Bacon, Leek and Cheese... You get the idea, a wonderful dish that can be both practical for a weekday since it's a dish that can be made in advance or for company to become a sophisticated entree...

Take into consideration that a quiche is a super flexible option for your meal rotation, you can use any protein (or omit), a variety of cheeses, veggies to make it exactly your family's taste. Now you can take your time and break it down over a couple of days or not, you can make it ahead of time, hold in the fridge for the next day and then bake.

So what do you need to make this?  Here you go:

For the Pie Dough:

2 1/2 cups all purpose flour, plus a little extra for rolling

1 tsp salt

1 tsp sugar

1 cup or 2 sticks butter, cut into pieces

1/4 cup of ice water - use in 1 Tbls increments

In a food processor put the flour, salt and sugar then pulse to combine. Now add the cubed butter and pulse until it becomes like course sand with small butter pieces left behind.

Now add 1 Tbls of water to the dough and it will begin to hold together, add another tablespoon and look at the texture of the dough. Does it hold together in your hand if you press it? You can add 1 more tablespoon or leave if it's done yet still crumbly. Now divide the dough in two (this makes 2 pie crusts) and wrap it in plastic wrap in the form of a disk about 3/4 inch thick and refrigerate it for at least 1-2 hours. You can freeze the additional crust if you're only making one pie and save for later....

Take one disk of the dough out and place on a floured surface with a little flour on top. Now begin rolling out from the center out until you form a 14 inch round. Place the rolling pin over the edge of the round, lift the edge of the around the rolling pin and wrap it around to make it easier to place on the pie pan so there is an even overhang around the plate.

Gently fit the dough onto the pie pan so it touches the pan and up the sides, if there is uneven overhang you can cut it with scissors but leave enough to fold under and pinch. You can crimp with knuckles and fingertips. Refrigerate for at least 1/2 hour while you make the filling.

Preheat oven to 375 F. Prick the pie dough all over with a fork, Place a sheet of parchment paper over the dough and fill with pie weights, beans, rice or whatever you use. Bake for about 20 minutes until the edges just begin to brown and take off the weights and paper, bake another 10-15 minutes until golden brown. If the edges start getting too dark, you can cover the edge with aluminum foil while baking. 

Cool the pie on a rack before adding the filling.

For the Quiche:

8 slices bacon, cut into 1/2 inch pieces

1/2 cup chopped leeks (sliced white and light green pieces)

1/2 cup chopped onion

Salt & fresh ground pepper

1 pinch Cayenne pepper to taste

3 whole eggs

2 egg yolks

1 1/2 cup heavy cream

1/4 cup milk

1 tsp fresh thyme, chopped

6-8 oz Gruyere Cheese, shredded

Preheat oven at 425 F.

Over medium heat cook the bacon until done, place on a paper towel to drain. Check the oil in the skillet and remove all but 1 Tbls of the fat, save the rest in case you need more. Now you will add the onion, leeks and cayenne, salt & pepper and stir until tender and golden brown about 5-7 minutes, 

Whisk the eggs, yolks, cream and milk together in a large bowl. Add the thyme and stir to combine.

Sprinkle 2/3 of the onion & leek mixture onto the bottom of the baked crust nice and evenly. Top with 1/3 of the cooked bacon and 2/3 of the shredded cheese. Using a ladle or similar pour the egg mixture on carefully. Sprinkle the remaining onion-leek mix, then the remaining bacon and the Gruyere Cheese.

Bake the quiche in the oven until golden brown and set without any jiggle in the center, for about 40-50 minutes. You can check with a knife so it comes out clean. Allow to cool slightly before serving but room temperature is fine.

I hope you enjoy it and think of many variations for quiche! Add chicken or other veggies, or all veggies. i.e: Broccoli Cheddar, Shallot Mushroom, Asparagus Leek Gruyere, Sausage Potato.


Sunday, January 30, 2022

Dijon Cream Sauce.- Sounds simple but tastes, oh so decadent...


Dijon Cream Sauce:  This simple sauce which comes together very quickly, can turn an everyday dish into something special. It tastes celebratory but easy enough for anyone to make.

Today I made it to go with some small white potatoes, cut in fourths, unpeeled which I had boiled for 10 minutes beforehand. Ten minutes later, while the steaks were cooking, the dinner came together....

To prepare this sauce / dish, you'll need:

3 Tbls Butter

1/2 Medium White Onion, cut finely - I like to use Shallots

1/4 - 1/2 cup White Wine

1 cup Heavy Cream

2 - 3 Tbls Dijon Mustard

1 - 2 Tbls Tarragon, I used dry

2 slices Emmentaler Cheese, cut in very fine strips (this can be optional)

Salt & Pepper to taste

In a pan over Medium Heat, melt the butter and add the onions, mix and allow to sweat until very tender but uncolored. Add the wine and let it reduce "au sec" which means to almost dry. Keyword here is "almost" ok?

Once only a couple of teaspoons of wine remain you can add the heavy cream, mix well. Whisk the sauce and bring it to a gentle simmer. Let it reduce by half which should take about 10 minutes. Once the sauce is thick enough to coat the back of a spoon, it's ready for the finishing touches.

Add the Dijon and the Tarragon but you can use any other herb you like, we happen to love Tarragon! Mix well, decide on the thickness of the sauce, add the cheese, add salt and pepper and you're done.

I hope you will try this sauce so you too can enjoy the subtle flavors.... It's lovely!

Monday, December 20, 2021

Authentic Turkish Dolma, these are Sweet Bell Pepper Dolmas, amazing!!


 Turkish Dolmas.- Maybe you're aware of the different types of "Dolmas" there are, from Stuffed Grape Leaves, Tomatoes and Sweet Red Bell Peppers and more.... These will be Sweet Bell Peppers today.

You'll see how the combination of spices come together to give a flavorful stuffing plus a sauce that will finish the dish. Comforting, wonderful flavors that your family will love!

I'm using ground beef for these but you're not limited to red meat, I love the Lamb Stuffed Grape Leaves, but any stuffing will be amazing, ground pork, chicken, cheese, vegetables....

To make this recipe you'll need:    This makes 20 stuffed peppers, if you want less then divide the ingredients:

20 Bell Peppers, any color
1 tsp salt
1 tsp sugar

FOR THE STUFFING:
200 g ground meat
1 large onion, grated
1 Tbl salt
5 Garlic cloves, grated
1/3 cup Tomato sauce
1 Tbl Red Pepper paste
4 tomatoes
1/2 tsp Cumin, ground
1/2 tsp Allspice, ground
1/2 tsp black pepper, ground
2 Tbl butter, softened
1/3 cup Olive Oil
12 sprigs of Parsley, finely chopped
12 sprigs Mint, finely chopped
1 1/4 cup rice

FOR THE SAUCE:

2 cups hot water
1 Tbl Butter, softened
1/3 cup Tomato puree
1 Tbl Tomato Paste (if you don't have any then double Tomato puree)
1 tsp salt
1/2 tsp black pepper
3 pinch sugar
3 Tbl Olive Oil

PREPARATION:

· Remove the stems of the bell peppers by pressing your thumb down gently and take out the extra seeds. Thus, you will have a perfect hole for stuffing. · Mix the sugar and salt and rub inside of the peppers with the mixture to explode the cells so that flavors of the stuffing mixture will get into the skin of the pepper. · Cut the sides of the tomatoes and set aside to use them as lids. Grate the rest of the tomatoes for stuffing mixture. · Soak the rice into water for 15 minutes. · Combine the minced meat with the onion, salt, garlic and knead it. · Add the tomato puree, pepper paste, grated tomatoes, olive oil, butter, black pepper, cumin, and allspice. · Then add the rice, parsley and fresh mint and mix until all the ingredients are combined. · To make the sauce, mix the hot water, butter, tomato puree, tomato paste, salt, black pepper, sugar, and olive oil in a beaker. · Add 200 ml sauce to stuffing mixture to make it juicier and tastier. · With a teaspoon fill each pepper with the stuffing. Make sure that you don’t overfill your peppers. Rice should have enough space to expand while it cooks. Close the peppers with the tomato lids. · After filling the peppers place them tightly into a large, shallow, and oven-safe pot. · Pour the tomato sauce on peppers, cover with the lid, and start to cook it on high heat until it boils. Then turn the heat on low and cook for 25 minutes. · After 25 minutes, take the lid and place the pot into the oven, a little higher than the middle rack. Bake at 200C (392F) on upper and lower heat with fan for 30 minutes until partially browned. Your great Turkish dolma is ready to dig in. I strongly recommend serving with yoghurt.

Enjoy this wonderful dish!!!

Thursday, December 9, 2021

"Colache".- From the North of Mexico, more or less, a family favorite!


"Colache".-  It's supposed to be from the Noreast of Mexico but honestly I've seen it in a lot of places, one of those dishes that Grandma used to feed the kids.... I've never seen it in a restaurant but just in people's homes. Not in mine but I saw it at a Pot-Luck once and decided to make my own. There are many variations due to region, budget, weather, etc. This is the recipe my kids grew up with and holds fond memories for us....

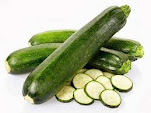
I have to mention that when living in the US, the Zucchinni is dark green and slender and much more bitter than the tender "calabacita" in Mexico and so tasty. I tried everything to get rid of the bitterness of the Zucchinni but it only lessened a small bit, so try and get young and tender ones, ok? I've enclosed pictures of both, ok? You might need to go to a Mexican or Latin Market... First is Zucchinni, Second Calabacita....

Also called "Colichi" or "Calabacitas a la Mexicana" or "Guisado de Calabacita Tierna"....

To make it I used:

2 Tbl Butter, I always use Salted but that's just me

1/2 White Onion, chopped in small pieces

1/2 - 1 cup corn kernels, you can use frozen


1 tsp Dill, dried

Salt and Pepper, fresh ground

1 - 2 pinch Chile de Arbol Powder, I use a very hot Indian one we love

2  Calabacitas, cut in half lengthwise then sliced across

2  Roma Tomatoes, chopped, but you can use any kind you like

2 - 3 Garlic cloves, chopped fine

1/3 cup melting cheese, grated, your choice, we've used them all

1 Tbl Cilantro leaves, chopped

In a pan put the butter and once melted add the onion and stir fry until tender. Add the corn, the salt and pepper plus the chile (if you're using) and cook them together for 2 - 3 minutes

Now add the Calabacitas and allow to cook and soften for another 2 - 3 minutes. You can cover the pan if you like but just briefly

Once they've softened some, add the tomato and dill and mix everything together. Taste to check that your seasonings are good.

If you like the flavors you can add the cheese evenly over top, turn off the heat and allow the cheese to melt, once melted add the Cilantro and allow everything to rest for about 5 minutes before serving.

NOTE:    This is the basic, yet a very complete version, but I'm sure you can see how many things you could be adding, right? Vegetarian, Main Dish or Side Dish, be flexible and create your own version.

I have added Roasted Poblano Chile Strips, Red, Yellow or Green Bell Peppers, Caramelized Onions, Leeks, cooked potatoes, Carrots, Peas.... you get the idea

I hope you like this very simple dish, we love it!


Sunday, December 5, 2021

Egg Muffins? or Egg Bites?... A quick bite for anytime and any flavor!...


 Egg Muffins.-   You've seen them all over on buffet tables and fast food restaurants. They are easy and fast to make plus you can make them in your favorite flavors or whatever you have in your fridge, leftovers or almost anything, it doesn't take a lot either....

I made mine in 3 flavors but the base is the same for all of mine. I started with cheese, my chosen protein or veggies, a different cheese, green or red onions, cilantro and the batter. This is just a guide since you can put literally anything, ok?  I made Bacon & Cheese, Veggie and Ham and Cheese.

To make the batter, you'll need:  This makes about 18 muffins

1 doz eggs

1/2 cup Sour Cream (you can also use cottage cheese)

Salt and Pepper to taste

1/4 cup Heavy Cream

1/4 - 1/2 cup Shredded Parmesan Cheese

Put in blender or in a bowl and mix until well combined and frothy.

NOTE:  I put a little Cheddar Cheese on the bottom, followed by green onion, cilantro, cooked Bacon and a pinch of crushed Red Pepper Flakes. Finally you pour the batter, leave a space at the top.

Take your muffin pan and either spray well with cooking spray or butter.

Prepare whatever extras you will be using: I had:

This is for the Bacon and Cheese ones:

4 Bacon strips microwaved for 4 minutes, chopped into thin slices

1/4 cup shredded Cheddar Cheese

1/4 cup chopped green onions

2 Tbl chopped Cilantro

Put the ingredients for the batter into the blender and blend until frothy. Pour into your molds and bake at 350 F for 20 minutes. Depending on your oven I would check at 15 minutes.

For the Vegetarian ones:

1/4 cup shredded White Cheese, your choice

1/4 cup red onion, finely chopped

1/4 cup shredded Mild Cheddar Cheese

1/3 cup finely chopped vegetables (I used frozen veggie mix) any will work

Top with batter, bake as before

For the Ham & Cheese ones:

1/4 cup White Cheddar Cheese

1/4 cup chopped green onions

1/4 cup shredded Emmerthaler Cheese (you can use Swiss Cheese)

1/3 cup finely chopped Ham slices

Top with batter, bake as before

NOTE: If you only want to make 6 muffins then use 5 eggs and reduce the quantity of the Sour and Heavy Cream.

Now you can think of what other fillings you can use for muffins. How about leftover Rotisserie Chicken (add some Salsa!), Pepperoni slices, cooked Chorizo, Turkey, Pastrami, Roasted Red & Green Peppers, chopped Brussel Sprouts, Broccoli, Peas, Corn, etc..... 

Hope you give this a try and see. These can be frozen or placed in an airtight plastic container in the fridge and have them ready for a quick "take and go" breakfast.... 

How about setting up a Holiday Buffet Table with Muffins, fresh fruit and juices, some great coffee and hot chocolate, and an array of pastries. You could add cold cuts, bread, etc. and you could enjoy your time by having everyone serve themselves.

Enjoy!