Showing posts with label Vegetarian. Show all posts

Sunday, October 12, 2025

SIKIL PAK.- De Yucatan para el mundo!...

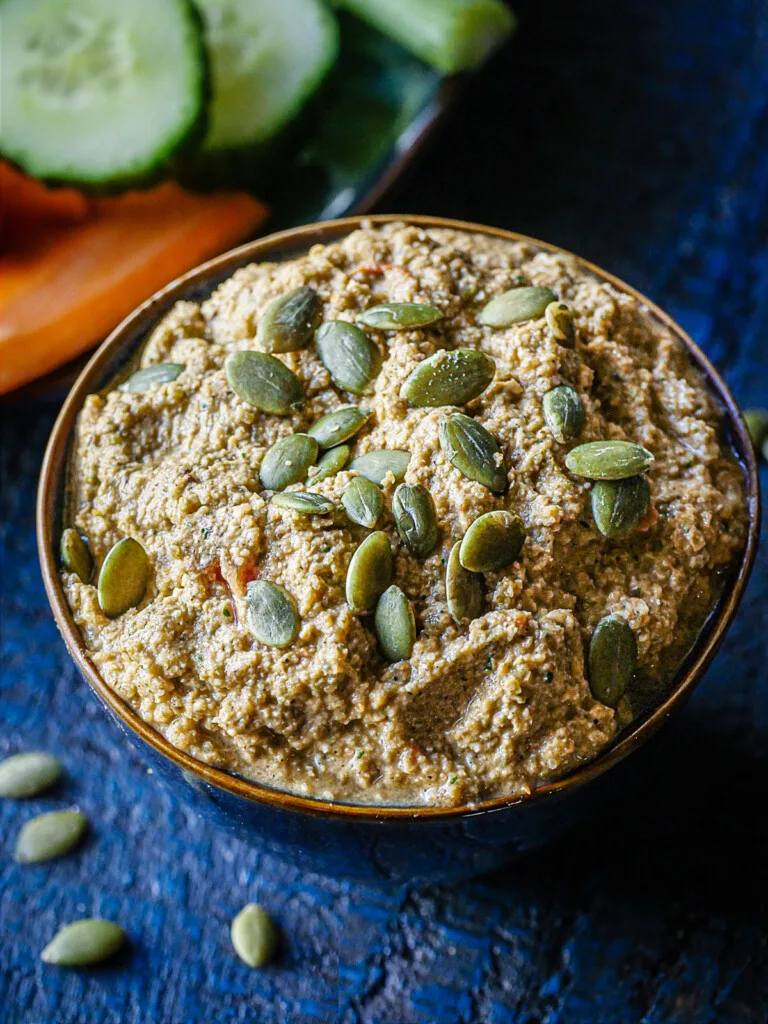
  •  Shot of Sikil Pak Pepita Dip in a blue bowl along side cut vegetables.
  •  
  •  
  • 1/2 kilo de jitomates maduros
  • 1 habanero fresco
  • 60 g o 3/4 de taza de pepitas con cáscara
  • 1 cucharadita de sal o al gusto
  • 1/4 de taza de hojas y la parte superior de los tallos de cilantro picados
  • 1/4 de taza de cebollines frescos picados picados
  • Sirve con totopos o bastones de verduras como calabacita, pepino, zanahoria y jícama crudos

Para preparar

  • Precalienta un comal, sartén o parrilla a fuego medio. Cuando esté caliente, pon los jitomates, el habanero y las pepitas. Voltea y mueve las pepitas mientras se tuestan durante 2 o 3 minutos, solo hasta que parezca que se inflan un poco. Deberán de quedar crujientes y con sabor tostado. No dejes que se doren demasiado o que se quemen. Pasa todo a un recipiente y aparta.
  • Deja que los jitomates y el habanero se sigan tatemando y tostando hasta por 8 minutos, volteándolos lo necesario hasta que se suavicen por completo y la piel esté completamente quemada. Retira del fuego.
  • Con una procesadora de alimentos o molino para café o especias, muele las pepitas tostadas con una cucharadita de sal hasta que estén molidas finamente. Si usas una procesadora de alimentos, puedes agregar ahí los jitomates, medio habanero a la vez, el cilantro, los cebollines y sigue pulsando hasta que todo esté machacado y se forme una pasta. O puedes pasar las pepitas molidas a un molcajete y machacar los jitomates y habanero ahí, probando cómo va quedando y luego añade y machaca el cilantro y los cebollines. Sirve con totopos o bastones de verduras.
  • Nota: En el oeste de Yucatán lo preparan con cilantro, y en el este lo hacen con cebollines. Algunas personas mezclan los dos. Algunos usan el habanero crudo y otros lo usan rostizado o tatemado. Yo en lo personal, remojo los Habaneros limpios, sin venas ni semillas, en vinagre para cortarle el picor.

Friday, March 21, 2025

PAD KRA PAO.- Thai Basil Stir Fry... A must for your recipe collection!!


       PAD KRA PAO.- The most iconic dish and favorite street food in Thailand!... This Thai Basil Stir Fry can be made with protein, vegetarian or vegan. It can be a main dish or a side one, anyway you like it, spicy or not, juicy or not, your family's special ingredients and done in a flash!...

Don't be taken aback by the ingredients, these are the basic ones needed for a Thai kitchen, so if you like Thai food you'll be using them over and over... 

A very easy dish to prepare, just follow the steps and you'll see the changes you can make, the ingredients you can add or remove and produce a wonderful meal for your family.

To prepare this, you'll need:

10 oz protein, your choice, raw or cooked - in small spoon size bites
2 tsp Fish Sauce
1 Tbls Oyster Sauce
1 Tbls Soy Sauce
2 Tbls water
2 tsp sugar, or more according to your taste
1-5 Thai Chilies or the chilies you like or have
5-8 Garlic cloves
1 Tbls Ginger - grated or chopped fine
1/4 cup mild red chilies, red bell pepper, capsicum, chopped
1/2 medium onion, small dice
1 1/2 cup Basil Leaves
Vegetable oil as needed
Eggs - 1 per serving
Jasmine Rice or whichever you have - to serve along with

1-    Make the sauce by combining oyster sauce, soy sauce, fish sauce, black or dark soy sauce, sugar, ginger and water. Stir until the sugar is completely dissolved.
2-    Pound the Thai chilies into a fine paste in a mortar and pestle, then add the garlic and the mild chilies, ginger and pound into a rough paste, just until there are no more big chunks.
3-    If using raw protein, heat a wok or a skillet until very hot on high heat, add just enough oil to coat the bottom and add the protein, spreading the pieces out into one layer. Let them sear until browned on the underside, then give it a toss and stir until it’s done. This should only take a few minutes in total. Remove from the pan. Note: You can skip searing the protein and just add it to the wok raw, but the browning does add a nice flavor.
4-     In a wok on medium-high heat, add the chili garlic mixture and stir until the garlic starts to turn golden, about 2 minutes. Add the onions and cook it for 30 seconds to a minute to soften slightly. 
5-     Turn the heat up to high and add the protein and the sauce, and toss everything together just for 30 seconds or so, until the meat is well coated and heated through. If you didn’t pre-cook the protein, take your time and keep tossing until it’s cooked through.
6-    Turn off the heat, add the basil, and toss just to wilt.
7-    Make the fried eggs if you wish, and serve the stir fry with jasmine rice and topped with a fried egg

I hope you will try this dish and see why we love it! The flavors are classic and unmatched! Also an economical dish to prepare and serve.


Wednesday, August 16, 2023

Leek, Bacon & Edam Cheese Quiche - Come away with me....


 Leek, Bacon & Edam Cheese Quiche .-  What can I tell you about this? It's a lovely lunch, brunch or light dinner dish that somehow has fallen out of favor... but not at my house! I still make and love Quiche!... All kinds of Quiche and this recipe can be used as a great base recipe to base yours from... It's also a great fridge cleaner-outer since you can use all those little leftovers you might have rumbling around in there, so pretty practical too.

Eminently flexible since you can add or change the ingredients. Maybe no bacon, all veggie or chicken? No Edam? How about Emmenthaler, Gouda, Swiss, Sharp Cheddar? Your choice... It's also great cold, easy to carry-out for lunch or picnic, or a quick lunch or even a lovely dinner, with a green salad and a glass of wine... 

To make this you will need:

Pie Dough (this makes 2 - 9" pie doughs

2½ cups (375 g) all-purpose flour 1 Tbsp (12 g) granulated sugar 1 tsp fine sea salt 3 Tbsp (45 mL) vegetable oil 1 cup (225 g) cool unsalted butter, cut into pieces (does not have to be ice cold) ¼ cup (60 mL) cool water 2 tsp white vinegar or fresh lemon juice 1 egg white, for brushing the baked quiche shell Quiche Filling: 2- 3 large leeks 3 - 4 slices of Bacon, chopped into fine batons 3 Tbsp (45 g) butter

½ cup (125 mL) dry white wine ½ tsp fine salt ¼ tsp ground black pepper ¼ tsp ground nutmeg 2 large eggs ½ cup (125 mL) whipping cream (I used 3/4 cup heavy cream, no half & half) ⅓ cup (80 mL) half-&-half cream 1 ½ cup (165 g) coarsely grated Gruyere cheese or your choice

Directions • 1. Combine the dry ingredients by stirring the flour, sugar and salt in a large bowl. Add the oil. Using a pastry cutter, electric beaters or a mixer fitted with the paddle attachment, blend until the flour looks evenly crumbly. NOTE: I used my Kitchenaid and done before you know it, pay attention to the texture. Some baking wisdom! Adding a little vegetable oil to the flour before adding the butter is another secret for tender and flaky pie dough. The oil coats the flour so that it won’t overhydrate when the water is added. Too much water develops the protein in the flour, which is why a crust becomes tough or shrinks when it bakes. 2. Add the butter and cut in until the dough is rough and crumbly but small pieces of butter are still visible. 3. Add the liquids. Place the water and vinegar (or lemon juice) in a small bowl, stir together and then add a little at a time to the flour mixture, mixing just until the dough comes together. Shape it into two discs, wrap well and chill until firm, at least 1 hour. If you are not making a pie immediately, refrigerate the dough, well wrapped, for up to 2 days, or freeze it for up to 3 months. Thaw it overnight in the fridge before rolling. You will need only one disc of dough for the quiche. NOTE: This makes 2 pie doughs, you only need 1 for this Quiche so you can freeze the other one. 4. Roll out the pie dough on a lightly floured surface into a circle just under ¼ inch (6 mm) thick. Trim away any large pieces of dough from the edge and tuck and pinch the edges in a pattern. Alternatively, trim the pastry to the outside edge of the pie plate and press in place. Cut out shapes from the excess pastry, moisten with water and press gently along the top edge of the pastry. Dock the bottom of the pie shell with a fork. Chill the pastry shell for at least 30 minutes (up to a day). 5. Preheat the oven to 375°F (190°C). 6. Weight the pie shell. Place two sheets of aluminum foil over the pie shell, gently covering the outside trim. Use pie weights, dried rice or dried beans (about 2 cups/500 mL) and pour these on top of the foil, spreading them out to the edges. 7. Bake the pie for 20 minutes. Carefully remove the foil together with the pie weights (this is why you double up on the foil). Return the pan to the oven to bake for 10 minutes more, until the edges of the pastry are light brown and the bottom of the pastry appears dry but still pale. 8. Brush the pie shell, hot from the oven, with lightly whisked egg white. Cool the pie shell in its pan on a rack before filling. 9. Prepare the leeks. Trim away the ends and dark green parts of the leeks. Cut each leek in half lengthwise, then cut into ¼-inch (6 mm) slices. Place in a colander and rinse and drain well. 10. Cook the leek filling. Add the bacon. Melt the butter in a large sauté pan over medium heat and add the leeks. Cook, stirring often, until softened completely, about 15 minutes. Add the white wine and continue to cook until all liquid has evaporated. Remove the pan from the heat and stir in the salt, pepper and nutmeg. Let the mixture cool for 15 minutes. 11. Preheat the oven to 400°F (200°C) and place a 9-inch (23 cm) your baked pie shell on a baking tray 12. Whisk the eggs well and then whisk in the whipping and half-&-half creams. 13. Assemble the quiche. Line a baking tray with parchment paper and place the partially blind-baked pastry shell on top. Sprinkle the cooled leeks over the bottom of the pie shell, then sprinkle with the cheese. Carefully pour the eggs into the pastry, giving them time to cascade and fill in between the leeks and cheese. The quiche will not be filled to the top of the pan, but the eggs will expand as the quiche bakes. 14. Bake the quiche for 15 minutes, then reduce the oven temperature to 350°F (180°C) and continue to bake for about 20 minutes more, until the quiche is set and golden brown. 15. Cool the quiche in its pan on a rack for at least 15 minutes before slicing to serve warm.


Thursday, July 6, 2023

French Carrot Salad -or- “Carottes râpées” - very, very French Salad that pairs with everything...


 “Carottes râpées”, the very very French Salad that will make you smile in its simplicity. So economical and is a perfect "at home" quick lunch or light snack, easy ingredients and comes together in a snap.

You'll be able to see from the ingredients in this recipe that it can be used in many types of diets too.

The basic salad consists of: grated raw carrots (hence the name), dressed in some lemon and ground cumin. You could make it fancier by using colored carrots, using lime instead, increase the cumin or use ground coriander.

You'll need:

3 Tbls Extra Virgin Olive Oil 

3 Tbls fresh Lime Juice

1 tsp light honey

1/2 tsp ground Cumin

Salt to taste

1 lb Carrots, grated 

1/2 cup chopped Flat Leaf Parsley -or- Cilantro

Make the dressing, add the salt and carrots in a bowl and toss well, Parsley is added at the end, toss well.

Allow to rest 30 minutes to 2 hours before serving to let all the flavors come together.

It is a lovely palate cleanser when served as a side to the lovely but rich Croque Madame, some fatty pork or how about with a Raclette or heavy Mac N Cheese... I can also add that it's great as a standing midnight snack in front of the refrigerator or a quick, refreshing bite on a hot day. It's great at picnics or pot lucks...

So make this lovely salad and take it to the park so you can enjoy it outdoors on a sunny day!


Wednesday, June 21, 2023

GARLIC NAAN - Amazing flatbread with incredible flavor!!


Garlic Naan .-  If you've never had some Naan, you've been missing out, truly. But I have to also say that buying it at the supermarket is not the same thing as fresh & hot from your kitchen!... The texture is amazing, pillowy softness, garlic flavor with a little salt.... you get it right?

Plus people hear "bread" and they're intimidated by the whole thing, yet this could be a great introduction that will let you know it's easier than you think, you'll be so amazed by your results that maybe it'll be a gateway into other baked goods...

Anyway, a very easy recipe, common ingredients and great results!!...

You will need:

1/2 cup warm water, or more as needed

1 tsp white sugar

1 package active dry yeast (7g)    


1/4 cup butter

2 cloves garlic, finely minced or garlic press

2 cups bread flour, or more as needed (I used A&P flour)

1/4 cup yogurt, plain

1 tsp Kosher Salt

1/4 Cilantro, chopped (optional) other herbs can be used


Directions:

1-    Combine water, sugar and yeast in a bowl. Let rest until it foams and softens, 10 - 15 minutes. Over medium heat, heat the butter in a pan to melt and keep watch for it to sizzle and bubble. As soon as it sizzles, mix in the garlic and take it off the heat.

2-    Add the flour, yogurt, salt and 1 Tblsp of the garlic butter you set aside and add all this to the yeast mix in the bowl, stir it with a wooden spoon until it comes together into a shaggy dough. Now knead the dough with your hand until it doesn't stick to the sides of the bowl, it's ok to add a little more water, in drops almost, if you need it.

3-    Now place the dough onto a work surface to knead it, you can use a little flour here if it's sticking but only as needed. Continue kneading until it forms a smooth ball for about 3 - 5 minutes. Now into another bowl, place the dough with a little of the garlic butter on top and spread it well. Now cover the bowl with plastic wrap and let the dough rise until it doubles in size, this will take about 2 hours.

4-    After the 2 hours have passed, you will punch the dough down, to deflate it, and you'll place the dough on the counter to shape. Knead it back into a smooth ball and then shape into a tipe of rectangle, so it's easier to portion, cut 6 pieces from the dough. Now roll it piece into a ball, separating each ball, dust very lightly with flour and cover with plastic wrap for a second rise, the balls will puff slightly, for about 20 minutes.

5-    Preheat a heavy iron skillet over medium heat until it's very hot, 5 -10 minutes. While you're waiting for the skillet to heat up roll each piece of the dough into an oval shape that's about 1/8" thick. This is the time to add any herbs, if you're using them, on top of the oval panckage. Press slightly to adhere.

6-    You will cook the Naan once the pan is hot, you should notice bubbles form, specially large bubbles, cook about 1 - 2 minutes. Now flip the Naan, press it gently with either a spatula or a kitchen towel, continue to cook for another 2 - 3 minutes more. Charring on the Naan is good. Hint: If you've ever made flour tortillas, this is very similar...

Continue until all the dough is cooked, you can brush additional garlic butter on them or wait until served to add. 


Tuesday, April 18, 2023

Dirty Martini Pasta - The flavors of the drink in a creamy sauce...


Dirty Martini Pasta -   This might sound strange but if you like the flavor of the drink, the brininess of olives, butter and garlic... you should love this!

This dish is about as simple as it comes, very few ingredients and it's one of the sauces that I call "while the pasta cooks", so you know it's quick cooking....

To make this dish, you'll need:

Your choice of pasta
1-2 Tbsp Olive Oil
1-3 Garlic Cloves, minced or pressed
5-8 Green Olives (Castelvetrano), smashed and chopped + brine
Lemon Zest, plus additional for topping
2 Tbsp Vodka or Gin
1-2 Tbsp Olive Brine
1-2 Tbsp Butter
Salt & Pepper to taste
Fresh Parsley, lightly chopped for topping
Blue Cheese crumbles, for topping (optional)
SAVE YOUR PASTA WATER

PREPARATION -

1-    First of all, put your pasta water to boil. Have your pasta ready to cook once the water boils. You can start finishing the dish once the pasta is done so you can transfer it directly from the pot to your pan. Be sure you've prepped all your ingredients since this comes together quickly.

2-    While you're water is boiling, take a good sized pan over medium heat. Add the garlic, for about a minute, followed by the olives and lemon zest. Saute it together until the garlic and lemon zest begin to get golden brown and the pan has lost some of its moisture, about 2 minutes.

3-    Deglaze the pan with the liquor, To do this you pour the liquor into the pan and you scrape the bottom of the pan to remove all the dark bits that remain on the bottom of the pan, this will add flavor to the dish plus will cause the alcohol to burn off and leave the flavor.

4-    To finish the sauce, now add the olive brine and 1 tbsp of butter. Now stir continuously so that the butter will emulsify the sauce (thicken and make it silky)

5-    If your pasta isn't ready yet, you can remove the pan from the heat so it doesn't continue cooking. If your pasta is ready then you can add your pasta directly from the pot into the sauce, mix continualy so it becomes well coated. Stir in a little more olive brine, taste to insure its to your taste. 

6-    If your sauce is too thin, add pasta water, a couple of tablespoons at a time, and stir well and you can repeat as needed to give you more sauce, it will also thicken it and give it a silky finish.

7-    To serve, sprinkle with more lemon zest, blue cheese crumbles and parsley. Enjoy!


Thursday, June 30, 2022

Stuffed Potato Waffles.- A great change for an old favorite!...


Stuffed Potato Waffles.-  Great recipe for a change of pace on an old favorite. Whether you go ahead and stuff them or have them without stuffing, you'll appreciate the flavor difference, so go ahead and play with your food! Get creative!

We love it with my fresh homemade Ranch Dressing (on this blog put "ranch" in the search field or click on this link https://peoplewhoeatwithspoons.blogspot.com/search?q=ranch) it's amazing! But Sour Cream, Chipotle Mayo or Salsa are great on it too... 

These ingredients make 2 double waffles. To make this recipe you will need:


400 g Potatoes

125 g Flour

5 g     Baking Powder

Salt and Pepper to taste

1         Egg

3-4      Cebolla Verde

120 ml Leche

Additional items (optional):  Ham, Cheeses, Bacon, etc. Of course you can also use toppings if you like so the choices are endless...

NOTE: I like to add Paprika and Chili Powder but you can add to your taste or omit altogether.

1.-    Peel potatoes and cut in chunks. In a large pot with salted water, bring to a boil and cook potatoes until they are tender, about 15-20 minutes. Once done, drain and mash fine, you can use a masher or ricer (my choice) or your choice just get it smooth.

2.-    To the potatoes add the rest of the ingredients and mix well. Again, this can be done by hand or I used a mixer with a dough hook. Don't overmix, it will be thick and lumpy.

3.-    Prepare your waffle maker by putting some oil, butter or spray on both waffle plates. Warm up.  Once the machine is ready, put some of the batter into the plate carefully, not too thick so you allow for stuffing. Place your chosen stuff on the batter but leave a space all around the edge of the batter so it will seal when you cover it. Don't overdo it. Once they are ready to finish, put some batter on top of your stuff carefully, don't drag it, use the batter to seal with the bottom batter so you don't see any stuffing anymore. Again, not thick, ok?

4.-    Close waffle maker and allow to cook until done according to your machine. It might take a little longer since it's stuffed, just keep an eye on it once the sensor lights up.

I'm sure you will think of your own variations, these are very flexible. 

Enjoy!

Thursday, March 10, 2022

Estofado de Lentejas y Chorizo - Platillo Español que te encantara!


Estofado de Lentejas con Chorizo - Otro platillo Español que nos regala sabores increibles pero sobretodo que es economico y muy facil la preparacion, teniendo los ingredientes es solo question de pocos minutos para tenerlo listo.

Siempre es bueno incorporar lentejas a la dieta y no solo por la nutricion que ofrecen sino por el buen sabor y lo flexibles que son para muchos platillos. Se pueden comer en sopa, ensaladas, guisados, se pueden preparar en frio o caliente y se pueden usar frescos o de frasco pero sobretodo son muy economicos y rendidores. Siempre me sorprende escuchar cuando las personas mencionan que no les gustan pues son ricas! 

Tambien, se encuentran versiones de paises alrededor del mundo todos con sus cualidades particulares, entre nuestros favoritos son estilo Griego, Mexicano y este Español. Este platillo se puede hacer para adaptarse a casi cualquier dieta cambiando ingredientes o añadiendo proteina y demas.

Ojala traten esta version para que se den cuenta lo sabroso que son las lentejas.... He aqui la receta:

Para preparar esto se necesita:  Receta para 4 o mas servicios dependiendo si se usa de plato principal con un buen pan o como acompañante:

  • 250 g de Lentejas cocidas (valen en conserva)
  • 1 Cebolla pequeña
  • 2 dientes de Ajo
  • 2 Zanahorias
  • 1 Pimiento verde
  • 2 Tomates
  • 200 g Papas
  • 200 g de Chorizo
  • 2 hojas de Laurel
  • 1 cucharada sopera de Pimentón dulce
  • 2 cucharadas soperas de Aceite de oliva
  • 1 cucharada de Vinagre de Jerez
  • Sal marina
  • Pimienta negra

Preparacion:

  1. Si se usan lentejas de frasco o ya cocidas, se escurren las lentejas de su líquido de conserva para usar; si se usan secas sin cocer, se ponen en agua con 1 diente de ajo y un pedacito de cebolla y se cocen como por 15-20 minutos hasta que estan casi suavecitas, se terminaran de cocer con el resto de los ingredientes.

  2. Pelamos y picamos la cebolla y los dientes de ajo. Pelamos, lavamos y cortamos en rodajas las zanahorias. Pelamos, lavamos y troceamos las patatas. Retiramos el tallo y las semillas al pimiento y lo troceamos.

  3. Retiramos la piel al chorizo y lo cortamos en rodajas si se usa Chorizo Español. 

  4. Calentamos el aceite en una cazuela y sofreímos 5 minutos el ajo y la cebolla.

  5. Añadimos la zanahoria, la patata, las rodajas de chorizo, las hojas de laurel y el pimiento troceados, sazonamos con sal, pimentón y pimienta recién molida y cocinamos 5 minutos más.

  6. Incorporamos las lentejas escurridas y el vinagre, cubrimos de agua y cocemos a fuego bajo durante 15 minutos.

  7. Retiramos las hojas de laurel para servir.

  8. Y ya tenemos nuestras lentejas estofadas con chorizo listas para servir.

NOTA: Ahora, yo siempre hago cambios en todas las recetas dependiendo en lo que tengo disponible o como SIEMPRE SE PRUEBAN LAS RECETAS uno va tomando en cuenta el sabor y se pueden aumentar las cantidades o añadir nuevos ingredientes. En este caso tenia una chuletita pequeña de cerdo que me habia sobrado, cruda, y la inclui picadita junto con el ajo y cebolla; asi mismo encontre, dentro de los tesoros de mi refri pedacitos de pollo que los corte y los añadi tambien. No tenia chorizo Español sino Mexicano, lo añadi para sofreirse. Las especias fueron mas generosas que lo que muestra la receta pues segui mi paladar como de costumbre y nos gustan los sabores fuertes.
Entonces la moraleja es: Sobretodo, prueben, prueben, prueben.... no solo conoceran como responden los ingredientes sino estaran seguros que su platillo sera de SU gusto... 

Provecho!! 

Thursday, December 9, 2021

"Colache".- From the North of Mexico, more or less, a family favorite!


"Colache".-  It's supposed to be from the Noreast of Mexico but honestly I've seen it in a lot of places, one of those dishes that Grandma used to feed the kids.... I've never seen it in a restaurant but just in people's homes. Not in mine but I saw it at a Pot-Luck once and decided to make my own. There are many variations due to region, budget, weather, etc. This is the recipe my kids grew up with and holds fond memories for us....

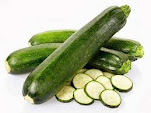
I have to mention that when living in the US, the Zucchinni is dark green and slender and much more bitter than the tender "calabacita" in Mexico and so tasty. I tried everything to get rid of the bitterness of the Zucchinni but it only lessened a small bit, so try and get young and tender ones, ok? I've enclosed pictures of both, ok? You might need to go to a Mexican or Latin Market... First is Zucchinni, Second Calabacita....

Also called "Colichi" or "Calabacitas a la Mexicana" or "Guisado de Calabacita Tierna"....

To make it I used:

2 Tbl Butter, I always use Salted but that's just me

1/2 White Onion, chopped in small pieces

1/2 - 1 cup corn kernels, you can use frozen


1 tsp Dill, dried

Salt and Pepper, fresh ground

1 - 2 pinch Chile de Arbol Powder, I use a very hot Indian one we love

2  Calabacitas, cut in half lengthwise then sliced across

2  Roma Tomatoes, chopped, but you can use any kind you like

2 - 3 Garlic cloves, chopped fine

1/3 cup melting cheese, grated, your choice, we've used them all

1 Tbl Cilantro leaves, chopped

In a pan put the butter and once melted add the onion and stir fry until tender. Add the corn, the salt and pepper plus the chile (if you're using) and cook them together for 2 - 3 minutes

Now add the Calabacitas and allow to cook and soften for another 2 - 3 minutes. You can cover the pan if you like but just briefly

Once they've softened some, add the tomato and dill and mix everything together. Taste to check that your seasonings are good.

If you like the flavors you can add the cheese evenly over top, turn off the heat and allow the cheese to melt, once melted add the Cilantro and allow everything to rest for about 5 minutes before serving.

NOTE:    This is the basic, yet a very complete version, but I'm sure you can see how many things you could be adding, right? Vegetarian, Main Dish or Side Dish, be flexible and create your own version.

I have added Roasted Poblano Chile Strips, Red, Yellow or Green Bell Peppers, Caramelized Onions, Leeks, cooked potatoes, Carrots, Peas.... you get the idea

I hope you like this very simple dish, we love it!


Sunday, December 5, 2021

Egg Muffins? or Egg Bites?... A quick bite for anytime and any flavor!...


 Egg Muffins.-   You've seen them all over on buffet tables and fast food restaurants. They are easy and fast to make plus you can make them in your favorite flavors or whatever you have in your fridge, leftovers or almost anything, it doesn't take a lot either....

I made mine in 3 flavors but the base is the same for all of mine. I started with cheese, my chosen protein or veggies, a different cheese, green or red onions, cilantro and the batter. This is just a guide since you can put literally anything, ok?  I made Bacon & Cheese, Veggie and Ham and Cheese.

To make the batter, you'll need:  This makes about 18 muffins

1 doz eggs

1/2 cup Sour Cream (you can also use cottage cheese)

Salt and Pepper to taste

1/4 cup Heavy Cream

1/4 - 1/2 cup Shredded Parmesan Cheese

Put in blender or in a bowl and mix until well combined and frothy.

NOTE:  I put a little Cheddar Cheese on the bottom, followed by green onion, cilantro, cooked Bacon and a pinch of crushed Red Pepper Flakes. Finally you pour the batter, leave a space at the top.

Take your muffin pan and either spray well with cooking spray or butter.

Prepare whatever extras you will be using: I had:

This is for the Bacon and Cheese ones:

4 Bacon strips microwaved for 4 minutes, chopped into thin slices

1/4 cup shredded Cheddar Cheese

1/4 cup chopped green onions

2 Tbl chopped Cilantro

Put the ingredients for the batter into the blender and blend until frothy. Pour into your molds and bake at 350 F for 20 minutes. Depending on your oven I would check at 15 minutes.

For the Vegetarian ones:

1/4 cup shredded White Cheese, your choice

1/4 cup red onion, finely chopped

1/4 cup shredded Mild Cheddar Cheese

1/3 cup finely chopped vegetables (I used frozen veggie mix) any will work

Top with batter, bake as before

For the Ham & Cheese ones:

1/4 cup White Cheddar Cheese

1/4 cup chopped green onions

1/4 cup shredded Emmerthaler Cheese (you can use Swiss Cheese)

1/3 cup finely chopped Ham slices

Top with batter, bake as before

NOTE: If you only want to make 6 muffins then use 5 eggs and reduce the quantity of the Sour and Heavy Cream.

Now you can think of what other fillings you can use for muffins. How about leftover Rotisserie Chicken (add some Salsa!), Pepperoni slices, cooked Chorizo, Turkey, Pastrami, Roasted Red & Green Peppers, chopped Brussel Sprouts, Broccoli, Peas, Corn, etc..... 

Hope you give this a try and see. These can be frozen or placed in an airtight plastic container in the fridge and have them ready for a quick "take and go" breakfast.... 

How about setting up a Holiday Buffet Table with Muffins, fresh fruit and juices, some great coffee and hot chocolate, and an array of pastries. You could add cold cuts, bread, etc. and you could enjoy your time by having everyone serve themselves.

Enjoy!

Saturday, November 20, 2021

TEXAS CHILI.- Sometimes you just need to have it!


Texas Chili.- Easy, economical, fast and easy dish everyone will love! There is something about Chili that hits the right spot, a comforting and familiar flavor...

I've tried so many different recipes for Chili, from Turkey / Chicken / Vegetarian / Vegan / Steak / Ground Meat with or without beans. Why so many versions? Due to my Private Chef Clients that I've had over time and their requirements many types were needed and I can attest that they're all great....

Yesterday we really wanted some Chili so I went along and made this:

Ingredients you will need:

2 Tbl Oil

1 Yellow Onion, chopped

2 tsp salt (can be more or less, your choice)

2 lbs Ground Beef (or equivalent protein of your choice)  


2 Poblano Peppers, roasted, seeded and peeled, chopped

1 Red Bell Pepper, roasted, seeded, peeled, chopped

5 - 7 Garlic cloves, chopped (can be more or less, your choice)

3 Tbl Chili Powder (I used Spanish Chili Powder, use your favorite, more or less)

2 tsp Cumin, powdered (more or less, you seeing a trend here, I'll explain)

2 tsp Ground Pepper, fresh ground

1/2 tsp Cayenne Pepper (you can use any type of chile, your choice)

1 tsp Ground Oregano (more or less)

1 15oz can Fire Roasted Tomatoes (I used 6 fresh tomatoes roasted in the oven)

1 6oz can Tomato paste

2 cups Chicken / Beef / Vegetable broth

2 cups Beans (can be canned 16 oz or home made your choice of beans)

Here's the procedure to cook:

1-    In a large pot, add the oil until hot, then add the onion and cook until tender. Then add the ground beef, add the garlic, chili powder, cumin, salt & pepper, cayenne and oregano, mix it all well until the meat is well cooked and to allow the flavors to come together for about 15 minutes. After this time taste it to see if you're on the right track or add more of you want....

2-    Now add the tomato paste, break it up and make sure it's well combined and allow the tomato paste to cook well, 5 - 10 minutes.

3-    Add the roasted tomatoes and break them up with your spoon or whatever works so they become pieces, you want their juice to combine with all the other ingredients.

4-    Look at the texture of the chili, do you like it liquid or not so much, you have 2 cups of stock but I only used 1 cup for a texture we liked. See #5 first

5-    Add the beans if you're using any, you can add the bean liquid instead of the stock if you want in place of the stock or half and half.

6-    Now let the chili cook for about 10 minutes and taste it. Adjust all the seasonings until you get it perfect for YOU.

NOTE:   Naturally, like always with all my recipes, changes, additions and deductions apply. This is a dish for YOUR family so you choose, ok? Use this as a base recipe....

As far as changes or additions I made, here's what I did on the fly:

-    I added the vinegar from a can of Jalapeño Peppers to give it some zing. It was a small can so I added about 1 - 2 Tbl white vinegar at the end and it was perfect.

-    I added more Cayenne Pepper but it was only slightly spicy but enough.... feel free to add any hot sauce you like, always less since you can always add more....

Once a little time passed, while I was doing the dishes, Rene came to the kitchen, the aroma brought him, he's my official taster and he declared it Perfect! YUM!!!

Served it with Cheddar Cheese and Sour Cream. I also made the Cast Iron Cornbread on the side.   What a perfect ending to the day and it hit the right spot....

I hope you will try this recipe, as you can see it's simple and quick so great for any day of the week or you can make a big pot for everyone to enjoy. This makes about 4 good servings

Enjoy!!
Tuesday, October 26, 2021

Pollo A la Toscana: Facil y con mucho sabor, les encantara!


Pollo A la Toscana:  Adictivo con mucho sabor, flexible con muchos ingredientes, cena rapida que sera un favorito para todos!

No quieres Pollo? Puede ser de cualquier proteina como Puerco, Pescado... Es fabuloso con Salmon, pero usen lo que les guste. Tambien se puede hacer solo la salsa para usarla sobre pasta, arroz, verduras o proteina....

Para preparar este platillo se necesita:

1 Pechuga de Pollo doble, deshuesada, cortada a lo largo para dar 4 escalopas.

1 cucharada de sal

1 cucharada de pimienta recien molida

1 1/2 cucharadas de Paprika

1 1/2 cucharadas de cebolla en polvo

3 cucharadas soperas de aceite de oliva

Para la Salsa:

6 - 8 dientes de ajo, finamente picados

2 Morrones Rojos, rostizados, pelados y cortados en tiras

1 cucharada de Mostaza Dijon (o mas)

1 1/2 taza de crema para batir (se puede usar leche evaporada si se quiere)

3 tazas de espinaca, hojas solamente

1/2 taza de Queso Parmesano preferiblemente recien rayado

2 cucharadas soperas de perejil picado fresco para servir

Preparacion.-

1-    Poner sal y pimienta al pollo junto con la paprika y la cebolla en polvo

2-    Poner unas 2 cucharadas de aceite en la cacerola sobre flama mediana-alta. Una vez caliente se añade el pollo para sellarlo por unos 5-7 minutos por lado o hasta que se pone dorado. No amontonar al pollo, si se tiene que hacer en partes es mejor. Poner el pollo en un plato y reservar.

3-    Poner la otra cucharada de aceite en la cacerola para lijeramente sancochar el ajo (30 segundos a 1 minuto), luego añadir el morron y sancochar como 1 - 2 minutos mas para que se junten los sabores. Agregar la mostaza Dijon y mezclar.

4-   Baja la flama a mediana-baja, agrega la crema (o leche) y esperar a que tenga un hervor muy suave, mientras se mezcla de vez en cuando. Agregar sal y pimienta a su gusto.

5-    Ahora agregue las espinacas las cuales se relajaran en la salsa, luego se añade el queso parmesano. Dejar que la salsa hierva suavemente por un minuto mas hasta que el queso se derrita en la salsa.

6-     Se regresa el pollo al sarten para recalentar. Al servir se le pone salsa y el perejil picado.

NOTAS:

a.    Se puede agregar 1/2 taza de vino blanco despues de añadir el ajo al sarten, se permite que se reduzca por mitad y se procede.

b.    Se pueden poner hierbas adicionales segun el gusto, como Oregano, Albahaca, etc.


Espero traten esta receta tan facil y rapida, estoy segura que les encantara. Provecho!

Tuesday, October 5, 2021

Wild Rice and Mushroom Soup.- Warm, comforting and incredibly flavorful...


Wild Rice and Mushroom Soup.-  With the cooler weather this lovely soup is excellent to warm and comfort your family. Not only is this a very tasty soup but contains many nutrients like protein, manganese, phosphorous, magnesium and zinc, it has more protein than other forms of rice and as much fiber as brown rice. This is one of my favorites!

It's a flexible recipe since you can exchange ingredients to what you have on hand or what is in season or even use dry ingredients! This can be made vegetarian and vegan too! 

To prepare this soup you will need:

For the rice:
Wild Rice
Salt
Garlic Cloves
Fresh Thyme Sprigs
Water

For the Soup:
Dried Porcini Mushrooms (or other dried mushrooms)
Butter (or olive oil or other cooking fat)
Fresh Mushrooms (any type you like)
Shallots
Garlic
Tomato Paste
All Purpose Flour
Vegetable Stock (or what you have on hand)
Dry White Wine
Heavy Cream - Half & Half or your choice 
Soy Sauce or Worcestershire

For the Parsley Butter: 
Butter (can be vegan or your choice)
Salt
Ground Black Pepper
Fresh Parsley Leaves

PREPARATION:

1-  First prepare the rice. Combine salt, thyme, garlic and water in a medium saucepan. Bring to a boil and add the wild rice. Lower the temperature a little and cook for 30 - 35 minutes. Remove the thyme sprigs and garlic, drain the rice and set aside.

2-  Place the dried mushrooms in a small bowl, pour boiling water over them and allow to soak and soften. If they're large, once they soften you can drain and chop in smaller pieces. Be sure to save the mushrooms soaking liquid for use a little later on.

3-  Now add the fresh mushrooms to a soup pot and brown them with a little butter or some oil until browned. Add the garlic, shallots and tomato paste, saute for a little while and then you can add the dried mushrooms.

4-  Add the flour to the vegetables and mix until a dark fond is created at the bottom of the pot.

5-  Now add the wine (if you are not using you can add some stock) to deglaze the bottom by scraping the fond.

6-  Add the stock and mushroom soaking liquid to the soup pot, bring to a boil and then simmer for 15 minutes.

7-  While you are simmering the soup you can go ahead and make the Parsley Butter if you are using it.

8-  Now you can add the wild rice and cook for an additional 10 minutes. Finally, remove from the heat and add the heavy cream and soy sauce to your taste.

9-  Finally, serve immediately with a dollop of the Parsley Butter along with some great crusty Artisan Bread.

NOTE:  If you store any leftovers in the fridge you will see that the soup will thicker so when you use the soup, add some stock to give it the texture you like.

If desired, you can add more ingredients like potatoes, carrots, peas, shredded chicken, etc.


Tuesday, September 28, 2021

Penne A La Vodka.- A rich flavorful sauce that's worth the effort!!


What can I say about Penne with Vodka Sauce? That it's creamy, flavorful and delicious? You bet! Yes, it takes a while but it cooks in the oven so you don't need to be at the stove all the time and baking in the oven develops the flavors incredibly!!

Who doesn't need a great recipe for pasta? It's always great to have in your repertoire and will impress the pasta lovers in your family because it's wonderful...

To make this dish you will need:


1/4 cup Olive Oil

1 Onion, chopped

3 - 5 Garlic Cloves, diced

1/2 tsp Red Pepper Flakes

1 1/2 tsp Oregano, dried

1 cup Vodka

2 28oz Cans of Whole Plum Tomatoes, peeled

Kosher Salt and Fresh Ground Pepper

Penne Pasta

4 Tbls Oregano, fresh

3/4 to 1 Cup Heavy Cream

Parmesan Cheese, freshly grated

PROCEDURE:

1-  Preheat oven to 375 F

2-  Over medium heat, use an oven proof pan, add some olive oil and then the onion and garlic and saute for about 5 minutes until transparent. Add the red pepper flakes and dried oregano and cook for another minute more. Add the Vodka and continue to cook until the Mixture is reduced by half.

3-  In the meantime, drain the tomatoes through a colander and add the to the pot while you break them up with your hands. Add 2 tsp of salt and some black pepper. Cover the pan with a tight fitting lid and place in the oven for about 1 1/2 hours. After, remove the pan from the oven and allow to cool for 15 minutes.

4-  Meanwhile, bring a pot of salted water to a boil and cook the pasta. When the pasta is done, set aside 1 cup of the pasta water in case it's needed, and drain the pasta and reserve.

5-  Now, in batches, put the tomato mixture in the blender or use an immersion blender to make the sauce very smooth. Return to the pan.

6-  Now reheat the sauce to a simmer, add 2 Tbls of the fresh Oregano and enough heavy cream to make the sauce creamy, add salt and pepper to taste and simmer for 10 minutes on low heat.

7-  Now add the pasta to the sauce and cook for 2 - 3 minutes more, mix in well. Stir in 1/2 cup of Parmesan Cheese and blend.

8-  To serve, put an additional bit of Parmesan Cheese and some of the fresh Oregano as a  on each serving. Enjoy!!

NOTE: You could also add protein to this dish if you like, could be Chicken / Beef / Salmon, etc.