Showing posts with label Salads. Show all posts

Saturday, December 30, 2023

Salad Dressings: Six great ideas for healthful salads!!

Here are six healthy and very flavorful Salad Dressings you can make at home so you know the ingredients are good for you. Look through them and you'll see:

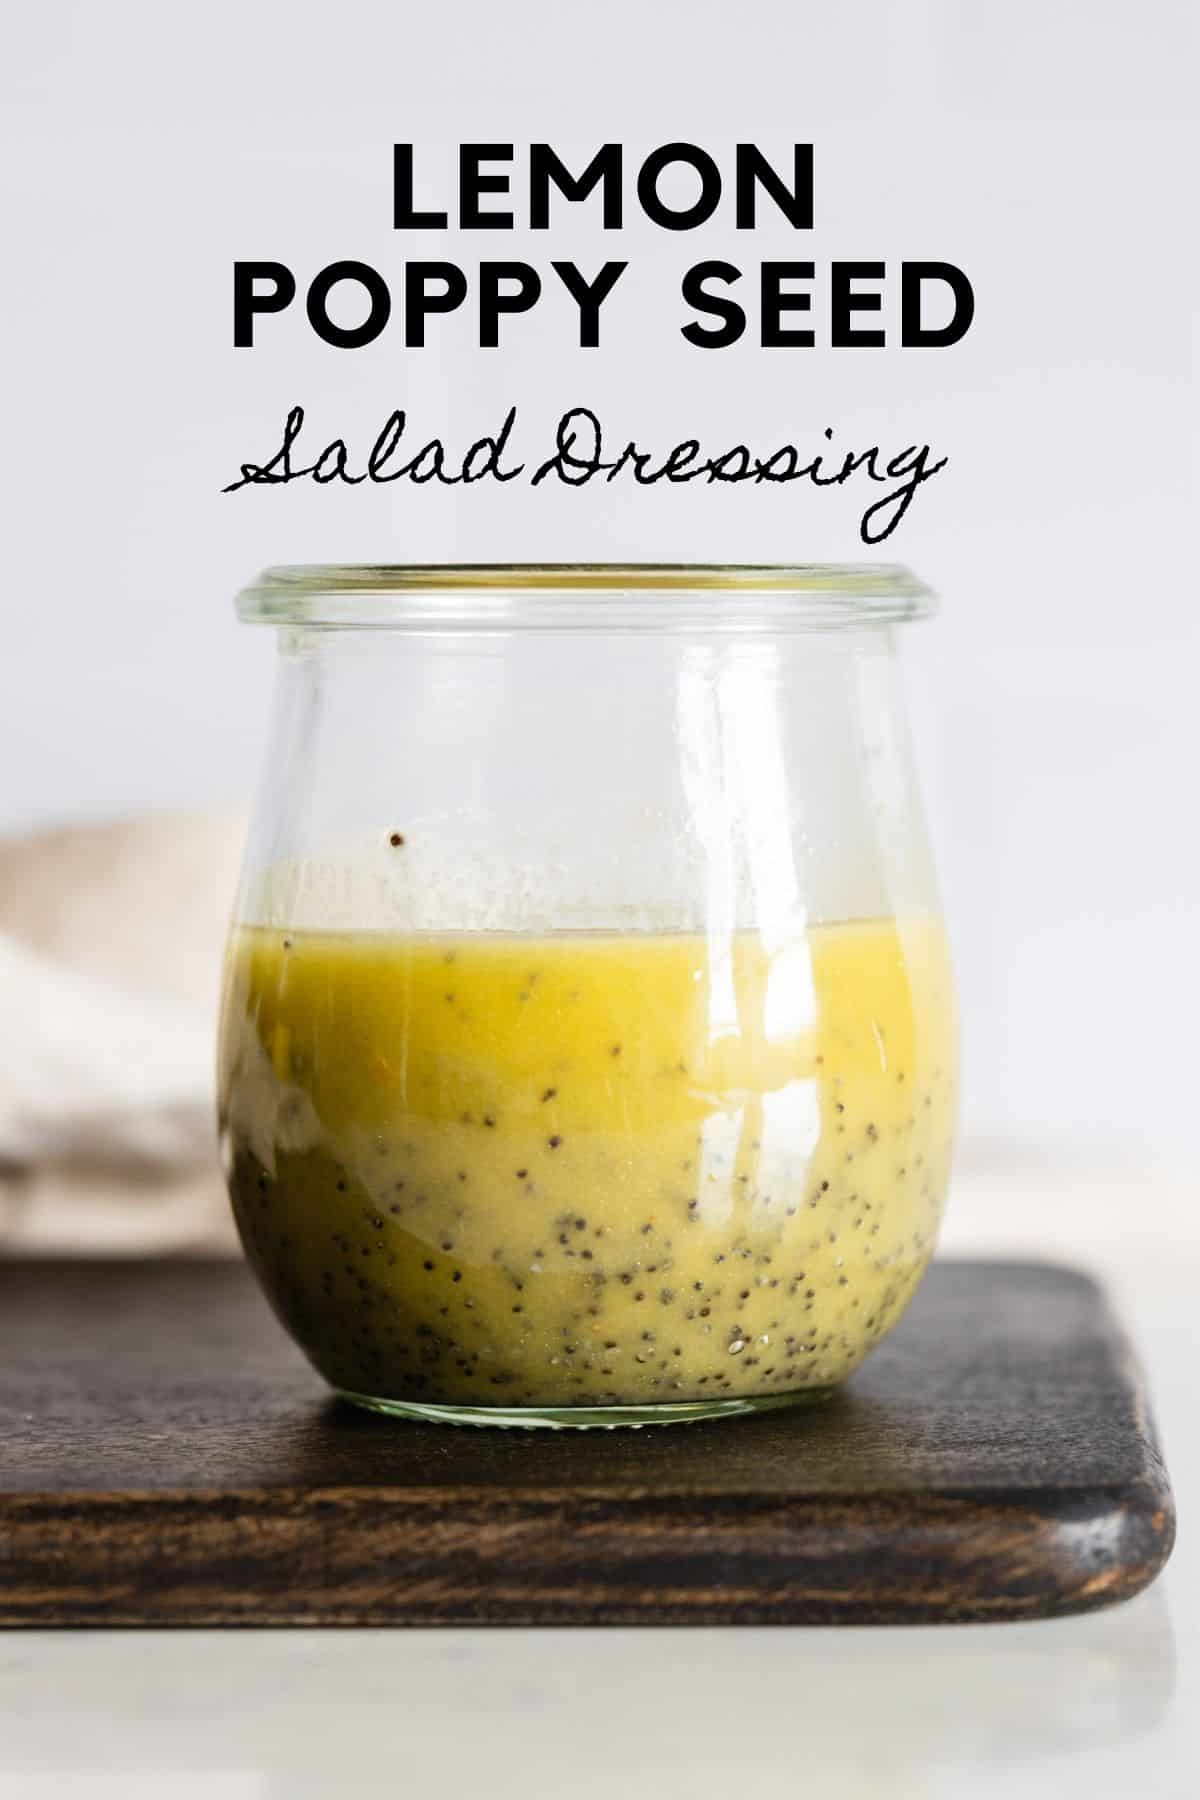
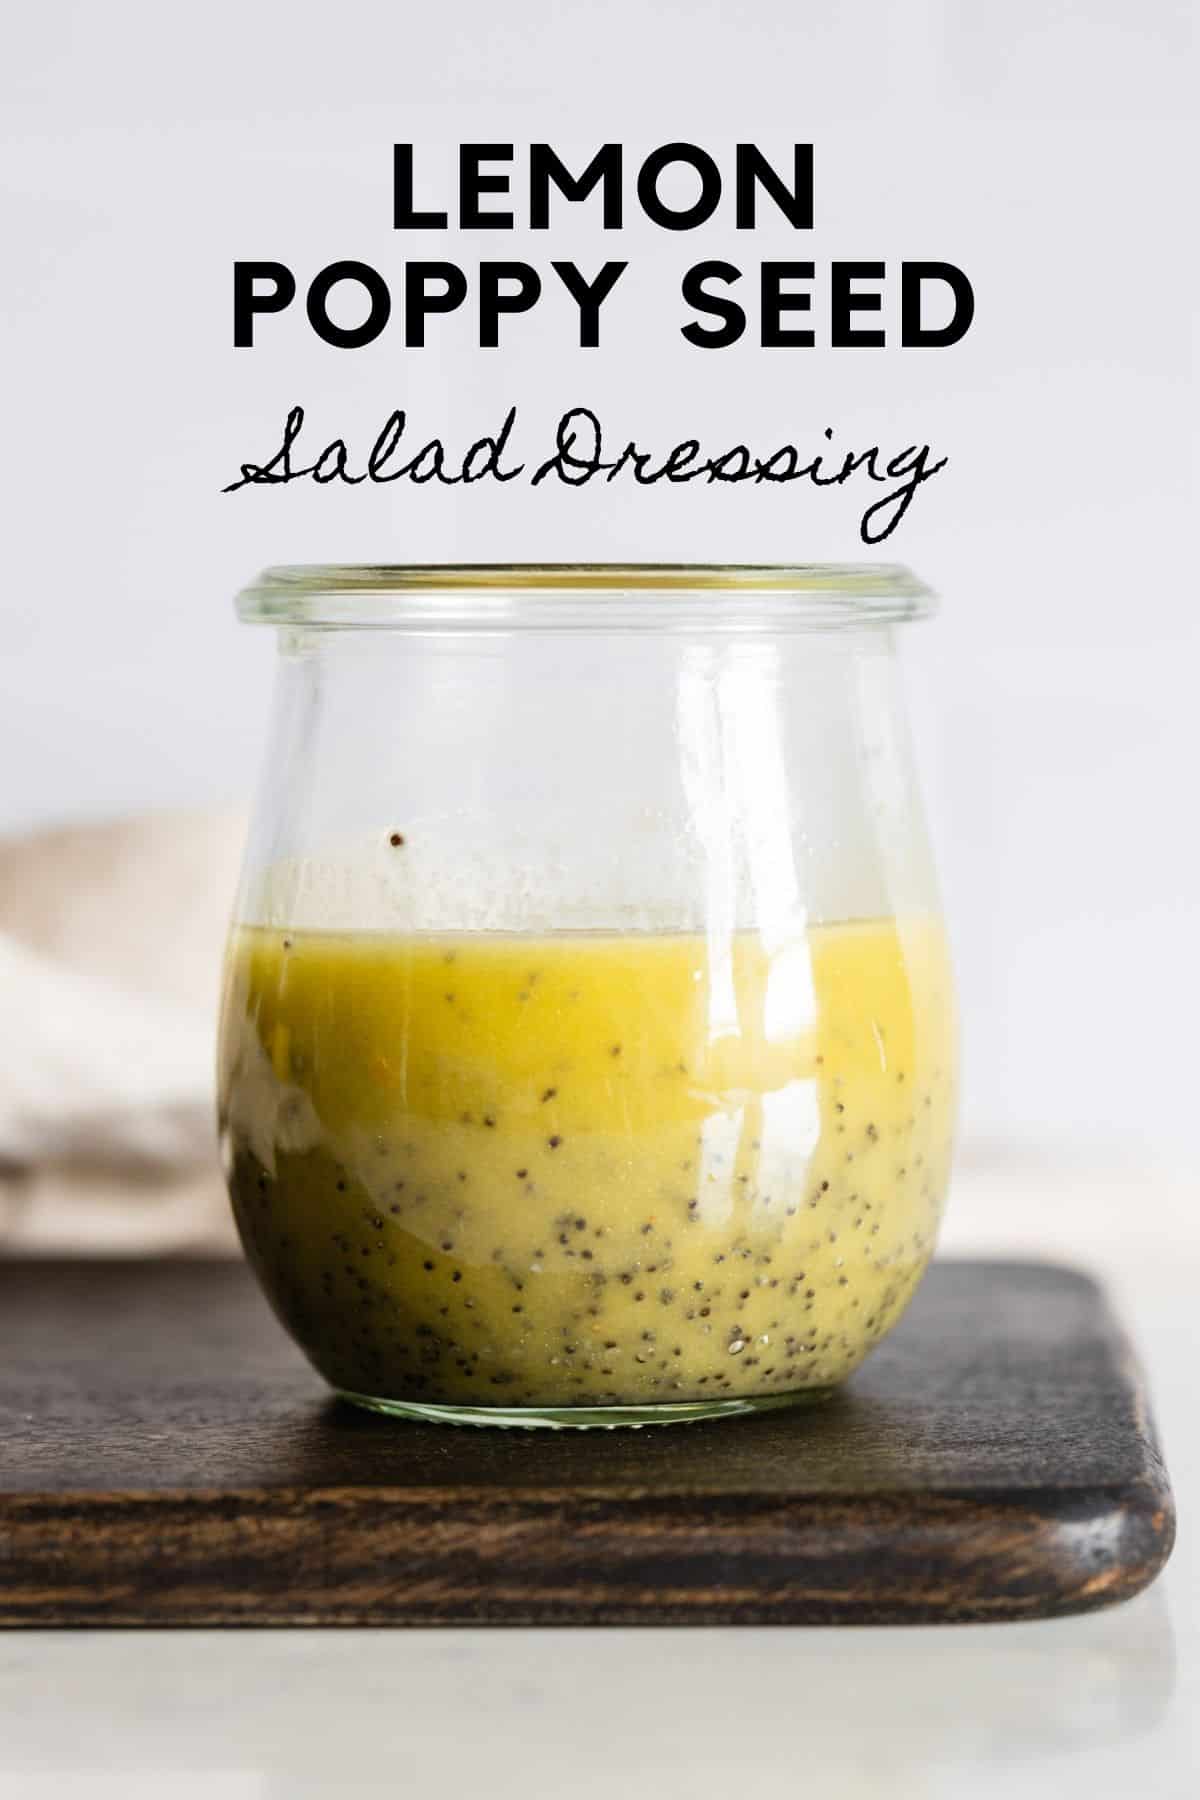
Cilantro Lime Dressing, Maple Mustard Dressing, Lemon Poppy Seed Dressing, Greek Yogurt Dressing, Citrus Basil Dressing, Peanut Salad Dressing. 

They are all easy to prepare and come together in a snap. Why not try them soon!

Ingredients

       FOR CILANTRO LIME DRESSING            

  • 1 small avocado
  • 1 handful cilantro
  • 1 lime
  • 1-2 Tbsp water

  • FOR MAPLE MUSTARD DRESSING       
  • 1 Tbsp maple syrup
  • 1 Tbsp Dijon Mustard
  • 1 Tbsp Balsamic vinegar
  • 6 Tbsp flavorless oil avocado oil is my favorite

  • FOR LEMON POPPY SEED DRESSING      
  • 6 Tbsp extra virgin olive oil
  • 1 Tbsp Dijon mustard
  • 1 Tbsp poppy seeds
  • 1 Tbsp honey
  • 1 lemon
  • sea salt

  • FOR GREEK YOGURT DRESSING      

  • 2 Tbsp mayonnaise preferably homemade
  • 2 Tbsp plain Greek yogurt
  • 1 tsp Dijon mustard
  • 2 Tbsp water
  • sea salt
  • pepper
  • 1/4 cup chopped fresh herbs basil parsley cilantro dill - or a mix of them

  • FOR CITRUS BASIL DRESSING     

  • 1 cup basil leaves
  • 1 Tbsp Dijon mustard
  • 3 Tbsp flavorless oil avocado oil is my favorite
  • 1 orange
  • 1 lime
  • sea salt
  • pepper

  • FOR PEANUT SALAD DRESSING      

  • 2 Tbsp unsweetened smooth peanut butter
  • 1 tsp grated ginger
  • 1 tsp grated garlic
  • 1 Tbsp soy sauce
  • 1 tsp sesame oil
  • 1 lime
  • 1-2 Tbsp water

Instructions

  • Maple Mustard, Greek Yogurt, Lemon Poppy Seed, and Peanut salad dressings simply add ingredients to a sealable jar and shake to combine.
  • Cilantro Lime and Citrus Basil Dressings add ingredients to a jar wide enough to fit your immersion blender and blend until smooth.

Thursday, July 6, 2023

French Carrot Salad -or- “Carottes râpées” - very, very French Salad that pairs with everything...


 “Carottes râpées”, the very very French Salad that will make you smile in its simplicity. So economical and is a perfect "at home" quick lunch or light snack, easy ingredients and comes together in a snap.

You'll be able to see from the ingredients in this recipe that it can be used in many types of diets too.

The basic salad consists of: grated raw carrots (hence the name), dressed in some lemon and ground cumin. You could make it fancier by using colored carrots, using lime instead, increase the cumin or use ground coriander.

You'll need:

3 Tbls Extra Virgin Olive Oil 

3 Tbls fresh Lime Juice

1 tsp light honey

1/2 tsp ground Cumin

Salt to taste

1 lb Carrots, grated 

1/2 cup chopped Flat Leaf Parsley -or- Cilantro

Make the dressing, add the salt and carrots in a bowl and toss well, Parsley is added at the end, toss well.

Allow to rest 30 minutes to 2 hours before serving to let all the flavors come together.

It is a lovely palate cleanser when served as a side to the lovely but rich Croque Madame, some fatty pork or how about with a Raclette or heavy Mac N Cheese... I can also add that it's great as a standing midnight snack in front of the refrigerator or a quick, refreshing bite on a hot day. It's great at picnics or pot lucks...

So make this lovely salad and take it to the park so you can enjoy it outdoors on a sunny day!


Tuesday, September 21, 2021

Green Goddess Dressing.- An old time ingredient that shouldn't be forgotten, so tasty!!


 I remember Green Goddess Dressing while I was living in New York a long time ago but since then not much yet I just had a salad and it reminded me how good it is and saw no reason to forget about it. If you try it, you too while agree with me. Tangy, creamy and lovely!

I wanted to make a salad, but not just our regular Caesar Salad which we love but something else just for a flavor change and I found a mention to this dressing from an old Chef and decided to make it since I had all the ingredients, and you know what? It's fabulous!

This is what I made: A Bacon, Lettuce and Tomato Salad with some extra things I had in the refrigerator, it was perfect.

Ingredients:

Iceberg Lettuce, cut in strips

Baby Romaine Lettuce, cut in strips

1/3 cup Cilantro Leaves, chopped

2 Tomatoes, without seeds, cut into small squares

6 Strips of Bacon, cooked and torn into bite size pieces

1/2 cup or more of shredded or strips of cheese, your choice, I had Gouda

2 Eggs, hard boiled, peeled and cut in half

Salt and Pepper as needed, or not

Green Goddess Dressing:

1 Large Avocado, ripe

1/2 cup Cilantro Leaves

1/4 cup Olive oil, I had Leek Oil from frying some leeks

3 Tbsp Mayonnaise, either home made or Avocado Mayo, your choice

2 Tbsp Lemon juice, fresh only

1 Tbsp White Wine Vinegar

1 Garlic Clove, large, peeled, smashed with your palm

Salt and Pepper to taste

Water if needed to give you the texture you like

NOTE: You can also add shredded chicken, beef or anything you have, other types of cheese, Cherry or Grape Tomatoes cut in half, Avocado slices, Black Olives or get creative.

Ingredients for the Dressing:

Place all ingredients for the dressing in a blender or similar and process until smooth. Insure it's not too thick and add a little water at a time so it's smooth and pourable.

Once the salad ingredients are ready on plates or bowl, finish with the Salad Dressing and serve. Enjoy!

Sunday, August 8, 2021

Wiener Schnitzel, a traditional dish from Austria.... The complete meal

 Weiner Schnitzel a very well know dish served in many cities in and around Austria and each country has their own versions. My favorite are the ones from Vienna so this is what I will show you. It's one of my family's favorites and we have it often and even though we live in Mexico, at the moment and we have what's called "Milanesa" we like the Vienna version much better. We like our version too but this one is excellent.

Schnitzel can be made with almost any type of meat, I've seen it with Venison, Pork, Beef, Chicken, Turkey, depending on your area and what's available. We've always preferred Pork. It's also made with a technique particular to Vienna called "souffleing" in order to create air pockets between the meat and the breading which I love. This is my preferred method and it's great. You need hot oil, I've also used lard once the meat is breaded in the traditional flour, egg, bread crumbs, not left for a long time but fried at once. You slip the meat into the oil and begin moving the pan front and back, lifting the pan handle slightly so the oil comes over the meat and this will puff it up. Once it begins to turn golden you can turn it over and finish cooking. You might need to practice the technique until you perfect it, it's worth it.

A traditional meal of Schnitzel is served with Austrian Potato Salad made with waxy potatoes, a flavorful Tomato Salad and a Cucumber Salad and finished with a big spoonful of Loganberry Preserves, fresh lemon slices for the meat and some fried Parsley as a garnish.

Some versions can be served with sauce, such as Mushroom Gravy or Cream Gravy but I haven't seen it in Vienna, maybe Germany or other countries surrounding Austria.

If your escalopes aren't thin, you will need a meat tenderizer or mallet to pound the meat between two plastic sheets or zip lock bag, put a little oil on the meat so it won't stick.

To prepare this dinner you will need:     

 4 Pork Escalopes

Salt and White Pepper to taste

1-2 cups All Purpose Flour, in a plate for dredging

2 eggs, in a plate for dredging, beaten

2 cups of dried bread crumbs, homemade or purchased

Oil or Lard, enough for about 2 cm in the pan. I use a cast-iron pan

Sliced fresh lemons

Loganberry Preserves or you can use Cranberry

500 g Small Waxy Potatoes cut in fourths, cook in boiling salted water. Add 1/4 cup finelly minced onion, fresh herbs, salt and pepper, White Wine Vinegar, pinch of sugar, toss well

500 g Grape Tomatoes, cut in half in a bowl tossed with White Wine Vinegar, salt and pepper and fresh herbs like dill and basil

1-2 Cucumber, peeled, cut in half lengthwise and sliced thin with 1/3 cup Plain Yogurt, White Wine Vinegar, salt and pepper, minced dill, pinch of sugar.

I hope you will try making this dinner as it is truly tasty and not hard to make, it's worth presenting it to your family and friends. Enjoy!!


Mediterranean Farro Salad with Lemonade Dressing: Lovely, Healthy and Bursting with Flavor!!

 Mediterranean Farro Salad with Lemonade Dressing: Not only super flavorful and flexible but nutritious and fun. You can change the ingredients to have the ones your family prefers, the dressing can be used for many other dishes. We first had something like this at our favorite Asian Restaurant in Las Vegas! You can tailor it to any dietary system too, vegan, vegetarian, etc.

You will need:                                

1 cup Farro

4 cups salted and boiling water

1 cup Arugula or other greens

2/3 cup Cherry Tomatoes, cut in half

1 cup cucumber, sliced

2/3 cup chickpeas, cooked and peeled

1/2 cup Sicilian Olives, pitted and sliced

1/3 cup red onions or scallions, minced

1 can artichokes, cut in quarters

2/3 cup fresh herbs, mint/parsley/basil, finely minced

Lemonade Dressing:

1 clove garlic, minced

1 tsp Honey & Mustard or Honey Mustard

1 cup Lemonade, sweetened or purchased

2 Tbls Basil, minced

1/2 lemon, juice only

1/2 cup Olive Oil

1/4 Salt or to taste

1-    Cook the farro in the boiling water until soft and chewy. Can take up to 45-50 minutes, don't overcook and let it become mushy. Drain and place in a salad bowl.

2-    Make the Lemonade Dressing. Place all ingredients in a glass contained or jar, close and shake to incorporate well.

3-    Pour about 1/4 cup of the dressing over the cooked farro before adding the salad ingredients to flavor the farro

4-    Add the salad ingredients to the bowl and toss well, then add more dressing and toss once more.

5-    Serve the salad and enjoy!!

Wednesday, June 23, 2021

SPECIAL SALADS THAT ARE UNIQUE, HEALTHY, FLAVORFUL AND WONDERFUL!!

Special Salads for Summer....


I've been trying to change our regular dishes, you know the ones that seems to appear all the time on your menu rotation (I don't have a problem with this since we love them but don't want to fall into a rut) so I've been looking around, getting inspiration from all around and I think I found some amazing examples of what I had in mind.
Summer is definitely here and I am assuming that we all get fantastic fruit and veg at this time, so with this in mind I used it as a primary ingredient, salads that can be a quick lunch, salad course or a main dish to give us flexibility and flavor plus!
I'm sure you'll find these recipes appealing, easy to make and maybe make them a part of your family's rotation....

PANZANELLA SALAD.- This Tuscan specialty is an all around favorite yet for some reason I forget about it but it's worth bringing back....

INGREDIENTS:

3 large Vine Tomatoes, very ripe, cut in cubes. Cut stems off

Handful Basil Leaves, hand shredded

½ Handful Oregano leaves, fresh

3 Garlic cloves, finely chopped

1 Artisan Bread, stale or hard, cut in cubes

1-2 Cucumbers, peeled and cut into cubes

1-2 Carrots, cut in small cubes

1 Red Onion, sliced in fine slices

2-3 Celery stalks, cut in small cubes

Extra Virgin Olive Oil

Red Wine Vinegar

Salt and Pepper to taste


  1. In a large bowl put tomatoes, Basil, Oregano and Garlic, 2 Tbl olive oil and Red Wine Vinegar. mix well. Taste it to adjust dressing and add salt and pepper so you like it. Allow to rest for at least 15 minutes.

  2. Place the bread cubes on a sheet pan, drizzle the tomato juices over them, toss and put in an 350 F Oven for about 10 minutes or until golden brown. Allow to cool.

  3. Put cucumbers, carrots, red onion and celery in a bowl, add olive oil, vinegar, salt and pepper to taste and once you like it, add the tomatoes and mix everything well.

  4. Top with more Basil Leaves. Serve.


Enjoy!


NOTE: You can add as few or many veggies that you like, whatever is in season, bitesize.


                                    ------------------------------------------------------

TOMATO GRATIN SALAD.-  Is it a casserole, side dish, or main dish? You decide!

INGREDIENTES:

¼ taza Aceite de Olivo Extra Virgen

6 oz Baguette de buena calidad, cortado en cubos medianos o 4 tazas de pan

3 lbs Tomate Bola maduro, cortado en cubos de 1 pulgada

2 Tbls Aceite de Olivo Extra Virgen

3-4 dientes de Ajo, cortado en rebanadas finas

2 tsp Azucar


1 tsp Sal

1 tsp Pimienta

¾ taza Queso Parmesano rallado

2 Tbls Albahaca cortada en listones finos (chiffonade)


NOTA: La manera mas facil es usar un sarten que se pueda usar en el horno, para no ensuciar mas trastes que se tengan que limpiar, pero si no se tiene sarten con mango metalico se puede usar una caserola para horno, cuando se hayan integrado el pan a los tomates y antes de poner el resto del pan y queso y terminar el platillo en el segundo recipiente.


  1. Se pone el aceite en un sarten sobre fuego medio-bajo para dorar los cubos de pan hasta que estan doraditos, como 4-5 minutos. NOTA: Es importante que el baguette sea de buena calidad porque sino el pan absorbera demasiado aceite y se desmorona. El pan debe quedar crocante.

  2. Se pone el pan dorado en un recipiente mientras que el sarten a fuego bajo se le añaden las 2 cucharadas de aceite (se usa el mismo sarten, no hay necesidad de lavarlo) hasta que caliente y se ponen las laminitas de Ajo, solo por 30 a 60 segundos cuando apenas empiezan a tomar color.

  3. Ahora es tiempo para los tomates, junto con 2 cucharaditas de azucar, la sal y las pimienta. El fuego ahora se sube a mediano durante 8-10 minutos o hasta que los tomates hayan soltado bastante jugo y casi queden cubiertos por el jugo. Se apaga el fuego.

  4. Es tiempo de añadir el pan (se aparta una taza de pan) para que absorba los jugos del tomate, presionando un poco para que se integre y al final se pone la ultima taza de pan sobre los tomates para que dore y se pone el queso rallado sobre todo.

  5. En un horno a 350 F por 30-40 minutos. A los 30 minutos se revisa la caserola y usando una espatula de silicona, se separa ligeramente los tomates de la orilla para liberar los jugos restantes y no se pegue. No se revuelve. Se regresa al horno por otros 10-15 minutos.

  6. Es importante dejar reposar el platillo como 10-15 minutos y mientras se prepara el albahaca que se pondra sobre todo antes de servir.


BUEN PROVECHO!


                                                    ----------------------------------------

EGYPTIAN BARLEY SALAD WITH POMEGRANATE, FETA AND FRESH HERBS.-  This salad is a true showstopper! Very flexible and easily goes from side dish or main dish plus it's so beautiful it's perfect for company!.....

INGREDIENTS:


4 Qts Water

1 tsp Salt

1 ½ Cups Pearl Barley

3 Tbl Extra Virgin Olive Oil

2 Tbl Pomegranate Molasses

½ tsp Cinnamon, ground

¼ tsp Cumin, ground

¼ cup Pistachios, chopped and toasted

1/3 cup Golden Raisins

1 Pomegranate, take out the seeds and have them ready. Separate 1/4-1/2 cup

½ cup Cilantro, chopped

3 oz Feta cheese in small cubes

6 Scallions, only the green parts, sliced fine

1-2 tsp Extra Virgin Olive Oil, as topping


  1. Water is put on the stove to boil along with the salt. Add the Barley to cook, it can take from 30 to 50 minutes, until its tender. Drain and place on a sheet tray, spread out, to cool while you get the rest of the ingredients.

  2. In a large bowl, add the Olive Oil, Pomegranate Molasses, Cinnamon and Cumin and whisk it all together.

  3. Add the now cooled Barley and mix in well.

  4. Add the pistachios and cumin and mix well.

  5. Add pomegranate, cilantro and mix.

  6. You can add the Feta. Scallions and mix in or save it for service time, your choice.

  7. Top with a couple of tablespoons of Extra Virgin Olive Oil to finish.


ENJOY!


How about these jewels? I'm really looking forward to going to the Municipal Market so I can stock up on the ingredients needed for these dishes, I know we'll enjoy them!!

Tuesday, November 19, 2019

UNA SALCITA PARA TODO! ... Salsa Mixta con Habanero!!

La salsa es el toque perfecto para cualquier comida y a traves de los años me he especializado en todo tipo de salsa, desde las elegantes de la cocina Francesa hasta las increiblemente sofisticadas salsas Mexicanas.... No hay nada como una buena salsa!

Las ventajas de hacer tu propia salsa son muchas, no solo para la salud pues sabes exactamente lo que contiene y no incluyen quimicos, conservadores, colores o sabores artificiales o cualquier cosa que podria ocacionar alergias o reacciones adversas. Otra cosa buena de producir tu propia salsa es que puedes ajustar el nivel de picor a tu gusto y el tipo de chile preferido pues cada uno tiene sus cualidades particulares, desde los que no pican hasta los que causan dolor!

Yo no soy muy buena para el chile, depende en el platillo del momento pero a veces tolero especialidades Thailandesas, Indues o Szechuanas muy picantes pero me das un Habanero y casi me muero! Durante el tiempo que vivimos en Merida, Yucatan me toco aprender como usar el chile emblematico de la region, aparte que los ingredientes que no son parte de la cocina Yucateca a veces son dificiles encontrar en los mercados y aunque se ha mejorado esta situacion, aun faltan muchas cosas y el comer la salsa Xinpec simplemente no es para mi pero hay maneras de tratar el Habanero para que sea no solo tolerable sino delicioso.

El secreto de como domesticar los chiles es en no solo quitarle todas las semillas que tiene sino el quitar las venas completamente hasta que no se vea nada de lo blanco de ellas. Otra cosa es el coser los chiles en la misma agua que el resto de los ingredientes para suavizar el sabor.

Siguiendo estos consejos, para preparar Salsa Mixta con Chile Habanero se necesita:

3-4 Tomatillos grandes, sin cubierta de papel ni rabo
2-3 Tomates Saladet o Roma, enteros
3-4 dientes de ajo, pelados sin rabito duro
1/2 cebolla, cortada en mitad
1-4 Chiles Habaneros, sin rabo, cortados en cuartos a lo largo, sin nada de semilla ni venas
Sal y pimienta al gusto

Un manojo pequeño de Cilantro, limpio

(Mi desayuno el dia de hoy, Huevos Rancheros YUM!)

Se pone el primer grupo de ingredientes en una ollita y se cubre de agua sobre fuego mediano-alto. Una vez que rompa el hervor se le baja la flama a muy bajita y se coce solo hasta que cambien de color los tomatillos. Se apaga el fuego y se ponen los tomatillos, tomates, cebolla y ajo en el vaso de la licuadora, sin el liquido. Se le agrega sal y pimienta y se licua un poco, entonces se empiezan a agregar los pedazos de chile Habanero, cuartito por cuartito, se licua poco y se prueba. Si el nivel del picor esta aceptable, asi se deja, si aun se quiere mas picor entonces se le pone otro cuartito y asi sucesivamente hasta que quede a su gusto y el nivel de sal y pimienta tambien. Cuando el picor esta aceptable entonces se le pone el cilantro y se termina de licuar.

Ahora, si se quiere que sea una salsa realmente picante se pueden dejar los chiles crudos sin limpiar o se pueden asar en un comal para licuarse asi.

Esta es una salsa que se puede usar en Huevos Rancheros, Enchiladas, Chilaquiles, Tacos Dorados, Flautas, con Pollo, Puerco, Pescado o Mariscos, Verduras o cualquier cosa que se quiera realmente. Esta salsa tambien se puede usar como base para preparar una mayonesa de Habanero o un poco mas suelta como un aderezo para ensaladas o como "salsa secreta" para sandwiches o hamburguesas o tacos de pescado. Realmente tiene usos ilimitados.

Espero les guste esta salcita tan rica que ha sido parte de mi familia por tanto tiempo. Provecho!

Tuesday, April 2, 2019

LENTIL SALAD WITH ROASTED TOMATOES: A lovely dish!

LENTIL SALAD WITH ROASTED TOMATOES.- A wonderful side dish or main dish. Simple yet the combination of flavors really satisfies, a very healthy dish, quick to prepare and offers nutrition while delivering big on taste.

This salad doesn't take long to prepare and can be served room temperature, cold or hot, you can leave it in the fridge for a quick bite or serve it at a family dinner.

To prepare this dish you will need:

For the Lentils:
1 cup Puy or Beluga Lentils (the small lentils)
3-4 4 cups water
1 Bay Leaf, dry
1-2 Garlic Cloves, peeled, whole
1-2 tsp salt

For the Tomatoes:
1 pint Cherry or Grape Tomatoes (I have used ripe Roma Tomatoes, cut in 1 inch cubes) halved
1-2 tsp Olive Oil
Salt and Pepper

For the Dressing:
4 Tbls Olive Oil
1 Tbls Dijon Mustard
2 Tbls Lemon Juice, fresh squeezed
1/2 - 1 Tbls Honey (you can use Maple if Vegan)
The Garlic from the Lentils
Salt and Pepper

For the Salad:
1/4 - 1/2 cup Red Onion, chopped fine
1/3 - 1/2 cup Parsley Leaves, rough chop

Put the lentils to cook with the water, garlic clove and bay leaf. On medium heat bring to a boil and then lower the heat to a simmer for about 15 minutes or until tender, about 15 - 20 minutes.

You can make the dressing while you wait for the lentils to cook. Preheat the oven to 350F and on a lined baking sheet put the tomatoes that you have drizzled with some oil and salt and pepper, Roast for about 15 minutes until wrinkly and tender. Once done, allow to cool slightly.

I use an immersion blender for the dressing and use the blender cup. Put all the ingredients for the dressing and pulse to emulsify well. Add salt and pepper. Save for the salad.

Once the lentils are cooked, remove the bay leaf and garlic clove (you'll use in the dressing) drain the lentils into a bowl and add the tomatoes, onions and parsley. Add the dressing and toss well. Serve.

We've got a Picaña on the grill so as soon as it's ready, we'll serve it along with this salad for a wonderful summer meal. Enjoy!

NOTE: You can substitute or add many things to this salad, like roasted peppers, roasted fruit like pears, roasted carrots, beets, onions and asparagus or avocado


. You can add cheese or greens, serve with tuna or other protein if desired. A very flexible salad that also take a different dressing if you like such as Balsamic or your favorite.

Monday, March 25, 2019

SPICY SZECHUAN PEANUT NOODLES.- A family favorite you need to try!

SPICY SZECHUAN PEANUT NOODLES.- I've been making this for a long time, in many versions like Vegan, Vegetarian, Non-Dairy, No Red Meat, Quick Weekday Meals, etc. and have loved them all!

This is a dish to make quickly and yields maximum flavor. It doesn't matter if you leave out the protein either since it more than makes up in flavor and you won't miss it, plus you can make it spicy or not (I like it hot) and is sooo satisfying! I even used to offer it as a Entree in my Catering Division and was always a BIG hit with everyone! Also, if you make the sauce / dressing in advance you can keep it in a jar in the fridge and this meal can be ready as soon as the pasta is done, nothing could be quicker and easier.

For this amazing recipe you will need:

1 Tbls Szechuan Peppercorns (or you can use other type, your choice)
1/2 lb ground pork or chicken (optional)
3 Tbls Soy Sauce
Salt to taste (might not need it, taste first)
Oil, to fry the pork or chicken only
3 Tbls garlic, chopped
2 Tbls ginger, chopped and peeled
5 Tbls scallions, cut in small pieces
1/3 cup Peanut Butter, Smooth (but you can use the chunky style too, your choice)
2-3 Tbls Sesame Paste (Tahini, if you like)
2 Tbls Chili Oil
1 cup chicken stock, if needed
12 oz Chinese Egg Noodles, fresh or dry (can be spaghetti or similar)
Salted Peanuts, chopped

If you're using the peppercorns then heat a wok or heavy skillet over medium heat, add the peppercorns and ir them until they begin to smoke and then remove them. You will grind them and set them aside.

If you're using meat then put enough oil into the fry pan or work for frying and bring the oil to temperature. While this happens combine the meat with 1 Tbls Soy Sauce and add some salt. Once the oil is hot, add the meat and break it up, cook stirring until it's crispy, then remove from the oil, set aside on a paper towel.

If you cooked the meat then remove all but 2-3 Tbls of the oil from the pan. If not, then add the oil. Start heating the water for the noodles. Bring the pan back to temperature and then add the garlic, ginger and scallions and stir for about 30 seconds, then add the sesame paste or peanut butter (salt if you want), chili oil and chicken stock. Simmer for about 4 -5 minutes then add the meat back into the pan and stir.

Cook the noodles to al dente as always. Drain from the water and place in a large bowl. Pour sauce over the noodles and add the meat (if using) and toss to cover the noodles well. Sprinkle with the grounded up peppercorns and serve. You can sprinkle the chopped peanuts on top as well.

NOTE: I usually make more sauce than this recipe calls for so I can store it in the fridge and have it on hand when the mood strikes for a quick meal....  for me this is a 5 minute thing since all the ingredients are part of my everyday pantry but I can understand if the ingredients are unfamiliar with you, try them and use them in other Chinese or Szechuan Dishes you can find o


n the internet so you not only learn to use them but as you become more familiar with them you'll incorporate them into other dishes you make, it's really great!

You can ad many vegetables as well like Bok Choy, carrots, zucchini, red and green bell pepper, toasted peanuts, bean sprouts, spinach, etc. Other meats could be duck, beef, chicken breast or thigh

Please try the recipe and see how easy and quick it is, hope you like it as much as we do. Enjoy!!

Monday, February 25, 2019

FRESH CRUNCH SALAD.- A favorite around our house.....

Fresh, Mediterranean inspired flavors in this easy to put together salad that's perfect for the warmer days coming up. It lends itself well to most healthy eating plans but specially due to the major flavor infused into this salad that has made this dish a favorite around our house!

Another thing about the salad is that you can use canned items if you wish without losing out on any of the crunch or flavor! Comes together quick, great for take along lunches or a picnic, gives you some protein and vitamins without it becoming boring.
You'll see, the flavors will win you over!

You'll need:

FRESH CRUNCH SALAD.-

1 lb garbanzo beans, cooked, peeled or can use canned
1 cucumber, chopped small
1 cup broccoli florets, cut bit sized
1 cup grape tomatoes, cut in half
1 cup kale, sliced fine, remove the stems
1/2 cup red onion, chopped fine
2 Tbls Kalamata Olives, no pits and chopped fine
3 Tbls Red Wine Vinegar (try not to substitute since you need this flavor)
1 clove garlic, chopped fine
1 Tbls Flat Lead Parsley, chopped fine
1 Tsp Thyme, fresh, chopped fine

Salt & Pepper to taste only if needed
Extra Virgin Olive Oil only if desired

Prepare all ingredients and then add them to a bowl, toss and refrigerate for an hour before serving.

NOTE: Of course I prefer made from fresh ingredients and fresh herbs but you could get away with canned garbanzos and dried herbs too. No grape tomatoes, try cherry tomatoes or chop Roma Tomatoes into small pieces. Try to get everything around the same size, bite sized, it will make it easier to eat without the need to use a knife, better for the take-along, right?

I mention the addition of salt & pepper only if desired as well of Olive Oil purely as a personal choice. I would make the salad without these items, refrigerate for an hour then taste it and decide if you need those additions, ok?

With regard to being easily used along with other diets, you can tell it would serve a vegetarian, vegan, dairy free, gluten free, high fiber, sugar conscious and wheat free. So you get a healthy salad along with great flavor.

Hope you will try this. We will be sure to have it often during the summer months. Enjoy!

Tuesday, December 25, 2018

Jello.... How about something different?

Gelatin or Jello.- We all grew up with Jello and know all about it, for the most part, but there is a whole other world of using gelatin that will amaze you and no, it's not just your granny's jello salad anymore.... I won't go into where and how gelatin is obtained or you'll stop reading right here but suffice it to say that we'll mention some cool ways to use gelatin......

Apart from the fact that it does contribute to nutritional needs, it's good for your hair and nails due to being rich in collagen, beauty items, etc. there is the regular flavored gelatin and the flavorless gelatin used for more savory or custom uses too. It can help in jelling mousses, marshmallows, make foams, panna cotta, custards, jello shots and more. Hey, I still remember my Nina's Avocado Salad Mold and had a Christmas Salad once in Charleston that was strange but amazing. So gelatin can be both sweet or savory, very flexible.

So refrigerator cheesecake, mousse pie, Dream Cake, all these and more all have gelatin in common.

I received quite a few emails asking for the recipe to the gelatin I posted, so here it is:

CONDENSED MILK GELATIN WITH FRUIT CENTER.- 

2 Condensed Milk cans
1 Evaporated Milk Can
1 Cup Whole Milk
1/2 Cup Water
3 Unflavored Gelatin Envelopes, I used Knox (or 3 Tbls gelatin powder)
1 large gelatin bag, D'Gari Brand, Ref Fruits Flavor (large Jello Box)
3 cups of water, boiling
Fruit, your choice (I used strawberry, raspberry, blueberry, blackberry mix to fit your mold
1 large mold, spray with non-stick spray or wipe lightly with oil
1 small mold, to fit inside larger mold (should leave space all around to allow for other gelatin)

Make sure your molds have some oil or sprayed. Center , smaller mold with be prepared first. Put the 3 cups of water to boil (if you're using other size or brand of gelatin and it uses 4 cups of water, you will use only 3 cups here since we want it to jell somewhat hard and stand by itself).

Put the unflavored gelatin and pour into the 1/2 cup of water and allow it to rest and hydrate. Sprinkle on top, a little at a time, so it will get hydrated.

Measure the water you need for your flavored gelatin into a pan. Heat to hot. Once the water is hot, add the flavored gelatin and insure it's well dissolved. Put about 1/4 inch of this gelatin on the bottom of your small mold and refrigerate so it will gel well. Once it sets, place your fruits inside the mold and fill the mold with the flavored gelatin. Refrigerate until firm.
NOTE: If your fruits are tart, sprinkle with sugar beforehand and mix well before adding to your mold.

While your gelatin is getting firm, we will mix the milk gelatin. In a pan over med-high heat add the whole milk, evaporated milk and condensed milk and get it hot but not boiling mixing all the time, once its hot, take off the heat and you will add your hydrated unflavored gelatin. Mix really well and insure no lumps.

Now take your larger mold and pour about 1/2 inch of milk mixture into the mold, refrigerate until firm. Once this is firm, you will take your smaller mold and turn to remove the fruit from the mold, you can take it into your hand or a very lightly wet plate (so it will slide off gently), run a knife along the edge to get some air into the mold and it should release.

On your now firm milk jello, place the fruit jello in the center of the milk gelatin, leaving equal space all around. You will now fill the larger mold with the milk mixture so it is completely filled. Refrigerate at least 4-6 hours or until set firm.

Once your gelatin is firm, invert onto your serving platter.

NOTE: You can top this gelatin with anything you like when serving, more fruit, whipped cream or anything you'd like.

I made a flavored syrup taking about 1 1/2 cups of the fruit, placed in a small pan with about 1/4 cup sugar and on medium high heat brought it to a boil mixing all the while. Lowered the heat to simmer for about 10-20 minutes so the fruit releases it's juices while pressing and mixing down the fruit.

Choose a jar, a fine sieve and a funnel plus a spoon. Place the funnel in the jar, the sieve over the funnel and the hot fruit in the sieve over the funnel and start adding fruit while pressing down on it to get the most liquid out of the fruit. This will give a syrup which you can use over almost anything you'd like (pie, cake, pancakes, etc)

Hope you enjoy and decide to try your own gelatin creations, they're easy and quite good looking!


Friday, December 21, 2018

BLT + AVOCADO PASTA SALAD WITH TANGY YOGURT DRESSING..... YUM!!

BACON, LETTUCE AND TOMATO + AVOCADO PASTA SALAD .-  Okay, this came out of having to use the ripe avocados I had in the kitchen that were at their peak and there was no way I was going to let them go past that, right? Yesterday I made Tomato, Onion, Relish, Sprouts with Avocado Sandwich and it was incredible, one of my favorites.... but today is another day.

So today I'm getting my ingredients together because the assembly is as quick as can be so once you're ready you're pretty much good to go.... I will serve this with a Tangy Yogurt Dressing so I will make this first:

TANGY YOGURT DRESSING.-

2 Tbls lemon juice, fresh squeezed is best
1 Tbls White Wine Vinegar or Rice Wine Vinegar, whatever you have on hand
1-2 tsp of sugar
1 tsp garlic, finely minced
1/2 cup yogurt, any kind like Greek, whole milk not low fat
1/3 cup Olive Oil, whatever kind you like
1/2 tsp salt
1/4 tsp pepper, fresh ground
1/2 tsp dill, fresh or dry

Combine all ingredients in a bowl or jar and mix well. Make as thick or loose as you like, you can add some milk to thin out or even water, your choice.


BLT + AVOCADO PASTA SALAD.-

1 lb (box) pasta, not long noodles, like bows, rigatoni, farfalle, shells, etc. cooked in salted water
1 lb bacon, cooked until crispy and cut in pieces
1 box cherry tomatoes, cut in half
2 cups lettuce, can be romaine, red, iceberg, arugula
1-3 avocados, cut into small sections
1/4-1/2 cup red onion, thinly sliced
1-2 tsp salt
1 tsp black pepper, fresh ground

Cook the pasta, drain and place in large bowl. Cook the bacon, drain on paper towels, cut and put into bowl. Prepare the vegetables and once done, add to bowl.

These are the basic ingredients for the salad but feel free to add any additional ones that you'd like, i.e: cucumbers, corn, peas, cheese, broccoli, cauliflower, chickpeas, shredded chicken, small pieces of beef, tuna, salmon, whatever you think would go with your salad. Mix and match and create your own signature salad!

Drizzle dressing over the salad and toss to cover ingredients well. Taste for seasoning and adjust as needed. Serve and enjoy!


Thursday, December 6, 2018

MARINATED CAULIFLOWER SALAD.- Cold, flavorful and so so easy....

MARINATED CAULIFLOWER SALAD.-  Although I'm talking about cauliflower I'm sure you can imagine how this can apply to other vegetables, right? Great alternative to your "usual" side side and it's nice for a change....

All you'll need is:

1 large head of Cauliflower, cut into florets
1/4 cup red onion, finely chopped
1/4 cup White Wine Vinegar
1 tsp Dijon Mustard
1/2 cup Extra Virgin Olive Oil
Kosher Salt and Fresh Ground Pepper
2 Tbl Capers, drained
2 Tbl Parsley Leaves, finely chopped

Put enough water in a pot to boil, sufficient to cover the cauliflower. Once it's boiling, add the florets and par-boil for about 2 minutes just to take the hard edge to the florets but not to make them soft. Drain and put in a bowl.

In a small bowl, add the vinegar, onion and mustard. Drizzle a thin stream of olive oil over the vinegar while whisking or mixing to emulsify it well. Add salt and pepper and pour over the still hot or warm cauliflower. This is when it absorbs best. Add capers and parsley. Mix well.

Cover and refrigerate for at least 4-6 hours or overnight is best. You can serve chilled or at room temperature.

NOTE: Broccoli, Green Beans, Potatoes, Fennel, Onions, Cabbage, Tomatoes, etc. are all good substitutes or additions, up to you. You can also pour this over lettuce leaves and use as a salad topping to finish off.  Add garbanzos, sprouts, peas, radishes, beets, bacon


..... you get the idea....

Sunday, August 5, 2018

MEXICAN STYLE PULLED PORK WITH CARROT PICKLES!

MEXICAN STYLE PULLED PORK WITH CARROT PICKLES.-

I've made Pulled Pork before, the regular kind we all know and love, but this time I wanted something a little different that would offer super taste while giving us the BBQ satisfaction that only comes from traditional recipes, so looking in my pantry I realized I could do American BBQ Sauce except with a twist, and boy, was I right!

I always keep a selection of dried chiles: Ancho, Guajillo, Chile de Arbol, Pasilla, so out they came, along with Laurel Leaves, Thyme, Allspice, Black Peppercorns, Kosher Salt, Piloncillo, Garlic Cloves, Mustard, Apple Cider Vinegar, the pork stock from cooking the meat, onion.... This would work!

The work begins: First, whenever you're using dried chiles, they must be split, deveined so they can be toasted in a dry pan before being put into boiling water to soften, this adds to their flavor believe me (same preparation for any mole by the way, very traditional technique), then you roast the onion, garlic and add it to the hot water. You bring to a boil, then lower the heat and leave it simmering for 30 minutes or so or until they get really soft and you are able to blend them. This will be the base to the sauce.

Since I had to wait for the chiles it was a good time to put the meat to cook and it should be ready by the time it was the sauce's turn once more, so I brought out the pressure cooker ("the bomb" I grew to love, I have a write up in my other blog about what happened to another "bomb"), anyway, I put about 6-8 oz water, Laurel Leaves, Allspice, 1/4 onion, 3 garlic cloves, some thyme leaves, threw in 1 Kilo of Pork Butt and then salted and put a generous helping of fresh ground black pepper on top. I closed the pressure cooker, waited for the pressure to build up and the valve to seal before putting on a timer for 45 minutes. I lowered the heat once the valve closed.

Checked on the chiles and they seemed pretty soft, a BIG advantage to using in Mexico vs US is they are fresh and soft and not hard and brittle like in the US plus the flavor is superior too. So I turned off the heat and left them in the hot water resting until I was ready to use them.

When my timer went off, I released the pressure on the cooker to check the meat and found it was ready and would be easy to shred. So took out the meat, placed it in a bowl to cool and put the stock from the pork through a sieve so I could use it clean. It would be a little time before the meat was cool enough to handle so I decided to make the sauce first.

Removed 3/4 of the liquid from the chiles and set it aside just in case I should need some additional water. Took out my immersion blender and still in the pan the chiles were cooked in blended the chiles. There were still some little tiny pieces of skin on the chiles so I placed the sauce in the glass contained that came with the blender and blended it really hard more, until it truly looked smooth.  Placed a sieve on the pan where the chiles were and ran the blended chile mixture through the sieve really well so I would have a smooth sauce. Once I was done it was time to taste the sauce and see what I needed to add and started doing my additions, tasting, adding, tasting until I was satisfied. Pretty good.

Took the now cooled meat and shredded the whole thing, put it into the sauce, put it on the stove over medium high heat and brought it to a boil. It needed to be reduced so I lowered the heat to a steady boil and left it cooking. It reduced for at least 30-45 minutes.

Here are approximate measurements for the Pulled Pork: All this was placed in a Pressure Cooker for 45 minutes.

1 K Boneless Pork Butt, cooked whole
6-8 oz water
1/4 onion, no need to chop
3 garlic cloves, peeled
6 Allspice berries, whole
Salt and Pepper

For the Mexican Pulled Pork Sauce:

2 Chile de Arbol, deseeded
3 Chile Anchos, deseeded
1 Chile Guajillo, deseeded
2 Chile Pasilla, deseeded
3 garlic cloves, peeled
Once soft, all this is blended together in a blender or immersion blender. Run through a sieve and return to the pan to finish the sauce, then you will add:

2-3 Tbl Yellow Mustard
1/3 - 1/2 cup Apple Cider Vinegar
The clean pork stock
Salt and Pepper
1/4 - 1/3 cup Piloncillo or brown sugar or cane sugar

With a whisk, blend all ingredients really well so they incorporate. Taste and decide if you should add more or not. If the flavor is to your liking then shred the pork meat and add to the sauce.

You will notice that the sauce is somewhat thin, I like mine a little thicker so put the pan back on the stove, bring back to a boil, then simmer for about 30 min. Check on the sauce every 5-10 minutes. Once it gets the texture you like, you're done!

CARROT PICKLES.- I needed a topping for the Pulled Pork and came up with this

4 large carrots, peeled
3 green onions, white and green separated, sliced
1-2 Tbl Cilantro leaves, chopped
6-8 oz water
6-8 oz white vinegar
1/2 - 1 cup sugar (any kind and to your liking)
salt and pepper

In a food processor or box grater, grate the carrots. In a sauce pan, put the water, vinegar, sugar and salt and pepper and bring it up to a boil while you grate the carrots. Once grated, add to the vinegar and lower the heat to a simmer. Add the white portion of the onions. Keep the green parts and cilantro separate until the end.

Cook the carrots for about 15-30 minutes and then taste them, they should have softened up a little but still have a little crunch. This will be a salad like topping for the Pulled Pork so should be easy to eat. Once done, drain the liquid (or you can leave the carrots in the liquid and store like regular pickles) just drain what you will be adding to the pork. Add the reserved onion and cilantro. Mix.

We use this in tacos, tortas or sandwiches and everyone loves them, hope you will too! Enjoy!