Showing posts with label Chinese. Show all posts

Tuesday, January 16, 2024

Mongolian Beef / Carne Estilo Mongol: Un favorito de muchos y muy rica!!


Mongolian Beef / Carne Estilo Mongol - Un platillo muy popular y muy sabroso, bastante saludable, con mucho sabor y mientras tiene varios pasos son faciles y es rapido.

Para preparar este platillo, se necesitaran:

INGREDIENTES:

MARINADA PARA LA CARNE:

1 K Carne de Res- "flank steak" (tiene muchos nombres), falda, bistek de lomo, etc. (yo use Arrechera)- cortado contra el grano y en piezas de 5-6 cm y 6mm de gruedo
2 tsp Aceite Neutro
2 tsp Shaoxing Wine (yo use Vino Blanco Seco)
1 tsp Salsa de Soya
1 Tblsp Almidon de Maiz "Maizena"        
1 Tblsp Agua
1/4 tsp Bicarbonato de Sodio

PARA LA SALSA:
1/4 taza de Azucar Morena Clara
3/4 taza Agua Caliente (se puede usar caldo de pollo o carne)
1/4 taza Salsa de Soya
1 tsp Salsa de Soya Oscura (si no hay, usa la que tengas) opcional- 1 taza de soya

PARA CUBRIR Y SELLAR LA CARNE:
1/2 taza Almidon de Maiz "Maizena"
2/3 taza Aceite Neutro

PARA EL RESTO DEL PLATILLO:
1 tsp Jenjibre (Picado finamente o rallado en un Microplano o Rallador)
6-8 Chiles Secos (de tu preferencia, Arbol, Serrano, Jalapeño) yo use Arbol- Opcional
3 dientes de Ajo grandes, finamente picados o en prensa
4-6 Cebollas de Cambray (blanco y verde separados en piezas de 5 cm)
1 1/2 tsp Almidon de Maiz "Maizena" (en 2 Tblsp de Agua fria, mezclado)

PREPARACION:

1-    Combinar la carne ya cortada con los ingredientes de la marianada en un recipiente. Marinar por 1 hora. La carne se vera jugoza, si se ve seca, añadir poquita agua.
2-    En una cuenca pequeña, mezcla la salsa. Disuelve el azucar en el agua caliente o caldo. Añadir los azucares y mezclar bien. Reservar.
3-    Poner la maizena en una charola y pasar la carne para cubrirla completamente, por ambos lados y reservar. Sacudir el exceso.
4-    Calentar 2/3 taza de aceite en un Wok o sarten pesado sobre flama alta. Justo antes que empiece a humear el aceite, poner la carne, sin empalmar y aunque se tengan que hacer varias tandas, en el sarten para sellarla como 1 minuto por lado. La carne se vera doradita en ambos lados. Una vez toda dorada, se pone en un plato y se apaga la estufa.
5-    Se quita el aceite del sarten, dejando solo 1 Tblsp de aceite para continuar. El resto del aceite se reserva para otros usos.
6-    De nuevo se enciende la estufa a temperatura media-alta. Se añade el Jenjibre, Chiles y se sofrien por unos 15 segundos, luego se añade el ajo y la parte blanca de las cebollas. Se sofrien por otros 15 segundos adicionales y se le agrega la salsa preparada.
7-    Se deja que la salsa hierva por 2 minutos mientras que se añade la maizena con el agua preparada, muy bien mezclada, poco a poco, removiendo muy bien para evitar grumos. La salsa se hara espesa dentro de muy poco tiempo y cuando tenga buen y cubra una cuchara muy bien.
8-    Se agrega la carne junto con las partes verdes de las cebollas que se habian separado y se mezcla todo muy bien por otro minuto o dos. Con la salsa espesa que cubre la carne muy bien no debe haber liquido suelto, si aun hay liquido hay que seguir calentando y mezclando para que termine de espesar.
9-    Ahora se sirve la carne sobre Arroz Blanco. A disfrutar!

Se puede preparar este platillo agregando mas verduras, como cebolla blanca en gajos, brocoli, morron rojo o verde, apio, zanahoria, etc. Lo que prefieras pero siempre tomando en consideracion el tipo de verdura si se necesite pre-cocinar para suavizarlas. Tambien se pueden servir sobre Ramen o pasta si asi se prefiere o simplemente como platillo acompañado con ensalada o verduras. 

Como cualquier platillo, hay mucha flexibilidad para que sea exactamente del gusto de tu familia!

Monday, February 27, 2023

Hong Kong Soy Sauce Chicken.- This is the Michellin Star Restaurant's Recipe from Singapore!!

HONG KONG SOY SAUCE CHICKEN.-  This is the recipe from the Michellin Star Restaurant in Singapur hailed all over for the wonderful flavor! The recipe and photos are from the original stand in Singapore!...

This is actually an easy preparation, just takes a while, but you will be rewarded with very juicy and flavorful Chicken. This preparation makes the skin shiny and dark brown while the meat absorbs the flavors!

The ingredients you will need: (In Mexico, Mercado LIbre, gets all supplies): Also in Chinese, Japanese & Corean Markets:

This recipe is for a small chicken, no larger than 1 K. This is due to the size of pots they had. If you have a larger pot you can use a larger chicken, adjust ingredients for this larger size.

1 Chicken, Whole

1 cup Dark Soy Sauce

1/2 cup Light Soy Sauce

1 Tbsp Sesame Oil

1 Tbsp Chinese Cooking Wine - Shaoshing or other

1 Tbps Black Vinegar

4 cups Water

Vegetable Cooking Oil, as needed

8 Tbsp Brown Sugar

5-6 Star Anise

10-12 Cloves

2 Cinnamon Sticks

1/2 - 1 tsp White Pepper or to taste

8 -10 Garlic Cloves

3 pieces Ginger, about 2" each

Spring Onions

Parsley


1.- Heat up the wok. Saute the garlic, ginger, star anise, cloves and cinnamon in a little hot oil over low hear until their aroma is released.

2.-  Add the dark soy sauce, light soy sauce, black vinegar, cooking wine, sesame oil and water to the work. Bring to a boil.


3.-  Add the brown sugar. Add a dash of white pepper for taste. 

4.-  Bring the mixture to a boil. Taste it, you can add soy or brown sugar until you get the desired savouriness and sweetness is achieved.

5.-  When the taste is correct, transfer the mixture from the wok to a stock pot. Once more, bring it to a boil over high heat. 

NOTE: If you don't have a wok, use a stock pot from the beginning and proceed as shown.

6.-  Gently lay the chicken into the boiling liquid, with the breast facing down.

7.-  Keep it at high heat to bring it back to a boil. Should be bubbling and churning inside the pot.

8.-  Turn the chicken over with breast facing up. The cavity should be completely full of the liquid and the leg join at the hip should be under liquid as well. Top up with boiling water if necessary to keep the bird fully submerged.

9.-  When the pot is bubbling steadily, turn off the heat and place a well fitting lid on the pot.

10.-  Now leave the chicken to poach in the hot liquid for about 40-45 minutes. If you're using a larger bird, give it some extra time. You can use an Instant Read Thermometer to insure the correct temperature.

11.-  After 30-40 minutes, check the temperature. If it's done, remove the chicken. If not, then keep it in the hot soy liquid for a while longer. Check temperature again.

12.-  Once done place the chicken on a cutting board and cover with foil to rest about 10 minutes and allow it to cool a little so you can cut it up.

NOTE:  The liquid stock can be reused. You can freeze for a later use too. Just needs some additional water and once you taste it you will be able to tell if more spices and sauces should be added. 

This is the actual stall at the Singapur Hawker Market.... An amazing place!


Hong-Kong-Soya-Sauce-Chicken-Recipe

Hong-Kong-Soya-Sauce-Chicken-Recipe

Tuesday, August 16, 2022

Chinese Pork and Ginger Stir-Fry - Easy, healthy and Oh so Flavorful!!!


Chinese Pork and Ginger Stir-Fry.-   Stir-fry dishes are very quick and retain the freshness of the ingredients so the result is a flavor plus dish, they're also very fast to make so they're good for weekday meals. 

Now I have and have had a wok at home for a long time because I find it amazing to cook with and not just for Asian foods, but if you don't have one it doesn't mean you can't prepare these recipes, just use a large fry pan, the thinnest one you have so it will heat quickly or if you have a cast iron pan you can use it as well since they retain heat so well. 

The trick to any stir-fry, and for me ANY dish I'm preparing is to get organized first, called "mise en place", where you get your ingredients together, prepare them so they're ready to cook, this way the actual preparation of the stir-fry only takes minutes!

To prepare this recipe you will need:

1 lb or 500 g  Pork meat, as free of fat and sinew as possible, thinly sliced

2 tbsp            Light soy sauce

2 tbsp            oyster sauce

2 tsp              dark soy sauce (if you don't have any, use regular soy sauce)

2 tbsp            Chinese Shaoxing Wine (if you don't have it use white wine)

1 tsp              Chinese Five Spice (I include my homemade version or buy it)

1 tbsp            sugar

2 tbsp            vegetable oil

3                    garlic cloves, roughly chopped

1                    piece ginger (1.5 in) peeled, sliced into fine matchsticks

6                    spring onions (scallions) sliced in 2 in slices (batons) keep the pale green and                          dark parts separate

1/2 tbsp         sesame oil

                      MARINADE:                                    


1 tsp              ginger, finely grated

1 tbsp            light soy sauce

1/2 tsp           pepper, fresh ground

2 tsp              cornstarch (corn flour)

1/2 tsp            baking soda

                       PREPARATION:

1-        Place the pork in a large bowl. Add the marinade ingredients and use your hands to mix thoroughly. Set aside to marinate while you prepare the rest of your ingredients for the 

stir-fry.

2-        Make the stir-fry sauce by mixing together the light soy sauce, oyster sauce, 

Chinese Shaoxing wine, dark soy sauce, Chinese five spice and sugar.

3-        Heat the oil in a wok or large frying pan over medium heat. Add the garlic, 

ginger and the bottom parts of the spring onion stems and stir-fry for 30 seconds. 

Add the pork and spread the pieces out in the pan. Turn the heat to high. Allow to 

cook for a few seconds then stir-fry until almost cooked. Add the stir-fry sauce and 

stir-fry for another 30 seconds or until the sauce thickens slightly and the pork is cooked 

through. Turn the heat off and toss through the green parts of the spring onion and the 

sesame oil.

NOTE-    You can serve this over rice, noodles or your choice.

I hope you will try this recipe so you too can see how great it is, it's become a regular 

rotation on our family menus!

Tuesday, July 12, 2022

Sweet & Sour Pork (Chicken, Shrimp).- Not red and not the same old dish....


 Sweet & Sour Pork (Chicken, Shrimp) .- An old favorite in those Chinese Restaurants you see in the movies with a dish of Sweet & Sour Pork, with it's characteristic neon red sauce. This is not that one, instead a rich combination of spices and veggies that come together for a fantastic meal.

This is a simple recipe to prepare and can also be prepared in advance and in parts to be brought together at dinnertime. On this occasion I used Pork Leg, boneless but you can use whatever you have like riblets, fatty meat, cut into bit size chunks. You can use chicken, cut up, pre-cooked chicken wings, shrimp (just be sure to put in at the end so it doesn't overcook)

To prepare Sweet & Sour Pork you'll need:

500-600g Pork meat, cut into bite sized cubes

1 Tbsp Soy Sauce

1 Garlic Clove, finely grated

1/2 tsp Ground Black Pepper

1/3 cup flour

2 tsp vegetable oil (you'll need more for frying)

1 onion, diced

1/2 Red Bell Pepper, diced

1/2 Green or Yellow Bell Pepper, diced

100g fresh Pineapple, diced

4 Spring Onions, trimmed, cut in batons

Rice to serve

Sweet & sour sauce:    


½ cup brown sugar

3 tbsp white vinegar

2 tbsp tomato ketchup

1 tbsp light soy sauce

1/3 cup pineapple juice

¼ tsp Chinese five spice

2 tsp corn flour (cornstarch) mixed with 2 tbsp water

STEPS TO PREPARE.-

1.-    Put meat in a bowl. Add Soy Sauce, garlic and pepper and mix well. Let rest for 30 minutes while you prepare the other parts.

2.-    Make the Sweet & Sour Sauce: In a saucepan, put the brown sugar, vinegar, ketchup, soy sauce, pineapple juice and Chinese Five Spice over Medium heat. Simmer for about 5 minutes so the sugar is well dissolved. Place the cornstarch/water in a glass and mix. Once the sauce starts bubbling, add the cornstarch slurry and stir 2 minutes more and it will thicken. Remove from the heat until ready to use.

3.-    Cooking the pork.- Fill a wok with about 2 inches of oil, you can use any heavy pan, bring it up to temperature 180 C. While oil is heating up, toss the pork with the flour so it's well coated and begin to cook, in batches so you don't overcrowd the pan. 3-4 minutes or until golden brown. Put on grate or paper towel.

4.-    In a clean wok or frying pan over high heat, add the oil and stir-fry the onion for a minute or two. Add the Peppers and continue to stir-fry. Now add the pineapple, make sure it's touching the surface of the pan so it will get charred bits. Mix everything well. Now is time to add the Sweet & Sour Sauce and again, mix well. Serve.

I hope you will try this recipe, you'll see how easy it is to prepare and the wonderful flavor that will please you're whole family.

NOTE: Just like you can change the type of protein to use, you can use many other types of vegetables in the mix as well. For hard vegetables simply par cook them first i.e.: carrots


Saturday, July 10, 2021

Chinese Style Braised Pork Riblets.- Such a lovely, easy dish!

 Chinese Sticky Red Pork Riblets.- I ordered BBQ Ribs but I received little riblets so I needed to adjust my plans and came up with this little concoction from pantry items, really easy and it came out excellent!

To make this you'll need:

1 Kg Pork Riblets or small Pork Ribs

2 tblsp oil

2 tblsp brown sugar (If you don't have any use regular sugar)

2 tblsp Soy Sauce

2 tblsp Woscestershire Sauce (I wanted dark soy sauce but haven't been able to find it)

3 tblsp White Vinegar

2 tblsp White Wine (again, I didn't have any Chinese Wine)

1/4 cup water

2-3 slices fresh Ginger, peel and slice fine

2 Green Onions (scallions) white and light green part only, sliced fine(save the green parts)

3 Garlic Cloves, peeled and bruised, so not cut but pressed down with the knife

2-3 Green Onions, green part only, sliced as a topping when serving

1 tblsp Sesame Seeds, as a topping when serving

TO BEGIN.-

1-    Rinse the riblets under water and place in a pot, cover with cold water and bring to a simmer over high heat, to bring out impurities in the meat, simmer for about 3-4 minutes while you skim the water of the foam, then drain the water and ribs. Transfer the ribs to a bowl, cover with water to rinse. Drain ribs again.

2-    Put the oil in a pot and add the oil over medium-high heat and now add the sugar. Mix and don't allow to burn. Once it begins to get a golden brown color you add the ribs so the caramel will adhere to the ribs and the sugar is a thick sauce.

3-    Now add the rest of the ingredients shown up through the garlic. Mix to combine well, put the lid on the pot over medium-low heat and simmer gently. You are braising the meat so you let it cook about 25 minutes and stir a couple of times during that time.

4-    Take the lid off the pot and raise the heat to medium and allow the ribs to bubble for another 10-15 minutes and when the sauce sticks to the ribs and you see some oil on the bottom of the pan. Check the ribs to insure they are tender, once done place the ribs on a serving dish, top with the scallions green tops and sesame seeds. Serve warm. Enjoy!!

As you can see this is an easy recipe and even when you substitute ingredients, the results are really great!! I made some Cole Slaw and White Rice to serve along side and can guarantee our dinner will be lovely!

NOTE: I am always trying to improve the recipes and this other time (today) I pre-cooked the riblets in my pressure cooker for about 20-25 minutes to insure they were tender. Take them out of the pot and set aside while you go to Step 2 and begin the process. This makes it a very easy and fast process but feel free to cook it as you prefer.


Thursday, April 4, 2019

SWEET & SOUR CHICKEN: A classic that's worth re-visiting....

SWEET & SOUR CHICKEN: A classic of Chinese Restaurants from our youth, brings back good memories of the Mi Kin Low Cafe in Tijuana, Mexico. Did you know Mexico is known for good Chinese Food? Yup, it's a fact, but we have all nationalities very well represented too!

Been on an Asian kick for some reason, might be the fact that for all the great food here in Merida, Yucatan (we have some absolutely divine Sushi places here) but THERE IS NO GREAT CHINESE FOOD! The best is supposed to be PF Chang's (yes, really). Now I'm not knocking PF Chang's, it's good but it's not Chinese. it's an American chain restaurant, and while American chains are much better here than in the US due to their using less processed foods and do actual cooking, that results are fresher and just better quality. Good for us, but I still refuse to eat McDonald's ugh.

Anyhoo, asked Rene and he suggested something like this and it took me on memory lane and while the recipe is a little bit involved, it's not hard to make at all and the results are worth it. Much better than take-out too and cheaper, since I had all the ingredients, why not.

I had two large double breasts, bone-in that I used for this. What I usually buy since I can easily de-bone them and will have the carcass to use when making stocks. Works for me. The breasts were so large that I split them in half  lengthwise and then cut then into strips and then into cubes about 1 inch in size. Since it was twice as much as called for, I doubled everything, ok?

You will need:

8 oz boneless, skinless chicken breast, in cubes
1 Tbls white wine or Chinese Shaoxing wine

For the strir-fry:
2 cloves garlic, finely chopped
1/2 Green Bell Pepper, cut in cubes
1/2 Red Bell Pepper, cut in cubes
1 tomato, small, cut in wedges
1 scallion stalk, cut in fine pieces
1 celery stalk, cut in small portions
1-2 cups Pineapple, in chunks

Oil for frying

For the batter:
4 Tbls all-purpose flour
4 Tbls corn starch
1/2 cup water
1/2 tsp baking powder

For the glaze:
3 Tbls catsup
2 Tbls Chinese chili sauce  or your choice
1 tsp Hoisin Sauce (Plum Sauce)
1/2 tsp Worcestershire Sauce
1 tsp Rice Vinegar
1 tsp Oyster Sauce
1 Tbls sugar
3 Tbls water with 1/2 tsp corn starch, mixed well

White Pepper as needed or desired

Cut your chicken into cubes and marinate with the wine for about 10 minutes.

Mix the batter in a bowl and put the chicken in the batter and mix well.

Prepare the sauce and have it ready. Have the water and corn starch mixed and ready to be added.

Heat up the oil to fry the chicken once hot. Don't over crowd the pan and place the golden chicken on towels or a tray to drain. Do this until all chicken is fried. If you have a wok, great, if not use a deep pan.

Set the pan aside or if you're going to be using the same pan to stir fry the dish then remove the oil (let it cool some) to another jar / bowl after filtering it to be re-used. Take 3-4 Tbls of the oil and put it in the pan you will stir fry the chicken in and bring it to temperature over high heat.

Add the garlic and stir it for a couple of minutes and the add the bell peppers and continue sauteing them until they become fragrant, just a minute or two. Add the rest of the veggies / fruit. Add the corn starch to the sauce and mix well and then add the sauce to the pan and mix well, you will see the sauce start to thicken almost right away, lower the heat to medium and then add the chicken and mix well so the glaze covers the chicken really well. Continue to mix it well for another 3-4 minutes. You can serve. Enjoy!

This recipe can be adapted to Pork, Shrimp or just and all veggie stir-fry. You can add more chili sauce to make it spicier or you can add more fruit if you like. Hope you enjoy it!


Wednesday, April 3, 2019

NEW! AN EASIER, FASTER RECIPE FOR "SPICY SZECHUAN NOODLES WITH PEANUT SAUCE"

This is the easiest, fastest, most foolproof way to get Szechuan Noodles with Peanut Sauce! Yahoo!!

You might have noticed that I have several versions of Szechuan Noodles, I love them that much, but over the years I've streamlined the recipe to make it easier and foolproof so it's done in no time flat but the result is just as delicious....

If you keep a wide array of Asian ingredients then this is an every day dish, but even if you have a limited pantry the ingredients are very basic and you will be able to use them for many other Asian Dishes as well.

You will need:

1 cup Peanut Butter (I use creamy but you can use chunky or make your own)
1/4 cup Soy Sauce (I use low salt version because I like it better than the heavier dark type)
1/4 cup Sesame Oil
3 Tbls Rice Vinegar
2 Tbls Garlic, finely chopped
2 Tbls Ginger Root, finely grated
1 1/2 tsp Asian Hot Sauce or Crushed Rep Pepper Flakes (I use Sriracha)
1 Tbls Hoisin Sauce (Plum Sauce)
2 Tbls Lime Juice, fresh (I use Persian Lemons because I love them)
3/4 cup Water
Salt as desired

1/2 cup Scallions, thinly sliced
Salted Peanuts, chopped (if desired)

1 Lb Noodles (you can use pasta, rice noodles, Udon Noodles or your choice)

Put the first group of ingredients in a blender (I use the glass of my immersion blender and it works perfectly) and mix until smooth. Taste it and make sure you like it or go ahead and add more peanut butter or hot sauce or lemon so it's perfect. Set Aside.

Boil water and once boiling put the pasta in the water until al dente. Drain the water and place noodles in a bowl. Add any extras (like the second and third group) or some of these extras:

Grated carrot, grated zucchini, beets, Sweet Red Bell Pepper, Green Bell Pepper, Spinach, Cilantro Leaves, or your favorite vegetables or greens. Good additions are also Cooked Pork Meat Strips, Rotisserie Chicken Strips, Cooked Shrimp, Shredded Crab meat or your desired adds.

You can see how flexible this recipe can be, it can go from Vegan to full blown protein rich, it's up to you to create your favorite version or you can do what I've done in the past and use it like a good old refrigerator cleaning dish and use up leftovers. Still great! You can have these cold, room temp or hot too.

NOTE: If you're not going to use it right away you can put it in a tightly sealed container and keep it in the fridge for up to a week, or if you want to keep for a quick dinner option some night then you can put it into a freezer bag or freezer container and keep it for a longer period.

Hope you try this easy recipe and create your own masterpiece! Enjoy!!

Monday, March 25, 2019

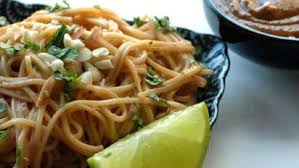
SPICY SZECHUAN PEANUT NOODLES.- A family favorite you need to try!

SPICY SZECHUAN PEANUT NOODLES.- I've been making this for a long time, in many versions like Vegan, Vegetarian, Non-Dairy, No Red Meat, Quick Weekday Meals, etc. and have loved them all!

This is a dish to make quickly and yields maximum flavor. It doesn't matter if you leave out the protein either since it more than makes up in flavor and you won't miss it, plus you can make it spicy or not (I like it hot) and is sooo satisfying! I even used to offer it as a Entree in my Catering Division and was always a BIG hit with everyone! Also, if you make the sauce / dressing in advance you can keep it in a jar in the fridge and this meal can be ready as soon as the pasta is done, nothing could be quicker and easier.

For this amazing recipe you will need:

1 Tbls Szechuan Peppercorns (or you can use other type, your choice)
1/2 lb ground pork or chicken (optional)
3 Tbls Soy Sauce
Salt to taste (might not need it, taste first)
Oil, to fry the pork or chicken only
3 Tbls garlic, chopped
2 Tbls ginger, chopped and peeled
5 Tbls scallions, cut in small pieces
1/3 cup Peanut Butter, Smooth (but you can use the chunky style too, your choice)
2-3 Tbls Sesame Paste (Tahini, if you like)
2 Tbls Chili Oil
1 cup chicken stock, if needed
12 oz Chinese Egg Noodles, fresh or dry (can be spaghetti or similar)
Salted Peanuts, chopped

If you're using the peppercorns then heat a wok or heavy skillet over medium heat, add the peppercorns and ir them until they begin to smoke and then remove them. You will grind them and set them aside.

If you're using meat then put enough oil into the fry pan or work for frying and bring the oil to temperature. While this happens combine the meat with 1 Tbls Soy Sauce and add some salt. Once the oil is hot, add the meat and break it up, cook stirring until it's crispy, then remove from the oil, set aside on a paper towel.

If you cooked the meat then remove all but 2-3 Tbls of the oil from the pan. If not, then add the oil. Start heating the water for the noodles. Bring the pan back to temperature and then add the garlic, ginger and scallions and stir for about 30 seconds, then add the sesame paste or peanut butter (salt if you want), chili oil and chicken stock. Simmer for about 4 -5 minutes then add the meat back into the pan and stir.

Cook the noodles to al dente as always. Drain from the water and place in a large bowl. Pour sauce over the noodles and add the meat (if using) and toss to cover the noodles well. Sprinkle with the grounded up peppercorns and serve. You can sprinkle the chopped peanuts on top as well.

NOTE: I usually make more sauce than this recipe calls for so I can store it in the fridge and have it on hand when the mood strikes for a quick meal....  for me this is a 5 minute thing since all the ingredients are part of my everyday pantry but I can understand if the ingredients are unfamiliar with you, try them and use them in other Chinese or Szechuan Dishes you can find o


n the internet so you not only learn to use them but as you become more familiar with them you'll incorporate them into other dishes you make, it's really great!

You can ad many vegetables as well like Bok Choy, carrots, zucchini, red and green bell pepper, toasted peanuts, bean sprouts, spinach, etc. Other meats could be duck, beef, chicken breast or thigh

Please try the recipe and see how easy and quick it is, hope you like it as much as we do. Enjoy!!

Sunday, August 26, 2018

HUMMUS PASTA, great for leftovers.....

HUMMUS PASTA, a good idea for leftovers or just because it's great! This is quality "fast food".....

The other day I made some smooth, creamy Hummus to have with crisps, toast, veggies but we had quite a bit left over. I don't know about your house but in ours once something is placed in a container and put in the fridge... it disappears from people's memories most of the time. So I made a point to remember I had this, looked around and decided Hummus Pasta was called for.

This could not be easier and it is an amazing way to use up any and all leftovers you have. (My other no-fail clean-out the refrigerator technique is Curry) You can use any type of pasta or noodles, even Ramen, ok?  Canned veggies, frozen ones, leftover veggies from a dinner this week, small pieces of protein from To-Go containers or roast chicken left over, taco meat, shrimp or just go Vegan and add all kinds of veggies (all types of salad fixins are great here, I love it with lettuce, sprouts), green beans, spinach, red bell pepper, olives, goat cheese, chickpeas, red onion, sun dried tomatoes, etc.

Once you put the pasta in a pan to cook, you can get the rest of your ingredients ready. Are they already cooked, fine. Do they need cooking? Get on it then. If they're ready to go then get a large pan ready, add some olive oil and begin adding your ingredients by hardest texture first, keep stirring, keeping an eye on the pasta, season until you're ready to complete the finishing touches.

When your pasta is 1-2 minutes from al-dente, add to the pan with the veggies and stir. Add your hummus and 1-2 tbl of the pasta water to loosen the hummus so it will cover the pasta. Stir and insure the consistency is how you like it. Add some lemon juice to brighten the flavors and taste to insure the seasonings are correct. You can always add more pasta water if needed or some olive oil.

Once you like it, you're done. Serve. Enjoy!

Thursday, May 31, 2018

PINEAPPLE FRIED RICE.- This time made with Brown Rice....

PINEAPPLE FRIED RICE.- 

Fried rice has always been a favorite for everyone, one of the reasons we always kept that extra box of the dry white rice Chinese Restaurants always used to send along with every order of delivery Chinese Food. In order to make Fried Rice you need rice that's been kept in the refrigerator overnight so it loses some of the moisture and allows it to get fried, but if you think about it it's a great way to finish up old rice or leftover rice.

This time I made the fried rice using Brown Rice, not just for a change in flavor but for a more nutritious side dish too. Allow yourself a little extra time since Brown Rice being a whole grain takes a little longer to cook. I found a great recipe on Saveur (a great resource, check it out) for all things www.saveur.com that will give you a perfect pot of Brown Rice every time with very little effort and pretty foolproof too.


INGREDIENTS.-   For PERFECT BROWN RICE EVERY TIME...
1 Cup of Brown Rice, can be short or long, doesn't matter
1 cup rice = 2 cups cooked rice
1 1/2 cup rice = 3 cups cooked rice
2 cups rice = 4 cups cooked rice
*If making more than 1 cup dry rice, use a bit more water
Salt to taste

Rinse the rice first in a strainer really well a couple of times. In a large pot bring 8-10 cups of water to a boil, be sure the pot has a tight fitting lid. Put on the stove over high heat. Once the water is boiling add the rice and continue to boil, uncovered for 30 minutes. Pour the rice into a strainer over the sink and let it drain about 10 seconds.

Return the rice to the pot, insure the heat is off. Cover the pot and leave it resting to allow the rice to steam for 10 minutes. After that time, uncover the rice, fluff with a fork and season with salt to taste.

INGREDIENTS.-  For PINEAPPLE RICE....
3-5 Tbl Soy Sauce
1 Tbl Sesame Oil
1/2 tsp Ginger Powder
1/4 tsp White Pepper
2-3 Tbl oil, your choice
2-4 cloves garlic, minced
1 small onion, chopped
2 carrots, peeled and chopped into small squares
1/2 cupcorn, can be fresh, canned or frozen
1/2 cup peas, can be fresh, canned or frozen
3 cups cooked Brown Rice
2 cups pineapple, cut in small pieces, can be fresh, canned or frozen
1/2 cup ham, bacon or your choice of meat, chopped in small pieces
2-3 green onions, sliced

In a small bowl whisk together the soy sauce, ginger, sesame oil and white pepper. Hold

Heat the oil in a large skillet or wok on the stove over medium high heat. Add the onion to the skillet and cook, then add the garlic, stir often and do not allow to burn. Once the onions are shiny after about 3-4 minutes, add the carrots and cook for about 10 minutes until they start to get tender (this is only if you're using fresh carrots since they are a hard vegetable), however, if you're using canned or frozen add the carrots, corn and peas together and cook, stirring about 3-4 minutes.

Add the rice while stirring it in, then add the meat you've chosen along with the soy sauce mixture. Finally add the green onions and mix. Allow everything to come together and get heated through. About 2-4 minutes. Serve.

NOTE: You can change the vegetables to whatever you'd like or have on hand, use leftovers too. Same goes for the meat, you can use almost anything or leave it vegetarian, your choice.

Don't forget that you can use this base recipe for leftover white rice too. Once you start experimenting with this recipe you'll see how flexible, easy and fast it is and you'll create your own family's version. I hope you will try it. Enjoy!


Thursday, May 17, 2018

PEKING DUCK - MAKING PEKING DUCK AT HOME

MAKING PEKING DUCK AT HOME.-

If you're like me you've had Peking Duck at your favorite Chinese Restaurant and was amazed by the show, the flavor and the duck. Did you ever wonder if you could try making it at home? I did and as a result I've made it several times, although this last adventure was under totally different weather conditions.... You might think: "what does the weather have to do with it?" or "this is not baking, so why the weather comment?".... And you'd be right, in baking, since it's a science, the weather affects the formulas and so must be taken into consideration, but cooking is an art and as such different rules apply.

One of my first attempts to make this duck was in Tijuana, Baja California- I had a much larger installation, a separate room to do my machinations in (ok, the laundry room area where I could hang the duck to dry as long as I wanted to and it was a closed place so no attacks from insects or kitty), over the years my kitchen has changed from really fancy to modest to darn near small and incredible anything gets done and now to small and the weather question. I'm also living in an Airbnb which leaves me handicapped as to the equipment I have to work with (which is why it's a valuable project to undertake, I have none of my professional cooking tools) plus I'm living in Merida, Yucatan which is humidity PLUS area of the country, in short the tropics so getting the duck to dry has been a challenge to say the least! But onward we go....

Also, there are several ways to go about this too, the classic method which requires 3-4 days of "painting / dipping" the duck and then hanging up to not only dry but mature, over and over, ergo the special place to work, etc. but this time while perusing the Serious Eats site that I find useful tips on, check them out, you'll love them www.seriouseats.com with recipes, equipment ratings, how-to's and shortcuts.
So anyway, I found the regular long recipe but then he thought the same thing as I did (great minds think alike, lol) and experimented with a shortcut version to Peking Duck which is the one I am trying today- shorter time, quick and dirty.... so we'll see how this one turns out under humid weather.

Right off the bat I realized the duck could not be hung to dry, I've got a laundry room I could use but there's some Chiles de Arbol drying there for a week and no drying at all due to the humidity so it wouldn't work for the duck. I had to leave it in the fridge for 3 days to even dry a little... so pay attention to the humidity in your area. Go by the way the skin on the duck is drying, it has to get dry like leather.

ONE MORE THING:  Under no circumstances THROW AWAY THE CARCASS / BONES of the duck. Try to leave some meat on the bones if you can since this will tenderize more and fall off the bone giving the soup the benefit of the meat or simply save the duck back for the soup, it's definitely worth it. I will show you how to use it, as DUCK NOODLE SOUP, so cover it up and refrigerate it or freeze.

 Some observations from this latest attempt: Next time I will leave the duck for a much longer period in the fridge, needs more drying to get the skin totally crispy and while mine was super yummy it was more a roast duck with the flavor of Peking Duck which is totally not a bad thing just not the result I was aiming for, so again, pay attention to the humidity in your area and adjust accordingly. Everything else was wonderful. Costco has always carried the Canadian ducks in their stores, even here I'm happy to report and for the $294 MX (about $15US) they cost for the whole duck and two meals it's a bargain of quality meat.

Here's the recipe:

1 Duck, about 4 lbs. (Got mine at the local Costco, same brand as in the USA)
1/2 cup honey or maltose
2 tsp soy sauce
2 Tbl Kosher salt
2 tsp baking powder
1 16oz can of beer, soda or ?

Pancakes:
2 cups all purpose flour
2/3 cup boiling water
1/4 cup sesame oil

Plum Sauce:
1/4 - 1/2 cup sugar
1/4 cup white vinegar
4 regular plums, cut in half and seed taken out
1 Tbl fresh ginger, grated
1 Tbl Chinese Chili Garlic Sauce

Serving:
1-2 bunches of scallions or green onions, cut off the dark green parts
1 cucumber, cut in half, take out the seeds

To Serve:

  • 6 scallions, white and light green parts only, finely sliced lengthwise
  • 1 small cucumber, seeded and cut into 4-inch long matchsticks


To begin:

Rinse the duck off. Dry it completely with paper towels. Put in baking pan on a rack and little by little, either using your fingers (like I did) or the handle of a wooden spoon, slip between the skin and the meat and begin separating the skin from the meat. Be careful not to make holes in the skin, start from the bottom cavity opening of the breast and inch your way up. You can also start on the top, go halfway and then meet your way from the bottom, whichever is easier for you. Try to slip your hand toward the thigh / leg area too. Take your time, sometimes if the duck is fresh or has not been dead a long time, there is a film between them and it can be pretty tight, just keep at it.

Combine the honey and soy sauce with 1 Tbl of water and warm up in a microwave for about 20 seconds and then mix well. Spoon, rub or paint all the surface of the duck, all the skin. In a small bowl combine the salt and baking powder and mix well. Sprinkle over all the surface of the duck.This will help with the drying and crisping of the skin.

Put the duck in the fridge, don't cover, at least 12 hours or as long as needed until the skin is like leather and dry. This is what you want. Once the duck is dry, take out the second rack out of your oven and place the one rack left at the lowest position to leave you room for the duck. 

Preheat the oven to 350F. Put 4 quarts of water to boil on the stove, make sure it's a rolling boil. Put the duck in the sink over a rack so it can drain and once the water is really boiling, pour half of the water over the duck, really well and all over, then turn it over and do the same on the other side. You'll see the skin contract / shrink as the hot water hits it. This is what you want. Let the duck dry for 5 minutes.

Now get a baking dish or something with an edge on it to catch juices and or fat from the duck as it cooks, get your can of beer / soda or whatever and drink it up since you don't need the contents because it doesn't really add any flavor and now fill up the can all the way with water. Place the can in the middle of your baking pan and gingerly sit the duck down over the can so it sits squarely in your pan. Move the legs and / or break the tail to insure it will remain standing up since this will allow cooking all over. Now place it carefully in the oven and roast it for 30 minutes, rotate and cook another 30 minutes more, so 1 hour total. Then reduce the heat to 250F and roast for another 30 minutes or until the fat stops dripping from the cavity. If it's still dripping fat, leave it for an additional 30 minutes more. The duck should have a wonderful dark brown color. If you think it's getting too dark, tent some foil over the top and around the wing tips to prevent it from burning.

At this point, carefully remove the duck from the can and put it on a cutting board. Allow it to rest without cutting it for at least 10 minutes before you attempt to cut it up.

Take the scallions, cut in about 4 inch pieces and slice then very fine. Cut the cucumber in long, thin slices too. These will be inside the pancakes so use an appropriate size for a duck taco, ok?

MAKING THE PANCAKES.- Combine flour and boiling water and stir with a wooden spoon until you get them to come together. Put on a counter top with flour on it and knead until the dough is smooth and elastic, for about 5 minutes. Cut the dough into about 24 pieces and cover with a damp towel.
Flour the surface and roll out the dough one piece at a time into a small circle, keep going and brush the first circle with the sesame oil before you put the second one on top and so forth. Or make larger balls to make larger pancakes, your choice. But the thinner the pancake, the better. 

Get a heavy cast iron pan or griddle over medium-high heat and get it hot. Cook pancakes for about 1 minute and they have light brown spots. Flip and cook about 30 seconds more. Place in a clean towel and be sure you can peel them apart. Cover well with a towel to keep warm.

You can also buy flour tortillas at the store if you'd prefer or if you think this would be too much, it's cool, no judgments at all, I know I can go a little over at times.

MAKE THE PLUM SAUCE.-  You can use Hoisin sauce too which you can get at most markets now. But if you've got fresh plums, put the sugar with 1 Tbl water in a heave pot over high heat and get the sugar to become a nice amber color, be careful and don't burn, it will take 3-4 minutes. Add all the vinegar right away which will make the sugar bubble, keep cooking for about 1 minute more and add plums, soy sauce, ginger, chili garlic sauce and reduce the heat to med-low and keep cooking while you smash the plums and they break down, about 10 minutes. Blend the sauce well in blender or with an immersion blender until smooth. Place in a bowl to serve.

Now you can carve the duck, careful of the skin. Spread some plum sauce over a pancake, top with cucumber and scallion and then duck meat with some skin on top. Enjoy!

I hope you won't be put off by the long process, it's really not hard just takes a while but I definitely recommend making this for yourself if you love duck. I don't have a Chinatown nearby, like in Vegas where I would just go to the International Market and pick up a duck, no such luck here :-( .....