Showing posts with label Italian Food. Show all posts

Tuesday, April 18, 2023

Dirty Martini Pasta - The flavors of the drink in a creamy sauce...


Dirty Martini Pasta -   This might sound strange but if you like the flavor of the drink, the brininess of olives, butter and garlic... you should love this!

This dish is about as simple as it comes, very few ingredients and it's one of the sauces that I call "while the pasta cooks", so you know it's quick cooking....

To make this dish, you'll need:

Your choice of pasta
1-2 Tbsp Olive Oil
1-3 Garlic Cloves, minced or pressed
5-8 Green Olives (Castelvetrano), smashed and chopped + brine
Lemon Zest, plus additional for topping
2 Tbsp Vodka or Gin
1-2 Tbsp Olive Brine
1-2 Tbsp Butter
Salt & Pepper to taste
Fresh Parsley, lightly chopped for topping
Blue Cheese crumbles, for topping (optional)
SAVE YOUR PASTA WATER

PREPARATION -

1-    First of all, put your pasta water to boil. Have your pasta ready to cook once the water boils. You can start finishing the dish once the pasta is done so you can transfer it directly from the pot to your pan. Be sure you've prepped all your ingredients since this comes together quickly.

2-    While you're water is boiling, take a good sized pan over medium heat. Add the garlic, for about a minute, followed by the olives and lemon zest. Saute it together until the garlic and lemon zest begin to get golden brown and the pan has lost some of its moisture, about 2 minutes.

3-    Deglaze the pan with the liquor, To do this you pour the liquor into the pan and you scrape the bottom of the pan to remove all the dark bits that remain on the bottom of the pan, this will add flavor to the dish plus will cause the alcohol to burn off and leave the flavor.

4-    To finish the sauce, now add the olive brine and 1 tbsp of butter. Now stir continuously so that the butter will emulsify the sauce (thicken and make it silky)

5-    If your pasta isn't ready yet, you can remove the pan from the heat so it doesn't continue cooking. If your pasta is ready then you can add your pasta directly from the pot into the sauce, mix continualy so it becomes well coated. Stir in a little more olive brine, taste to insure its to your taste. 

6-    If your sauce is too thin, add pasta water, a couple of tablespoons at a time, and stir well and you can repeat as needed to give you more sauce, it will also thicken it and give it a silky finish.

7-    To serve, sprinkle with more lemon zest, blue cheese crumbles and parsley. Enjoy!


Sunday, April 9, 2023

Tiramisu, an Icebox Cake.- A simplified recipe for this favorite of desserts!


 Tiramisu.-  It brings memories of travels to Tuscany and savoring all types of incredible food. I have a classic recipe for this much loved dish, but it's always a good idea to have another recipe that is more trimmed down and made easier for everyone. It's still great tasting but a couple of steps have been changed to make it a simpler procedure that anyone can make plus you don't need a heavy-duty mixer since it can be easily made with just a hand mixer or if you're good with a whisk, you can make it too.

The only step that I would suggest to not skip is the time needed in the fridge before serving. This time in the cold is very important and cannot be skipped, you'll be glad you did.

If you've never made this type of cake, don't be afraid to try this, just follow the steps in order and you'll be happy with the results, ok?

To make this refrigerator cake, you will need:

Loaf Pan (like for meatloaf or banana bread) 4.5 X 8.5 inches

Hand Mixer

Ingredients:

3/4 cup strong brewed coffee - 6 oz/170g (I used espresso) - room temperature
1/4 cup Kahlua - 2.5oz/65g (If I don't have I use Brandy or similar)
4 small egg yolks or 3 large - 1.6oz/45g - room temperature
1/4-1/3 cup sugar - 1.8oz/50oz
2 tsp instant coffee granules (I used an espresso capsule)
1 tsp vanilla
1/4 tsp Morton Kosher Salt
1 cup Mascarpone Cheese - 8.5oz/240g
1 1/2 cup Whipping Cream - 12.7oz/360g - use 1/2 for filling, save 1 cup
Galletas "Dedos de Dama"/"Soleras"/Lady Fingers/Savioardi - 7oz/200g
Unsweetened Cocoa Powder, for finishing

Procedure:

1-    Prepare your pan by putting a little water all around and covering it with plastic wrap
        to make it easy to remove later. One sheet one way and another across, make sure to 
        leave an overhang to cover it really well.

2-    Have your ingredients ready to use, measured out, it will be easier.

3-    Prepare soaking liquid: In a shallow pan since you will be soaking your cookies later.
        Place your coffee into the shallow dish along with the Kahlua, Set aside for later

4-    In a medium sized bowl, add the egg yolks and the sugar. In a small saucepan, add the
        sugar, instant coffee, salt, vanilla extract and 1/4 cup water. Place the pan on the stove
        so the sugar will melt and incorporate the rest of the ingredients, bring to a boil (1 or 2
        minutes), as soon as it's boiling you will use this hot liquid to "cook" the egg yolks in your
        bowl by streaming it, a little at a time in a thin stream, slowly, over the eggs, start                     slowly whipping the eggs and then stream the liquid, once it begins to incorporate, raise
        the speed and keep whipping. This is an abreviated "Zabaglioni" kind of. It will get lighter
        and airy, like mousse. The bowl will also cool. Set aside.

        In a larger bowl (you will incorporate the filling into this whipped cream mix. Add the 
        Mascarpone and 1/2 cup of the Whipping Cream, beat first at low speed to integrate
        both of them, then raise the speed to get "stiff peaks". Now you will combine the fluffy
        egg mixture you did before into the whipped cream and again, start low and increase
        the speed so you get "stiff peaks" again. Set aside.

5-    Now you can begin construction!... Now take your plastic covered loaf pan and measure
        your cookies for size, make sure they fit crosswise. If you need to cut them, go ahead, 
        you might not need to cut too much since pans are wider on top. Now put about 1/2 cup, 
        a thin layer of filling on the bottom, nice and even. Now start placing cookies onto the                 filling to cover the entire bottom, soaking them in the soaking liquid you made before,                turning them around but don't leave them, they will dissolve, quickly and then onto the             filling. Once you've covered it, you'll add another layer of filling, even it out and complete
        another layer of cookies. You should be able to have 3 layers of each, the filling and the 
        cookies ending with filling.

6-    Now you'll need to take the plastic overhang you left so you could cover it well and 
        fold each side over the cake gently, so it's really well covered. Make sure you even
        out the top once it's covered. Refrigerate at least 12 hours, I just do overnight.

7-    Next day, it's ready!... Take the last cup of whipping cream (you can sweeten if you like
        and add some vanilla) and whip to "stiff peaks". To remove the cake, unfold the plastic
        covering the top of the cake so you have something to hold on to. Now try to unmold
        the cake by insuring you can remove it. Place a serving platter or plate turned over so 
        you can put the cake on it. Turn it over so cake sits on the plate, Carefully remove all
        the plastic and smooth our the cake. Cover with the whipped cream, being generous
        all over and create a nice texture! You are done!!

8-    Keep the cake in the fridge until ready to serve!... Enjoy!!


Wednesday, May 18, 2022

Pink Sauce and/or Vodka Sauce.- You'll never believe the flavor you get from so few ingredients!!


Pink Sauce and/or Vodka Sauce.-   Just by leaving the Vodka out of the recipe you'll get Pink Sauce and they're both amazingly tasty. Incredible that so few ingredients can give you the flavor you'll find! Super easy, quick and everyone will love it!

I've served this sauce as it appears in the recipe or added my own variations: Basil Leaves or melting cheese or chicken or salmon or shrimp or peas or crushed red pepper flakes.... You can adapt to your own family's preferences.

To prepare this sauce you will need:

1 medium onion, finely chopped (I've used shallots or left them out completely)

4 garlic cloves, finely chopped (you can add more if you like)

2 Tbls Olive Oil plus more for finishing topping

4 oz Parmesan Cheese (I've varied this type of cheese to melting cheese)

1 can 4oz Tomato Paste or tube of paste

1/2 tsp or pinch of crushed Red Pepper Flakes


1-2 oz Vodka (you can omit if you like)

1/2 cup heavy Whipping Cream

1 lb Pasta (can be Spaghetti, Rigatoni, any type you like)

Basil Leaves for serving

Directions.-

1.    Put a large pot with water on high heat. Put a generous amount of salt into the pot and           bring to a boil while you prepare the rest of the ingredients.

2.    Peel and chop the onion. Peel and chop the garlic cloves.

3.    If your cheese is not grated, grate the cheese.

4.    In a heavy pot over medium heat, add the olive oil to the pot to heat. It's easier to place            this pot next to the boiling water one to make it easy later. Once the oil is hot add the                onion and garlic, stir constantly until the onion turns golden, about 4-5 minutes.

5.    Now put the tomato paste into the pot and stir to cover the onion and garlic well,                        continually stir for about 5 minutes. You'll see the bottom of the pot slightly brown from the        tomato paste.

6.    Add the vodka, if using, otherwise you can deglaze the pot with water or stock. Scrape the        bottom of the pot, scraping the bottom. Reduce the heat to low.

7.    In a heatproof measuring cup add the 3/4 cup of cream and then add 1/4 cup of the                  boiling water in the pasta pot. Stir to combine. Add the heavy cream mixture to the pot              with the sauce and mix well to combine until a smooth sauce forms. Turn off  the heat.

8.    Add the pasta to the pot with the boiling water. Cook the pasta until al dente. With a                  heatproof measuring cup take about 1 cup of the boiling water and reserve. Once the               pasta is ready, turn the heat under the sauce to low.

9.    With a wire spider, transfer the pasta into the sauce. It doesn't matter if some of the water        comes along with the pasta. Combine.

10.  Now pour the reserved water onto the pasta and the half the parmesan cheese. Mix so           the cheese melts and the sauce becomes smooth and coats the pasta really well. You              can add a teaspoon or so of more water so you have a thinner sauce if you like. Add salt        to the sauce.

11.   Serve the pasta, top with some of the leftover cheese and Basil leaves, drizzle with a little         Olive Oil for finishing. Enjoy!

I hope you will try this recipe so you can see how easy it is to prepare and how much your family enjoys it. 


Wednesday, December 1, 2021

Italian Sausage.- A classic that can be used in so many ways and always good!


Italian Sausage.- A true classic, we love it and I make it at home anytime I'm making Lasagna, Meatballs, Pizza and when I get some casings it gets made into sausage!! You can make Patties for breakfast or as a side dish, crumble it and add it to casseroles like Baked Ziti or? you name it it's always great!

It's a very easy preparations, few ingredients and should take you about 15 minutes to make, here is what you need to get it done:

1 K Ground Pork, not lean you need the fat

3 tsp crushed red pepper flakes

2 - 3 tsp kosher salt

3 - 4 cloves of garlic, peeled and pressed, grated or mashed

1 1/2 Tbl Fennel Seed, whole, medium ground

1 - 2 Tbl White Wine

Feel free to add, increase or decrease any of the quantities shown here, we like a full flavored sausage meat so I tend to go a little hard with the spices, but there is a very simple way to check so you are sure of the flavor in your sausage, it's called a "test piece". So add all your ingredients together and mix really well, get a small frypan with a little oil over med heat and once it's hot, make a tiny little flat pattie of your sausage mix, cook it well, allow it to cool a little and see if you like it. This way you can be sure you will love it.

This mixture can be frozen but make sure you freeze in the most practical way you can. I will be using some of it on a Pan Pizza but also love it in my Italian Sauce which I use in Lasagna, or I crumble it to use in Baked Ziti or other pasta dishes, you can make meatballs, or add to stuffing or how about making some shish kebobs, or how about some sausage and gravy, if you get some natural casings you can stuff them and have sausage the old fashioned way, it's very versatile.  So I put it in a smaller glass bowl, I'll use it tomorrow and whatever is left I'll decide how to freeze it (if we don't eat it all up that is).... 

I have other sausage recipes on this blog so you can go ahead and search for "sausage" and see which one you like best, this recipe is the most basic and the simplest of all and can be done in no time....

I hope you will try this simple but very satisfying recipe. Enjoy!

Tuesday, October 26, 2021

Pollo A la Toscana: Facil y con mucho sabor, les encantara!


Pollo A la Toscana:  Adictivo con mucho sabor, flexible con muchos ingredientes, cena rapida que sera un favorito para todos!

No quieres Pollo? Puede ser de cualquier proteina como Puerco, Pescado... Es fabuloso con Salmon, pero usen lo que les guste. Tambien se puede hacer solo la salsa para usarla sobre pasta, arroz, verduras o proteina....

Para preparar este platillo se necesita:

1 Pechuga de Pollo doble, deshuesada, cortada a lo largo para dar 4 escalopas.

1 cucharada de sal

1 cucharada de pimienta recien molida

1 1/2 cucharadas de Paprika

1 1/2 cucharadas de cebolla en polvo

3 cucharadas soperas de aceite de oliva

Para la Salsa:

6 - 8 dientes de ajo, finamente picados

2 Morrones Rojos, rostizados, pelados y cortados en tiras

1 cucharada de Mostaza Dijon (o mas)

1 1/2 taza de crema para batir (se puede usar leche evaporada si se quiere)

3 tazas de espinaca, hojas solamente

1/2 taza de Queso Parmesano preferiblemente recien rayado

2 cucharadas soperas de perejil picado fresco para servir

Preparacion.-

1-    Poner sal y pimienta al pollo junto con la paprika y la cebolla en polvo

2-    Poner unas 2 cucharadas de aceite en la cacerola sobre flama mediana-alta. Una vez caliente se añade el pollo para sellarlo por unos 5-7 minutos por lado o hasta que se pone dorado. No amontonar al pollo, si se tiene que hacer en partes es mejor. Poner el pollo en un plato y reservar.

3-    Poner la otra cucharada de aceite en la cacerola para lijeramente sancochar el ajo (30 segundos a 1 minuto), luego añadir el morron y sancochar como 1 - 2 minutos mas para que se junten los sabores. Agregar la mostaza Dijon y mezclar.

4-   Baja la flama a mediana-baja, agrega la crema (o leche) y esperar a que tenga un hervor muy suave, mientras se mezcla de vez en cuando. Agregar sal y pimienta a su gusto.

5-    Ahora agregue las espinacas las cuales se relajaran en la salsa, luego se añade el queso parmesano. Dejar que la salsa hierva suavemente por un minuto mas hasta que el queso se derrita en la salsa.

6-     Se regresa el pollo al sarten para recalentar. Al servir se le pone salsa y el perejil picado.

NOTAS:

a.    Se puede agregar 1/2 taza de vino blanco despues de añadir el ajo al sarten, se permite que se reduzca por mitad y se procede.

b.    Se pueden poner hierbas adicionales segun el gusto, como Oregano, Albahaca, etc.


Espero traten esta receta tan facil y rapida, estoy segura que les encantara. Provecho!

Tuesday, September 28, 2021

Penne A La Vodka.- A rich flavorful sauce that's worth the effort!!


What can I say about Penne with Vodka Sauce? That it's creamy, flavorful and delicious? You bet! Yes, it takes a while but it cooks in the oven so you don't need to be at the stove all the time and baking in the oven develops the flavors incredibly!!

Who doesn't need a great recipe for pasta? It's always great to have in your repertoire and will impress the pasta lovers in your family because it's wonderful...

To make this dish you will need:


1/4 cup Olive Oil

1 Onion, chopped

3 - 5 Garlic Cloves, diced

1/2 tsp Red Pepper Flakes

1 1/2 tsp Oregano, dried

1 cup Vodka

2 28oz Cans of Whole Plum Tomatoes, peeled

Kosher Salt and Fresh Ground Pepper

Penne Pasta

4 Tbls Oregano, fresh

3/4 to 1 Cup Heavy Cream

Parmesan Cheese, freshly grated

PROCEDURE:

1-  Preheat oven to 375 F

2-  Over medium heat, use an oven proof pan, add some olive oil and then the onion and garlic and saute for about 5 minutes until transparent. Add the red pepper flakes and dried oregano and cook for another minute more. Add the Vodka and continue to cook until the Mixture is reduced by half.

3-  In the meantime, drain the tomatoes through a colander and add the to the pot while you break them up with your hands. Add 2 tsp of salt and some black pepper. Cover the pan with a tight fitting lid and place in the oven for about 1 1/2 hours. After, remove the pan from the oven and allow to cool for 15 minutes.

4-  Meanwhile, bring a pot of salted water to a boil and cook the pasta. When the pasta is done, set aside 1 cup of the pasta water in case it's needed, and drain the pasta and reserve.

5-  Now, in batches, put the tomato mixture in the blender or use an immersion blender to make the sauce very smooth. Return to the pan.

6-  Now reheat the sauce to a simmer, add 2 Tbls of the fresh Oregano and enough heavy cream to make the sauce creamy, add salt and pepper to taste and simmer for 10 minutes on low heat.

7-  Now add the pasta to the sauce and cook for 2 - 3 minutes more, mix in well. Stir in 1/2 cup of Parmesan Cheese and blend.

8-  To serve, put an additional bit of Parmesan Cheese and some of the fresh Oregano as a  on each serving. Enjoy!!

NOTE: You could also add protein to this dish if you like, could be Chicken / Beef / Salmon, etc.

Friday, August 6, 2021

Short Rib Ragu.- One of those dishes that everyone loves!!!

Sort Rib Ragu.- It's a wonderfully comforting dish with amazing beef flavor, but can also be made with other types of meat, just choose meat that gets extra tender with long, slow cooking and can be shredded. Afterwards it can be served over Polenta or Pasta, maybe even Mashed Potatoes or whatever you like best. It could also be served in sandwiches... Make a good sized batch since it can be frozen in portions for up to 3 months and have it available at any time!

2 Lbs Short Ribs or Boneless Shortribs or Chuck Roast (this time I used Shank)

1 Tbl Olive oil

1 onion, chopped                            

2-3 garlic cloves, minced

1 Tbl Tomato Paste

3 Anchovy Fillets, rinsed and dried

1/2 tsp 5 Spice Powder- If you don't have it this is a combination of Cinnamon, Fennel Seed,                                             Star Anise and Clove, so a little bit of each

1/2 cup Red Wine

1 14 1/2 oz can of Chopped Tomatoes or the equivalent of fresh

1 1/2 cup Beef Broth

Preheat your oven to 350 F. Use a heavy oven-safe pot with a lid for this dish.

Put the olive oil into the pan over medium heat until it's hot, add the onion and stir until it gets golden, you add the garlic cloves and cook for a minute, then you add the Tomato Paste and Anchovies and the 5 Spice Powder. You need to mix all these ingredients together so the spices will "bloom" and get fragrant for about 3 minutes, don't allow to burn.

You'll notice that you've created a great "fond" at the bottom of your pot, now you will "deglaze" the "fond" with the Red Wine which means the wine will clean the bottom of the pot and allow all that flavor that was created there to be part of your sauce. You need to let this reduce for about 3-4 minutes which will reduce almost by half.

Add the tomatoes to the pot along with the Beef Broth, let this simmer while you get the meat ready.

Salt and pepper the meat generously on both sides and place the meat into the pot and cover.

Place your pot into the preheated oven for 1 hour in the middle rack of the oven. After the hour you will take the cover off the pot and cook for another 1 1/4 hour, or a total of 2 hours and 15 minutes.

Once you remove the pot from the oven, remove the meat from the pot and place on a plate to rest and cool a little. Skim the fat from the sauce in the pan.

After about 5 minutes or so you can begin to shred the meat using two forks until it's all done. At this point you will return the meat into the pot and mix everything really well.

There are so many ways to serve this, you can serve over Polenta, or Pasta, or Mashed Potatoes or in Sandwiches or come up with your favorite way.


Wednesday, June 23, 2021

SPECIAL SALADS THAT ARE UNIQUE, HEALTHY, FLAVORFUL AND WONDERFUL!!

Special Salads for Summer....


I've been trying to change our regular dishes, you know the ones that seems to appear all the time on your menu rotation (I don't have a problem with this since we love them but don't want to fall into a rut) so I've been looking around, getting inspiration from all around and I think I found some amazing examples of what I had in mind.
Summer is definitely here and I am assuming that we all get fantastic fruit and veg at this time, so with this in mind I used it as a primary ingredient, salads that can be a quick lunch, salad course or a main dish to give us flexibility and flavor plus!
I'm sure you'll find these recipes appealing, easy to make and maybe make them a part of your family's rotation....

PANZANELLA SALAD.- This Tuscan specialty is an all around favorite yet for some reason I forget about it but it's worth bringing back....

INGREDIENTS:

3 large Vine Tomatoes, very ripe, cut in cubes. Cut stems off

Handful Basil Leaves, hand shredded

½ Handful Oregano leaves, fresh

3 Garlic cloves, finely chopped

1 Artisan Bread, stale or hard, cut in cubes

1-2 Cucumbers, peeled and cut into cubes

1-2 Carrots, cut in small cubes

1 Red Onion, sliced in fine slices

2-3 Celery stalks, cut in small cubes

Extra Virgin Olive Oil

Red Wine Vinegar

Salt and Pepper to taste


  1. In a large bowl put tomatoes, Basil, Oregano and Garlic, 2 Tbl olive oil and Red Wine Vinegar. mix well. Taste it to adjust dressing and add salt and pepper so you like it. Allow to rest for at least 15 minutes.

  2. Place the bread cubes on a sheet pan, drizzle the tomato juices over them, toss and put in an 350 F Oven for about 10 minutes or until golden brown. Allow to cool.

  3. Put cucumbers, carrots, red onion and celery in a bowl, add olive oil, vinegar, salt and pepper to taste and once you like it, add the tomatoes and mix everything well.

  4. Top with more Basil Leaves. Serve.


Enjoy!


NOTE: You can add as few or many veggies that you like, whatever is in season, bitesize.


                                    ------------------------------------------------------

TOMATO GRATIN SALAD.-  Is it a casserole, side dish, or main dish? You decide!

INGREDIENTES:

¼ taza Aceite de Olivo Extra Virgen

6 oz Baguette de buena calidad, cortado en cubos medianos o 4 tazas de pan

3 lbs Tomate Bola maduro, cortado en cubos de 1 pulgada

2 Tbls Aceite de Olivo Extra Virgen

3-4 dientes de Ajo, cortado en rebanadas finas

2 tsp Azucar


1 tsp Sal

1 tsp Pimienta

¾ taza Queso Parmesano rallado

2 Tbls Albahaca cortada en listones finos (chiffonade)


NOTA: La manera mas facil es usar un sarten que se pueda usar en el horno, para no ensuciar mas trastes que se tengan que limpiar, pero si no se tiene sarten con mango metalico se puede usar una caserola para horno, cuando se hayan integrado el pan a los tomates y antes de poner el resto del pan y queso y terminar el platillo en el segundo recipiente.


  1. Se pone el aceite en un sarten sobre fuego medio-bajo para dorar los cubos de pan hasta que estan doraditos, como 4-5 minutos. NOTA: Es importante que el baguette sea de buena calidad porque sino el pan absorbera demasiado aceite y se desmorona. El pan debe quedar crocante.

  2. Se pone el pan dorado en un recipiente mientras que el sarten a fuego bajo se le añaden las 2 cucharadas de aceite (se usa el mismo sarten, no hay necesidad de lavarlo) hasta que caliente y se ponen las laminitas de Ajo, solo por 30 a 60 segundos cuando apenas empiezan a tomar color.

  3. Ahora es tiempo para los tomates, junto con 2 cucharaditas de azucar, la sal y las pimienta. El fuego ahora se sube a mediano durante 8-10 minutos o hasta que los tomates hayan soltado bastante jugo y casi queden cubiertos por el jugo. Se apaga el fuego.

  4. Es tiempo de añadir el pan (se aparta una taza de pan) para que absorba los jugos del tomate, presionando un poco para que se integre y al final se pone la ultima taza de pan sobre los tomates para que dore y se pone el queso rallado sobre todo.

  5. En un horno a 350 F por 30-40 minutos. A los 30 minutos se revisa la caserola y usando una espatula de silicona, se separa ligeramente los tomates de la orilla para liberar los jugos restantes y no se pegue. No se revuelve. Se regresa al horno por otros 10-15 minutos.

  6. Es importante dejar reposar el platillo como 10-15 minutos y mientras se prepara el albahaca que se pondra sobre todo antes de servir.


BUEN PROVECHO!


                                                    ----------------------------------------

EGYPTIAN BARLEY SALAD WITH POMEGRANATE, FETA AND FRESH HERBS.-  This salad is a true showstopper! Very flexible and easily goes from side dish or main dish plus it's so beautiful it's perfect for company!.....

INGREDIENTS:


4 Qts Water

1 tsp Salt

1 ½ Cups Pearl Barley

3 Tbl Extra Virgin Olive Oil

2 Tbl Pomegranate Molasses

½ tsp Cinnamon, ground

¼ tsp Cumin, ground

¼ cup Pistachios, chopped and toasted

1/3 cup Golden Raisins

1 Pomegranate, take out the seeds and have them ready. Separate 1/4-1/2 cup

½ cup Cilantro, chopped

3 oz Feta cheese in small cubes

6 Scallions, only the green parts, sliced fine

1-2 tsp Extra Virgin Olive Oil, as topping


  1. Water is put on the stove to boil along with the salt. Add the Barley to cook, it can take from 30 to 50 minutes, until its tender. Drain and place on a sheet tray, spread out, to cool while you get the rest of the ingredients.

  2. In a large bowl, add the Olive Oil, Pomegranate Molasses, Cinnamon and Cumin and whisk it all together.

  3. Add the now cooled Barley and mix in well.

  4. Add the pistachios and cumin and mix well.

  5. Add pomegranate, cilantro and mix.

  6. You can add the Feta. Scallions and mix in or save it for service time, your choice.

  7. Top with a couple of tablespoons of Extra Virgin Olive Oil to finish.


ENJOY!


How about these jewels? I'm really looking forward to going to the Municipal Market so I can stock up on the ingredients needed for these dishes, I know we'll enjoy them!!

Monday, July 20, 2020

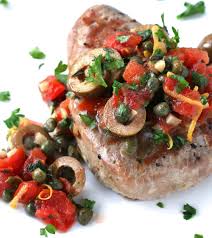
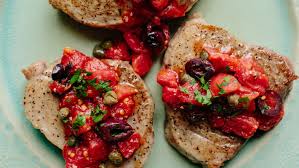
MASTERING THE BASICS.- Tuna Steaks Sicilian Style

MASTERING THE BASICS-  Tuna Steaks Sicilian Style:   Here is an easy and quick dish that can be a weekday entree or served to guests. High in nutrition and low in carbohydrates it can also become a part of your healthy offerings for your family too. Big on taste and nutrition, what more could you ask for?

Of course this preparation can also be made with other proteins since the sauce lends itself to this, you can also add tomato sauce and wine to make it into a "Puttanesca" type of sauce, add to pasta or rice and obtain a different dish, and due to the high flavor of this sauce you can pair it with beef, pork, chicken or other types of fish, so very flexible too.

You will need the following ingredients:

2 Ahi Tuna Steaks
4 - 6 Tablespoons Olive Oil
Salt and Pepper to taste
1/2 cup Onion, chopped
2 - 4 Garlic Cloves, peeled and finely chopped
3 Tablespoons Capers, drained (you can also add their vinegar if you like it like I do)
3 Tablespoons Olives, can be black or green, pitted and sliced
1/4 cup Raisins (optional)
1 - 1 1/2 cup Plum Tomato (Saladet) chopped in small cubes (you can use Cherry Tomatoes)
2 Tablespoons Flat Leaf Parsley, chopped
6 Basil Leaves, chopped
1/4 - 1/3 cup Pine Nuts (optional), toasted
1 Can of Tomato PASTE or if using a tube, about 1/2 can or 2-3 Tablespoons of Paste
1 Lb of  String Pasta, Spaghetti or Angel Hair or your choice- 1/2 the package, cooked and reserve at least 1-2 cups of the pasta water

PREPARATION:

1.-  In a medium pan, using medium high heat, add the olive oil to the pan and allow it to get hot, while you wait for this salt and pepper the fish on both sides.  Once the pan is hot add the fish and cook for about 3-4 minutes on each side. Once done, remove the fish to a plate, cover to keep warm. Do not clean the pan.

NOTE: If you are turning this dish into a pasta dish and want more of a tomato sauce, at this point you can add 1-2 Tablespoons of olive oil if the pan has gotten a little dry, add the tomato paste in order to fry it for a little while and remove the raw tomato taste. Once this is done you can continue the same order as in #2 and once you've been sauteed them for a while, you will add more liquid to make it a true sauce for pasta.

2.-  Using the same pan but lowering the heat to low, add the onions and stir until the become tender and lightly golden which only takes a couple of minutes, then add the garlic, capers, olives, raisins if using and the tomato and continue to stir for at least 3-4 minutes. The tomatoes should release their juice to make the sauce more liquid, if they don't you can add some stock, either fish or chicken, or use the caper or olive vinegar if you like it, you can also add white wine so its saucy. Taste the sauce to insure the seasoning is correct. Add 1/2 of the Parsley and Basil.

3.- Once the sauce is incorporated, if you're using pasta- Add the pasta at this time, you might need to add some of the pasta water to give it the texture that you need or not. Once you like the texture, add the pasta to the sauce, mix well. Top with the remaining Parsley and Basil once its on the plate.

If using wit fish or other protein, return the fish to the pan to warm up and once it's heated you can proceed to serve and top with the remaining herbs. Enoy!

Wednesday, March 18, 2020

PASTA LIMONE.- A refreshing take on pasta......

PASTA LIMONE.-  A very easy and fast preparation you can make any day of the week since it comes together in a flash using very few ingredients, plus I'm sure it will become a family favorite.

The ingredients you will need are:

2 Lemons, must be YELLOW LEMONS
12 oz or 340 g Spaghetti or other long Pasta
Kosher Salt, to taste
3/4 cup Heavy Cream
6 - 8 Tablespoons Butter - I use salted but unsalted is fine, your choice
3/4 cup Parmesan Cheese, finely grated
Fresh ground Black Pepper, to taste

TO PREPARE:

Using a vegetable peeler or sharp small knife cut a 2 - 3 inch piece of lemon rind (yellow rind only) and then slice them into very fine strips, reserve.  Grate the zest from the two lemons and put it in a pot where you will make the sauce. Cut the lemons in half and juice them so you have about 2 - 4 tablespoons of lemon juice and place in a small bowl, depending on how tart you like it, start low and increase juice until it gives the taste wanted.

Place a large pot on the stove with water, add salt and bring to a rapid boil, add the pasta and cook until almost al-dente (it will finish cooking in the sauce).

While the pasta cooks, add the cream to the pot where you put the lemon zest and cook over medium heat until it just begins to simmer, about 2 minutes.  Reduce heat to low and begin adding the butter, one tablespoon at a time, whisking all the time and don't add more butter until the first one is completely incorporated, this will emulsify the sauce. Remove from the heat.

Just before the pasta is al-dente add about 1/2 cup of the pasta water and return the heat to medium. Using tons begin to transfer the pasta to the sauce, along with some of the liquid and cook the sauce while tossing the pasta and adding some cheese a little bit at a time so it doesn't clump up and sauce is creamy, about  minutes or so.  If the sauce looks too thick, add 1 - 2 tablespoons of the pasta water and add some of the lemon juice, make sure everything is mixed well and is creamy.

Taste the sauce and add salt if needed.  Add black pepper too. Once the seasonings are adjusted, you can serve in bowls topped with more cheese, pepper if desired and some of the think lemon rinds,

I am sure you will enjoy this dish!

Wednesday, January 15, 2020

Bracciole, Braciola or Involtini..... How ever you want to call it....

Why the different names for this dish? It depends on where you are.... Sicily or in an Italian American family or the rest of Italy, it's all good. While it's a little involved to make, your family and friends will appreciate it.
.
This dish can be made with Beef, Veal, Pork, Chicken, Turkey or even fish. The filling ingredients can be your choice, what your family prefers, it's very versatile and works well made in advance and for a large gathering since everything can be made in advance and just reheated when it's needed

BRACCIOLE.- Step by step procedure:

Ingredients:

2 lbs Flank or Round Steak, butterflied or pounded thin to about 1/8" thickness. You can do it yourself or ask your butcher to do it for you.
1/2 Onion, diced small
3-5 Garlic Cloves, chopped fine
Pinch of Red Pepper Flakes
Olive Oil
1 can Tomato Paste or from tube of paste
1/2-1 Cup Wine, can be White or Red, your choice
1 Tblsp Oregano, finely chopped
1 Tblsp Basil leaves, finely chopped

8-10 Roma or Plum Tomatoes, very ripe
1/2 Small Onion, sliced
3 Garlic Cloves

Small bunch of Parsley Leaves
1-2 Tblsp Sugar
Salt and pepper

Spinach Leaves, enough to cover the meat
Pecorino, Grana Padano, Parmessan or your choice of cheese, plus Provolone, Fontinella, enough to cover the meat
Breadcrumbs, enough to cover the meat (optional)
Handful of Parsley leaves, chopped fine, enough to cover the meat
Optional: You can add Pine Nuts, Raisins, Hard Boiled  Eggs, Brocolini or anything you'd like to add

Directions:

In a sauce pan, put the Roma Tomatoes, the half onion and the 3 Garlic cloves and cover with water. Bring to a gentle boil and watch to see the skin of the tomatoes begin to wrinkle. Turn off heat and transfer everything, minus the water, to the blender, add salt. pepper and mix very well.

In a large pot, put some olive oil and bring to temperature, once hot add the diced onion for about 2-5 minutes until tender, add the chopped garlic cloves, the red pepper flakes, oregano, basil and cook for another 2-3 minutes. Now add the can of tomato paste and mix it in well with the other ingredients, keep stirring for about 4-5 min to cook out the raw tomato taste. Now add the wine and mix in well for 2-3 minutes.  Now is the time to add the tomato sauce in the blender to the ingredients in the pot and blend well. Add salt, pepper and sugar. Sauce should be coming to a boil, reduce the heat to low and taste it. Don't over salt since it will cook for another while and you'll have the chance to adjust the seasonings later. Cook for about 5 minutes and turn off the heat for now.

The meat, once flattened and thinned should be salt and peppered. Garlic can be rubber all over the meat, which are laid flat on the work area, or you can sprinkle chopped garlic all over. Add the Prosciutto. Put a generous amount of the grated cheese you've chosen over the meat to cover. Add the bread crumbs over this, then add the eggs if using, then the Parsley and finish off with the melting cheese. Now drizzle a good amount of olive oil over the meat and toppings before rolling.

The meat is rolled lengthwise, with the grain since you will be cutting against the grain once cooked.
Carefully roll the meat tight and once done you can either tie it closed with kitchen twine or use toothpicks, make sure it's well secured.
Bring the Marinara Sauce that you've reserved back to heat over med-low heat while you work on the meat.
In a large pan, put olive oil and bring the pan to temperature. Place the meat in the pan to sear until it's golden brown on all sides. Now you can deglaze the pan with a little wine or you can put the meat into the pot with the Marinara sauce, if the sauce is bubbling, lower the heat, partly cover the pan and let the meat simmer in the sauce and throw some torn Basil Leaves on the sauce.
The meat will cook until the meat is tender 30 - 45 minutes, when you insert a knife into it and you feel its tenderness,
Allow the meat to rest and cool a little before removing the string or toothpicks and trying to slice them.
Once you are ready to serve, heat the sauce once more, serve the sliced Bracciole and either make a mirror with the sauce on a plate or cover the meat with sauce. You can also serve with more grated cheese on top.
I hope you will try this dish to share with your family. Enjoy!

NOTE: This makes a great Marinara Sauce that can be used for many applications, from Fried Calamari, Chicken Breasts or Chicken Cacciatore, Eggplant Parmigiana, Lasagna Rolls, Fish Fillet, Meatballs or even over pasta....  You change the beef to Pork or Chicken or Turkey "milanesas" .

Wednesday, October 2, 2019

PESTO.- The perfect condiment / sauce / flavor exhancer that you can have on hand!

PESTO.-  What can I tell you about Pesto? There are so many advantages to making your own beginning with controlling the ingredients, no preservatives, colorants, chemicals or anything else you don't need. Never forget that the cleaner your ingredients, the better for you, no doubt. So if you can make your own, do it. Pesto is so easy to make that not only anyone can do it, it's also fast to prepare and yields amazing flavor which you can use on almost everything.... another plus is that it's healthy so if you happen to be on a regimen or diet (keto, Atkins, diabetes, cholesterol, blood pressure or ....) in all probability, you will be able to have it.

PESTO:  It is a sauce that originated from Genoa, Italy which is the capital of Liguria. The classic ingredients are garlic, pine nuts, coarse salt, Basil leaves, a hard cheese like Parmigiano-Reggiano or Pecorino Sardo and then it's blended with olive oil. As other foods throughout the ages arrived and with the assistance of Marco Polo or Columbus, the Moors or the Romans, etc. that were travelling between our continent to theirs or vice versa, major changes and additiones occurred in the world which gave us the "foods of the world". Just imagine if Italy had never gotten tomatoes from us? Or chiles? Pasta? or Potatoes, etc? Spices, herbs, fruits, vegetables and even proteins came into everyone's lives by all these travels and gave us not just original recipes but alternate ingredients as well. Just fantastic!

Why is it called "Pesto"? Because it was made in a mortar and pestle, get it? A molcajete to the rest of us.... Sure, that's the classic preparation method which you still find in Italy but in these fast lives the more common way to preprare it is with a food processor, which I use and makes it a quick result. While getting your ingredients ready to be used ("mise en place") might take you some minutes, you could do these in advance so they're available for you once you're ready to proceed, but we'll get to that, ok?

Now in my case as in any other food preparation, I will adapt, change, add or delete ingredients to suit our taste, to use what's in season or what I can get at the market or even what I feel like at that particular moment, so I've made Pesto with cilantro leaves or mint or other herbs or a mix of them. That goes for the nuts as well as Pine Nuts are quite expensive and I'd rather get them whole in something like Raw Kibe which I LOVE!!  So I usually use Almonds, those big bags at Costco of Raw Almonds are great but you need to peel them for this. (If you don't know how send me a message and I'll give you an easy way to get them peeled or look for a Youtube video) Anyhoo, I use some type of herb, garlic, coarse salt, the cheese is what I have and that's usually Grana Padano which we get at Costco and I do half grated fine and half grated course to have more of a texture. This also goes for the olive oil, I got a big bottle of Extra Virgin Olive Oil at Costco which I use for almost everything including taking tablespoons with Himalayan Salt grated fine into it which makes it really tasty to take (check out the nutritional benefits of taking Olive Oil tablespoons this way and you'll see why...).

So here is everything I used to make my Pesto at home:

2 cups Basil Leaves (I freeze the stalks in plastic to use for other sauces or soups)
2 cups Cilantro Leaves (I have this all the time so don't need to save stalks, I do use them too)
5 small Garlic Cloves (or 2 large, etc) peeled and crushed, chopped fine
1-2 tsp Coarse Salt / Kosher Salt / Salt Flakes, etc.
1/4 - 1/3 cup Grated Cheese (Parmesano-Reggiano / Grana Padano type)
1/3-1/2 cup Almonds, raw, peeled
1/3-1/2 cup Extra Virgin Olive Oil

These ingredients are approximate, depends on your taste. Do it this way, taste and adjust as needed. Experiment, mix. You'll put all the ingredients except the oil in your food processor at once and when you turn it on, on slow at first, you'll drizzle a thin stream of oil as it mixes until you reach your desired consistency. I open the processor in the middle to wipe down the sides of the processor and give it a quick taste before finishing the process. Keep an eye on it, you can always stop, open the food processor to taste or look at the texture, ok?

Also, don't forget that Pesto tastes great on almost anything, so keep trying it on your favorites! One last thing is that if you check the nutritional breakdown of pesto online you will get the store bought versions of this so if you make your own it will be even better tasting and give you more nutrition.

Enjoy this amazing sauce!

Sunday, July 28, 2019

MAKING OUR OWN EXPRESSO POWDER.- a lovely cup of coffee,

MAKING YOUR OWN ESPRESSO POWDER.-  Got tired of looking all over the place for Espresso Powder for baking and drinks in general so I gave up and decided to take matters into my own hands and produce what I need.  It's been quite a while since I found it at a store, in Las Vegas actually and in Merida what I did was get Espresso Coffee Pods from a Mexican Brand Los Portales or something like that, toast it and proceed. My measure was a pod and it served its purpose when I made Tiramisu. In CDMX I figured the problem would be non-existent but along with Kosher Salt (another impossibility which I can't understand) have been quite the search mission.
     This brings me to today's little project, come up with a decent alternative I can have on hand for whenever the inspiration hits that won't evolve into an all out do-or-die challenge, so here goes:

  1. Like most of my endeavors, I do lots of research to come up with alternatives so this time I found that espresso powder comes from ground, brewed and dried coffee beans! Bingo! Lots of ideas, right? So I made some espresso coffee and once I enjoyed a lovely cup of coffee I set aside the leftover espresso grounds....
  2. Took a hotel pan and lined it with aluminum foil, I would have used parchment paper but didn't have it at the moment, so just plain foil will have to do. I spread the grounds over the pan to make a thin layer, try to get as little liquid as possible in there. 
  3. Turned the oven to the lowest setting, for mine it said 160 F but my oven thermometer said it was closer to 200 F, so took that into consideration, so keep an eye on things, ok?
  4. Using the timer on my cell phone I set it for 30 minutes and put the pan in the oven. I would check it in 30 minutes and see how much it had dried.
  5. After 30 minutes I checked the coffee grounds and found they were still humid, not a lot but certainly not dry. So I left the pan in the oven and reset the timer for another 30 minutes. No, I would not raise the temperature, I wanted the grounds dried out but not roasted or they would taste burnt. So low temperature and keep an eye on them. Another 30 minutes will make 2 hours, will check back. Guess an additional 30 minutes are needed but it's very close.
  6. It took 2 1/2 hours until I could get a completely dry powder. Removed it from the oven, cooled it and placed it in my coffee / spice grinder. Ground it really fine and placed it in a baggie, pressed all the air out and sealed it. I have Espresso Powder.
    Now that I have Espresso Powder you might be thinking, now what? What's this good for that it would make all this worth it? Here are a couple of suggestions:

Mocha Chocolate Icebox Cake: An amazing dessert that is very easy to make, requires no baking so you can put it together, chill and be ready to serve, plus impress your guests too. 


2 cups cold heavy cream 12 ounces Italian mascarpone cheese 1/2 cup sugar 1/4 cup coffee liqueur, such as Kahlua 2 tablespoons unsweetened cocoa powder 1 teaspoon instant espresso powder 1 teaspoon pure vanilla extract 3 (8-ounce) packages chocolate chip cookies Shaved semisweet chocolate, for garnish
Mix all ingredients except the last 2. Put in a bowl and whip until peaks form, slowly increasing speed. In your mold, can be lined with parchment or film, place one layer of cookies, follow with a thin layer of the whipped cream, alternating layers and finishing with a cream layer. Chill or freeze (but thaw before serving) and top with the chocolate shavings. Serve.
You can add Espresso Powder to any chocolate baked good to bring out even more flavor; sear scallops; put on steaks with other spices as a rub; cookies, brownies, etc.

Saturday, March 16, 2019

WHILE THE PASTA COOKS, YOU CAN HAVE THE SAUCE READY! QUICK DINNERS.....

While the pasta cooks.... this reminds me of  watching Biba Caggiano on PBS cook traditional Italian food about 40 years ago or more, well food hasn't changed that much but we have adapted some recipes to make a long drawn out process a one-dish meal that's quicker and easier clean up for today's fast lifestyles, and we can all benefit from this, right? Let me show you how to make a showstopping dinner entree in one dish that is sure to impress...

PASTA PUTTANESCA.- Originally made in the brothels by working women who had to have a quick meal in between clients with whatever pantry ingredients they had on hand. Works for me. Don't forget that this is a flavor PLUS dish due to the strong taste of the ingredients but is a classic dish that will never disappoint. We've made it simpler, so here goes.

You will need:

1/2 lb Spaghetti, dried
Kosher Salt
Olive Oil
4-6 Garlic Cloves, finely chopped by hand (to not affect the flavor)
5-7 Anchovy Fillets, finely chopped (about 2-2 1/2 Tbls chopped)
Pinch of Red Pepper Flakes
1/4 cup Caper Berries, drained and chopped
1/4 cup Black Olives, pitted, chopped
1 cup whole Tomatoes, can be canned and peeled (about 7-8oz)
2-3 Tbls Parsley Leaves, minced
1 oz Pecorino Romano or Parmesan Cheese, freshly grated + more for serving
Black Pepper, freshly ground

In a large skillet, saute pan or saucepan place the spaghetti in and cover with water (just to cover and not like you're used to). Add a pinch of salt and bring to a boil over high heat, stirring now and then to prevent the pasta from sticking.

In the meantime, in a medium skillet put 4 Tbls oil, garlic, anchovies and red pepper flakes. Cook over medium heat until the garlic is lightly golden for about 5 minutes. You can lower the heat to keep it gently sizzling along. Now add the capers and olives and stir to combine well.

Time to add the tomatoes, stir once more to combine and bring it back to a bare simmer. You will continue to simmer until the pasta is just cooked "al dente" or about 1 minute less than any package recommends.

Now, using tongs, transfer the pasta to the sauce. You can drain the pasta but make sure you reserve about 1 cup of the pasta water for the sauce later. Add all the drained pasta to sauce.

  •  Add 2-3 Tbls of pasta water to the sauce increase the heat to a vigorous simmer. Cook while stirring and shaking the pan while you add more pasta water, as necessary to keep the sauce loose until the pasta is completely cooked yet still "al dente", maybe 1 or 2 minutes more. Remember the pasta will cook slower while it's in the sauce that it did in just plain water. Add olive oil, parsley and some cheese.

Taste the sauce and add salt & pepper to your taste, you should be generous with the pepper and not too much salt since other ingredients are already salty, ok? So a little at a time.

This dish is also served with the addition of tuna, just drain it if using canned or you can pre-sear some fresh tuna.

You can now also top it off with more grated cheese. Mmmmm.... Enjoy!