Showing posts with label French. Show all posts

Wednesday, August 16, 2023

Leek, Bacon & Edam Cheese Quiche - Come away with me....


 Leek, Bacon & Edam Cheese Quiche .-  What can I tell you about this? It's a lovely lunch, brunch or light dinner dish that somehow has fallen out of favor... but not at my house! I still make and love Quiche!... All kinds of Quiche and this recipe can be used as a great base recipe to base yours from... It's also a great fridge cleaner-outer since you can use all those little leftovers you might have rumbling around in there, so pretty practical too.

Eminently flexible since you can add or change the ingredients. Maybe no bacon, all veggie or chicken? No Edam? How about Emmenthaler, Gouda, Swiss, Sharp Cheddar? Your choice... It's also great cold, easy to carry-out for lunch or picnic, or a quick lunch or even a lovely dinner, with a green salad and a glass of wine... 

To make this you will need:

Pie Dough (this makes 2 - 9" pie doughs

2½ cups (375 g) all-purpose flour 1 Tbsp (12 g) granulated sugar 1 tsp fine sea salt 3 Tbsp (45 mL) vegetable oil 1 cup (225 g) cool unsalted butter, cut into pieces (does not have to be ice cold) ¼ cup (60 mL) cool water 2 tsp white vinegar or fresh lemon juice 1 egg white, for brushing the baked quiche shell Quiche Filling: 2- 3 large leeks 3 - 4 slices of Bacon, chopped into fine batons 3 Tbsp (45 g) butter

½ cup (125 mL) dry white wine ½ tsp fine salt ¼ tsp ground black pepper ¼ tsp ground nutmeg 2 large eggs ½ cup (125 mL) whipping cream (I used 3/4 cup heavy cream, no half & half) ⅓ cup (80 mL) half-&-half cream 1 ½ cup (165 g) coarsely grated Gruyere cheese or your choice

Directions • 1. Combine the dry ingredients by stirring the flour, sugar and salt in a large bowl. Add the oil. Using a pastry cutter, electric beaters or a mixer fitted with the paddle attachment, blend until the flour looks evenly crumbly. NOTE: I used my Kitchenaid and done before you know it, pay attention to the texture. Some baking wisdom! Adding a little vegetable oil to the flour before adding the butter is another secret for tender and flaky pie dough. The oil coats the flour so that it won’t overhydrate when the water is added. Too much water develops the protein in the flour, which is why a crust becomes tough or shrinks when it bakes. 2. Add the butter and cut in until the dough is rough and crumbly but small pieces of butter are still visible. 3. Add the liquids. Place the water and vinegar (or lemon juice) in a small bowl, stir together and then add a little at a time to the flour mixture, mixing just until the dough comes together. Shape it into two discs, wrap well and chill until firm, at least 1 hour. If you are not making a pie immediately, refrigerate the dough, well wrapped, for up to 2 days, or freeze it for up to 3 months. Thaw it overnight in the fridge before rolling. You will need only one disc of dough for the quiche. NOTE: This makes 2 pie doughs, you only need 1 for this Quiche so you can freeze the other one. 4. Roll out the pie dough on a lightly floured surface into a circle just under ¼ inch (6 mm) thick. Trim away any large pieces of dough from the edge and tuck and pinch the edges in a pattern. Alternatively, trim the pastry to the outside edge of the pie plate and press in place. Cut out shapes from the excess pastry, moisten with water and press gently along the top edge of the pastry. Dock the bottom of the pie shell with a fork. Chill the pastry shell for at least 30 minutes (up to a day). 5. Preheat the oven to 375°F (190°C). 6. Weight the pie shell. Place two sheets of aluminum foil over the pie shell, gently covering the outside trim. Use pie weights, dried rice or dried beans (about 2 cups/500 mL) and pour these on top of the foil, spreading them out to the edges. 7. Bake the pie for 20 minutes. Carefully remove the foil together with the pie weights (this is why you double up on the foil). Return the pan to the oven to bake for 10 minutes more, until the edges of the pastry are light brown and the bottom of the pastry appears dry but still pale. 8. Brush the pie shell, hot from the oven, with lightly whisked egg white. Cool the pie shell in its pan on a rack before filling. 9. Prepare the leeks. Trim away the ends and dark green parts of the leeks. Cut each leek in half lengthwise, then cut into ¼-inch (6 mm) slices. Place in a colander and rinse and drain well. 10. Cook the leek filling. Add the bacon. Melt the butter in a large sauté pan over medium heat and add the leeks. Cook, stirring often, until softened completely, about 15 minutes. Add the white wine and continue to cook until all liquid has evaporated. Remove the pan from the heat and stir in the salt, pepper and nutmeg. Let the mixture cool for 15 minutes. 11. Preheat the oven to 400°F (200°C) and place a 9-inch (23 cm) your baked pie shell on a baking tray 12. Whisk the eggs well and then whisk in the whipping and half-&-half creams. 13. Assemble the quiche. Line a baking tray with parchment paper and place the partially blind-baked pastry shell on top. Sprinkle the cooled leeks over the bottom of the pie shell, then sprinkle with the cheese. Carefully pour the eggs into the pastry, giving them time to cascade and fill in between the leeks and cheese. The quiche will not be filled to the top of the pan, but the eggs will expand as the quiche bakes. 14. Bake the quiche for 15 minutes, then reduce the oven temperature to 350°F (180°C) and continue to bake for about 20 minutes more, until the quiche is set and golden brown. 15. Cool the quiche in its pan on a rack for at least 15 minutes before slicing to serve warm.


Monday, August 7, 2023

Pan Bagnat, a unique sandwich from Provence...


 Pan Bagnat.-  Remember this name, you'll want to repeat this one!

Pan Bagnat is a local delicacy in Nice, France, and if you love Salad Nicoise then you will love this sandwich... Full of fresh flavors and Mediterranean favorites, it's a wonderful addition to your sandwich collection...

In order to make this, you will need:

1 - 2 Baguette or your choice of sturdy bread

The dressing: (this can be made ahead, you'll want to put it on many things!)

1/2  Red onion, cut in half then sliced very thin

1 clove of garlic, finely minced or grated

3 Tblp Red Wine Vinegar

Mix everything well and allow this to rest for at least 20 - 30 minutes to soften.

1 Large tomato, remove core and slice thin


In a bowl combine the dressing ingredients and allow to rest. Place the slices tomatoes on a plate and salt / pepper / lemon drops on them to season and allow to rest until needed.

Now take your baguette or chosen bread and slice lengthwise so you have a top and bottom. Remove some of the "crumb" to the bottom part of the baguette so you create a kind of channel where you'll place your finished dressing in... Once done, brush both sides of the bread with olive oil and cover well. NOTE: You can toast the bread in the oven for about 5 minutes if you like.

Place in a food processor:

1/2 cup Parsley leaves

2 Tbls Marjoram Leaves


3 Tbls Capers

3 Anchovy Fillets, rinsed and dried off

3/4 cup Nicoise Olives, pitter

Pulse until the mixture comes together to form a type of "tapenade" or spread to use in the sandwich. Once well mixed, but still chunky, you'll ad this mixture to the bowl with the start of the dressing (the onions with vinegar) and mix well, now add

1/4 cup Olive oil 

2 tbls Dijon Mustard

1/4 tsp Black Pepper, fresh ground

Mix it all well. Now you have your finished dressing.

To put together:

2 6.5 oz cans of Tuna (get the very best you can)

3 Hard Boiled eggs, peeled and sliced thin

Pile in your finished dressing on the bottom bread, be generous, then you follow with your tuna (you can break it up but still leave good chunks) add some lemon on the tuna if desired and then top with a couple more tablespoons of Olive Oil.

Now shingle your seasoned tomatoes over the tuna so you cover the entire sandwich. This is followed by slices of the hard boiled egg, once again shingled to cover the sandwich. Nowtop this with a little more finished dressing!!

Close the sandwich and then slice in half for easier preparation.

Each half of sandwich will be wrapped in cling film, tightly and place on a tray, now place another tray over the sandwiches so you can press them (like a Mufaleta), so place a heavy object on top of the second tray so they will be pressed.

Leave the weight on them at least 1 hour before serving. Enjoy!!


Thursday, July 6, 2023

French Carrot Salad -or- “Carottes râpées” - very, very French Salad that pairs with everything...


 “Carottes râpées”, the very very French Salad that will make you smile in its simplicity. So economical and is a perfect "at home" quick lunch or light snack, easy ingredients and comes together in a snap.

You'll be able to see from the ingredients in this recipe that it can be used in many types of diets too.

The basic salad consists of: grated raw carrots (hence the name), dressed in some lemon and ground cumin. You could make it fancier by using colored carrots, using lime instead, increase the cumin or use ground coriander.

You'll need:

3 Tbls Extra Virgin Olive Oil 

3 Tbls fresh Lime Juice

1 tsp light honey

1/2 tsp ground Cumin

Salt to taste

1 lb Carrots, grated 

1/2 cup chopped Flat Leaf Parsley -or- Cilantro

Make the dressing, add the salt and carrots in a bowl and toss well, Parsley is added at the end, toss well.

Allow to rest 30 minutes to 2 hours before serving to let all the flavors come together.

It is a lovely palate cleanser when served as a side to the lovely but rich Croque Madame, some fatty pork or how about with a Raclette or heavy Mac N Cheese... I can also add that it's great as a standing midnight snack in front of the refrigerator or a quick, refreshing bite on a hot day. It's great at picnics or pot lucks...

So make this lovely salad and take it to the park so you can enjoy it outdoors on a sunny day!


Tuesday, November 29, 2022

Are you familiar with Tart Tatin?... Usually with Apples but this is with PLUMS!!!....


PLUM TART TATIN.-  I hope you've had the chance to try a Tart Tatin, with it's lovely Apple flavor, since I didn't have apples but been dreaming of Plums... Found some so decided to try something new....

A very easy recipe, few ingredients easily found, great results.... Apple, Plum, Peach, ????? There's always a good reason for a fruit desert, right?

Here's the ingredients you'll need:

6 oz / 85 g butter, softened

6 Plums, cut in half, remove pits

1 3/4 cup sugar, divided

2 eggs, room temperature

1/3 cup Sour Cream

1/2 tsp grated lemon zest

1/2 tsp vanilla

1 cup flour A/P + 2 Tbls flour

1/2 tsp Baking Powder

1/4 tsp Kosher Salt


1-  Preheat oven at 350 F. Use 1 Tbl butter to grease the pan. Using a 9" glass pan.

2-  Cut plums in half and remove the pits. I then sliced the plums in about 1/2" slices and put them to the side. Then arrange the plums in the pan any way you like, you can also leave then in halves cut side down, your choice. Remember that this is an upside-down cake so take this into consideration when placing the fruit, you can make a pattern or just use the fruit halves as is.... 

3-  Put 1 cup sugar and 1/3 cup water in a small pan, cook over med-high heat until it turns an amber color, about 5 minutes, do not walk away. Allow the sugar to completely dissolve and bubble, don't stir just swish the pan. Once you reach the color, pour over the plums and leave until you've finished the cake part.

4-  Cream together the remaining butter and sugar using a paddle, until light and fluffy (without grains of sugar) on med-high speed. Reduce speed and add the eggs one at a time so they are completely incorporated. Add Sour Cream, Zest and Vanilla, mix well but don't overmix, mix on low until it combines.

5-  In a small bowl put the flour, salt and baking powder, then mix it well and add to the batter in the mixer at low speed. Don't overmix, only until combined.

6- The batter will be thick and sticky so use a scoop or large spoon to place dollops all over so you don't disturb the arranged fruit. Spread to even it out carefully. Bake for 30-40 minutes until the top is golden. 

7- You might want to put the pie pan onto a sheet pan to catch drips or bubbling up fruit.

8- Cool on a rack for 15 minutes, run a knife all around the edge, put a large plate over the Tatin and invert carefully. If any fruit sticks, don't worry just re-arrange it.

9-  Serve hot, at room temperature or cold or anyway you like. We love it hot with ice cream!!! Or sometimes with whipped cream YUM!!!

Enjoy!!


Friday, August 6, 2021

Espresso Creme Patissiere.- The best and easiest recipe to get an amazingly flavored creme!

Espresso Creme Patissiere.-  If you love Cream Puffs, Napoleons, Tarts, Pies or Eclairs then you know how great Creme Patissiere can be. From Vanilla or all the way to Espresso flavorings that make this creme an amazing addition to many desserts you find in French Pastry Shops, but did you ever consider that you can easily make this at home?

Usually, the traditional method of making Creme Patissiere is daunting to a lot of people but here is a super easy way that anyone can have it made in no time flat! I made just the Creme flavored with espresso coffee and served it as a type of pudding as dessert, it was a big hit!! 

Once you make this you'll be able to appreciate how easy it is to get amazing results but you can see how many flavorings you could give to the basic Creme Patissiere, so let's get to showing you how to get it done.

The ingredients you will need are:

1/2 cup sugar                            

1/4 cup cornstarch

A pinch of coarse salt like Kosher Salt

1 1/2 cups of whole milk

1/2 cup strong, freshly brewed espresso coffee, cooled

4 large egg yolks

2 Tbl butter

1 tsp Vanilla


To prepare the cream:

In a medium saucepan, mix together the sugar, cornstarch and salt.

In a glass measuring cup, whisk the milk, the egg yolks and espresso.

Now add the milk mixture plus the butter to the saucepan. 

Over medium heat, bring the mixture to a boil, you can use a whisk to prevent any lumps and then you can use a silicone spatula to prevent it sticking to the bottom of the pan.

Once it comes to a boil, allow it to boil for at least 1 minute, this will thicken the mix.

After the creme thickens, remove from the heat and add the vanilla.

Now it's ready. You should cool slightly before using since it will thicken even more. Especially if you will use this as a filling for pastry it should be cool. I used it without cooling it very much since I was going to use it as a type of pudding, then I refrigerated it,

To give it a professional finish to the creme, strain it through a sieve. To refrigerate, place plastic wrap making contact with the surface to prevent a skin forming on the creme, allow to cool in the refrigerator at least 2 hours.

I've had different flavors of creme patissiere like traditional Vanilla, Chocolate, Espresso, Raspberry, Rose, Gin and Tonic and even Salted Caramel. I can also imagine how many other flavor variations I will be making in the future!!

Here are some flavor variations for you to try:

  • Flavored: Add 1/4 t.- 1/2 t. flavor extract of your choice: coconut, almond, mint, etc. (add in with vanilla extract)
  • Adult: 1 tablespoon flavored liqueur (add in with vanilla extract)
  • Chocolate: 1/4 cup unsweetened cocoa powder (add in with cornstarch)
  • Cinnamon: 1/2 teaspoon ground cinnamon (add in with vanilla extract)
  • Cappuccino/Mocha: 1 tablespoon espresso powder/instant coffee granules, may combine with cocoa (add in with the half & half)
  • Citrus: zest and juice from 1/2-1 whole lemon, lime, orange, etc. (add in with vanilla extract)
  • Berry/Fruity: 1/3 cup seedless fruit puree or preserves of your choice: raspberry, strawberry, etc. (add in with vanilla extract)
  • Extra Light & Fluffy: 1/2-1 cup whipped cream (fold into cooled pastry cream) This is called Diplomat Creme

Thursday, August 5, 2021

Chicken Tarragon.- You need to make this dish a part of your repertoire!!

 Chicken Tarragon.-  Looks fancy enough for company but it's such an easy dish that you can make it as a weeknight meal like we do... So here's the quick and easy recipe for you...

To make this dish you will need:  Serving is 1-2 chicken cutlets, depending on size, for each person. If you have a whole chicken you will need to separate the breasts, remove the skin and de-bone each so you have 2 large breasts; these are cut in two, lengthwise, to make then thinner and these have to be pounded so they are thin and even. Otherwise, get boneless, skinless chicken breasts and just pound them between two pieces of plastic until even.

2 Boneless Skinless Chicken Breasts, prepared as shown above.

Olive oil                  

1 Tbl Butter

Salt and Pepper

All Purpose Flour

1 Tbl Dijon Mustard

1 Tbl Garlic, finely minced or pressed

1-2 Tbl Tarragon, can be fresh or dried

1/2 Cup Heavy Cream

1/2 Cup White Wine

1 Tbl Green Onion, green part only, finely chopped

Once your cutlets are ready for cooking, salt and pepper them on both sides, if you want to add extra spices you can do that now. Have all your ingredients at hand because this is a quick cooking dish.

Have a plate with some of the flour so you can dredge or lightly cover the chicken before cooking. Now put some olive oil into a pan over medium heat and add a tablespoon of butter to the oil, allow the butter to melt so you know the pan is hot before you add the chicken. Once you dredge the chicken, shake it out a little to remove any excess flour and put into the pan to begin cooking. Don't allow the chicken to get browned, you want it nice and tender and very lightly golden. Turn so that both sides are lightly cooked.

Now you add the Dijon Mustard, the garlic and Tarragon, mix it all together so that all will lightly cook and bring out flavors and aromas. Allow to cook for 1-2 minutes before you add the White Wine. Allow the wine to cook another 1-2 minutes before you add the Heavy Cream, cook for another minute. Make sure everything is well incorporated.

Now lower the heat to low and cover just for a couple of minutes to allow the wine's alcohol to evaporate and the heavy cream to thicken. Uncover.

Taste the sauce so you can judge the level of seasoning. Does it need more salt, more pepper? If it tastes to your liking, you are ready to serve. Turn off the heat.

I hope you will try this recipe and see how easy, quick and wonderful it is! Enjoy


Thursday, July 16, 2020

MASTERING THE BASICS.- Pork Chops with Creamy Mustard Sauce and Gherkins

MASTERING THE BASICS: In other words creating your knowledge base to cook simple yet very flavorful dishes for yourself or family and even for entertaining. While they may be simple, the taste is very much Gourmet, nothing strange or fancy equipment needed and every ingredient can be found at your local market. So let's give it a try, ok?

This is what is called a dish with an "Instant Sauce" which means it's made on-the-spot and together with this technique of using "concentration" or "reduction" will show you what you need. It's basically a PAN FRIED protein which is done first then you finish up with a lovely PAN SAUCE. This is a technique that everyone should have in their repertoire because it elevates a simple piece of protein into something amazing plus it can be adapted for 1,2,3,4 people with no effort.

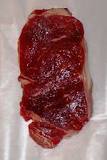
Today we will make: "Entrecote with a Creamy Mustard and Gherkins Sauce" which I made the other day and some friends were impressed yet they don't think its a dish they could make. You'll see how easy and great results you get, a lovely meal too!

First things first: What is Entrecote?

Entrecote is the French word for a steak that comes from the rib area. It can be a rib chop, a rib eye, a Scotch Fillet, a club, a Delmonico and even a sirloin if cut as a contre-fillet too.

I used some small Pork Ribs that I had on hand, but either beef or pork are fine. You will need these ingredients to make this dish: This is for 2 people and will serve for 1 steak too

2 Chops / steaks / Entrecotes
1 Tablespoon of butter
1 Tablespoon of neutral oil
Salt and pepper or meat on both sides, be generous

For the Sauce you will need:

2 Tablespoons of Shallots, very finely chopped (you can use onion)
1/2 Cup of White Wine, your choice
1 Cup of Veal Stock (you can use Beef or Chicken), warmed up and ready
1 Tablespoon Dijon Mustard
3 Gherkins (small pickles) cut in very thin strips
1 -2 Tablespoons of butter
Salt and Pepper to taste

MAKING THE DISH: Before cooking you should have your "mise-en-place" or everything in place so you are ready to cook with no delay, this is ALWAYS the first step in cooking, so have it all salted, measured and cut and chopped and ready to be put in the pan, ok?

1- First, over MEDIUM heat place our pan (a size that will fit your protein without crowding and that has sides that are at least 2 inches deep. When our pan is warming up add the neutral oil and then the butter and allow to melt. Its very traditional to always add some butter to oil when cooking in France and I always use it.
2.- Once your pan is hot and the butter melted, add your steak or chop or whatever you're using. Do not use a fork or prick the meat at any time. Leave the meat along because we want to sear it and create a crust on the meat so we can keep the juices from escaping and we will use the brown crust that will be made on the pan later. But for now and depending on how thick your protein is, allow it to cook for about 5 minutes per side if your meat is about 1 inch or so thick, if it's thicker then a couple of minutes more. You want it to be nicely golden brown. So check your meat after 5 minutes and if it looks golden brown you can turn it so the other side gets this color too, Just leave them alone and don't move them. To check and see if they're well cooked you can touch them and see if they feel firm, that will tell you they are ready. If they're soft or tender then leave for another minute and check again.
3.- Once they are done, place them on an oven proof pan, in the oven to keep warm while you make the sauce. The oven should just be warm at 65C or 120F.
4.- Now look at the pan and see it has too much grease left, pour the excess grease out but make sure you leave about 1 tablespoon of fat in the pan. The golden bits on the bottom of the pan is called the "fond" and is what will give more flavor to the sauce, you need it so leave in the pan.
5.- Now is time to make the sauce: On medium heat and in the same pan, remember? You put the shallots or onions if you're using, keep and eye on them as you mix them around the pan. You don' want to burn them but only to sweat them and give them a little golden color. After a couple of minutes you add 1 tablespoon of butter to the pan and mix the onion well with the fond in the pan, the pan will begin to look a little dry after a couple of minutes after adding the butter so it's time to add the wine; you raise the temperature to medium-high in the pan (remember we're doing a reduction type sauce) keep mixing and once the wine evaporates a little, it will look like a glaze in the pan, so you add about 1/2 cup of stock, keep mixing while the liquid bubbles, you need to wait a couple of more minutes until the sauce looks like it's beginning to thicken because it's reducing, ok? Don't worry if it doesn't look like a lot of sauce, don't forget we're only making 2 chops and it will be enough for this, this is the good part of the "instant sauces" they will easily adapt to the servings you need so cooking for 1 or 2 people is very easy.
Now you can see you are building a sauce and that it's getting a little thicker and reducing. Turn off the heat and add the Dion, 1 tablespoon, and you don't want the mustard to burn so you turn off the heat. Keep mixing or whisking to incorporate the Dijon well into the sauce and you'll see it will give the sauce a lovely sheen. At this point you want to filter the sauce to remove the little its there (you will need a sieve or colander) now you can use another pan after filtering the sauce or use a small bowl and then put it back into the original pan. Now your sauce is like satin and is smooth and velvety.
Turn the heat back to medium and add the gherkins and integrate it into the sauce. Now add 1 tablespoon of butter to finish the sauce and mix until it's melted, keep mixing, add another tablespoon of sauce and keep mixing to make it velvety. We use butter instead of cream in this sauce while the sauce will look creamy and lovely. Taste the sauce to insure he salt and pepper are correct. Once it's all incorporated, turn off the heat and it's time to serve.
6.- Take out the meat from the oven and turn off the oven. Place half of the sauce on the bottom of  each of your serving dishes and place the meat on top of the sauce. You can add salt & pepper if needed. If you've made a side dish to serve with this now is the time to offer this too. Enjoy!

This dish can be changed and adapted to other proteins, all you need is to begin the same way and create a fond. The wine can be changed for other liquors you like, cognac, brandy, red wine, rum, champagne or whatever or leave it out and just use stock.... You don't need to use gherkins, you can use vegetables like carrots or mushrooms, just par boil the carrots a little. The stock can be not just veal but chicken or beef or vegetable, you can also use water with some Worcestershire Sauce or soy, the butter can be replaced with heavy cream to finish too.... Experiment and you'll see what an easy and flexible preparation this can be plus so yummy!


Monday, November 25, 2019

Estofado de Pollo con Aceitunas, Alcaparras y Limon.-

Estofado de Pollo con Aceitunas Negras, Alcaparras y Limon.-  Comida completamente familiar y reconfortante y aunque toma algo de tiempo para terminarse, la preparacion es sencilla y se coce casi solo, dejandote libre para otros projectos.

Platillo Mediterraneo, saludable y con mucho sabor, aconsejo tener algun tipo de pan, como baguette, para provechar la salsa....

Los ingredientes necesarios para este platillo son:

1 1/2 K o 3 lbs de Pollo, puede ser las partes que mas les guste, yo use muslos
1-2 cucharadas de Aceite de Olivo
3 cucharadas de mantequilla
1 cebolla mediana, cortada en pedazos chicos
3 - 4 dientes de ajo, pelados y cortados finamente
1 taza de vino blanco de su preferencia
2 tazas de consome de pollo
3/4 taza de aceitunas negras, sin hueso
1 limon, solamente la piel sin lo blanco, cortado en tiritas finas (yo agrege el jugo del limon)
3 cucharadas de alcaparras
2 cucharadas de semillas de hinojo
1 taza de tomates cherrie, opcional
Sal y pimienta al gusto

Se prende el horno a 350 F / 180 C.

En una olla que se pueda usar en el horno (o de lo contrario se puede cocinar sobre la estufa a fuego bajo si es necesario) que la olla sea pesada. Se pone el aceite de olivo a fuego medio-alto y se calienta. Se le pone sal & pimienta al pollo y se pone en la olla a sellar. Cuando este dorado de un lado se voltea y se cocina por el otro lado. Una vez sellado, se remueve de la olla a un plato, si la olla tiene demasiada grasa se quita o sino se puede agregar la mantequilla.

Se agrega la cebolla a acitronar hasta que este transparente, despues se agrega el ajo y las alcaparras y se sanchochan algunos minutos sin quemar el ajo. Se agrega el vino y se mezcla con los demas ingredientes para levantar cualquier cosa que haya quedado en el fondo de la olla (el "fond"). Se deja cocinar como 2 minutos para que espese un poquito el liquido y se agrega el caldo de pollo, las aceitunas, la piel del limon y las semillas de hinojo. Se regresa el pollo a la olla y si se van a usar los tomates se ponen en la olla durante este tiempo.

Se tapa la olla y se pone en el horno precalentado. Aproximadamente 1 a 1 1/2 horas o hasta que el pollo este tiernito. Si se va a cocinar sobre la estufa, se tapa la olla y se le baja la lumbre a lo mas bajito, se cuida para que no se termine el liquido y se revisa despues de 1 hora para ver si el pollo ablando, si no, se deja cocer otro rato mas.

Cuando el pollo este cocido, se saca la olla del horno y se remueve el pllo de la olla a un plato. La olla, sobre fuego mediano-alto, se hierve el liquido de la olla como por 5 minutos para que espese un poco. Se prueba y se asegura que este bien de sal y pimienta. Si se quiere, se puede dejar la salsa tal cual sin agregarle ninguna cosa mas.

NOTA: La salsa se puede terminar ya sea con 2-3 cucharadas de mantequilla para darle un brillo especial o en su defecto se puede terminar con crema pesada (batir) para que se torne en una salsa cremosa con base de vino y limon. De cualquier caso, el resultado es espectacular.

Espero disfruten de esta receta. Provecho!

Tuesday, October 22, 2019

CREPES SUZETTES.- A definite for your knowledge base!!!

As a serious Francophile I can state that there's almost nothing better than crepes.... for breakfast, lunch or dinner. Whether you like them sweet, savory, with cream, ice cream, nutella or salmon, chicken or you name it....

BUT, and I arrived at this realization of many years of cooking French Food, travel and tasting it all, even better than French Crepes are Belgian Crepes!!! Yes, sir, the very best and don't involve more work or fuss. These take me back to a little Cafe in Belgium where we've always had the very best breakfasts ever, my whole family says so too, so take a tip and follow along:

FIRST: Make Belgian Crepes: Sweeter than the French version and more buttery Oh La La!

    • 2 1/2 cups flour
    • 1 1/2 cups whole milk
    • 1 cup of vanilla sugar
    • 2 eggs
    • Pinch of salt
    • Butter or margarine

PREPARATION


    1. Put flour and milk in bowl and mix well. Add Sugar. Mix. Add egg yolks keeping the white aside. Beat the egg white and add a spoon of sugar while beating it. Add the egg white to mixture and pinch of salt. Blend it all together with a spatula. Allow your batter to rest for an hour or two in the fridge. Take a spoonful of butter and let it melt in pan on high heat. Lower heat a little above medium heat when ready to pour in skillet. Use a ladle to pour mixture onto the skillet while with the other hand turns the skillet so that the batter flows evenly over the skillet. If you prefer thinner crêpes add milk. Leave on the stove until lightly browned. Turn the crêpe over until golden brown. Ready! When removing the crêpe from skillet put it on a rack for 1 minute. Keeps it crunchier! Repeat!  Make a stack or how ever many you need then make more, you'll thank me for this later....

    1. OK, now you've got your crepes so it's time to decide what kind of crepes you'll have. When I was a child I would eat them simply with some melted butter and sugar, fold them and enjoy.... they're still good this way but French Style is much better....
    2. SUZETTE SAUCE:

    1. 1/2 cup sugar and the peel of an orange grated (only the orange and not the pith (white part) in a food processor. Process this until the peels are small and integrated into the sugar; cut 2 sticks of butter into small cubes and add this to the food processor and pulse until it becomes fluffy; now comes 1/2 cup orange juice and mix until it's light and fluffy. You can add as much orange juice as necessary to achieve this (you can also use a mixer). Once this is done, bring out your crepes, put a Tblsp of orange butter in a pan on medium heat until bubbling, add one crepe and get it full of the butter, turn and then fold in half and then half again so it looks like a "fan" shape, put into another pan or dish and continue doing this with your other crepes. Once they are folded then you add the Orange Liqueur and Cognac and flame with a match or on the stove. Shake the pan so all the crepes are covered in this amazing liquid, careful you don't burn yourself. Sprinkle with powdered sugar, serve. You are now in heaven!  You're welcome!....

Tuesday, August 27, 2019

CHICKEN MARBELLA .- Just for you....

CHICKEN MARBELLA.-
This is a real old-timey dish that was very popular before you were born, people forgot about it but it's greast tasting so we should cook it again.... It's very easy. This is an individual serving but if you need to make it for more people you can just increase the quantities a little on everything and you'll come out ok.

2 chicken thighs or chicken breast (bone-in) but you can use boneless
1-2 tsp Kosher Salt
1/4 cup dry white wine (can be optional) or use what you've got
6 prunes, pitted and cut in quarters
1/4 cup brown sugar (you can use white or just leave it out)
1 Tbls capers with 1 tsp of the liquid
6-8 green olives, pitted, cut in half
2 tsp Red Wine Vinegar
2 whole garlic cloves, peeled and smashed flat
2 Bay Leaves
1 tsp dried Oregano
1/2 cup Olive Oil

1 Tbsp butter
2 Tbsp dried Parsley

Salt the chicken before beginning to get the marinade together, leave it on a plate in the meantime.

If you don't want to have clean up, use a large zip lock bag to put everything in.Otherwise use a bowl or baking dish

Put all the ingredients shown before the butter and parsley into the bag or baking dish, the butter and parsley are for the ending.

If using a zip lock, press all the air out, seal and place on a plate in the fridge. If using a baking dish then make sure the chicken gets covered really well. You can turn it over after and hour or so. Make sure to leave the chicken in the marinade at least 2 hours but better at 4-6 hours or even overnight.

Preheat your oven to 325F while you do the second part.

Remove the chicken from the marinade and place on paper towels to dry off so it will get seared. Save the marinade. If you have a fry pan that can take going into the oven use that or use an oven-proof baking dish or anything that can be put in the oven. Use a regular frypan for the searing of the chicken.

Over medium-high heat, place your pan on the stove with 1 Tbsp of olive oil and wait for it to get hot. Place the chicken into the hot pan, skin side down and allow it to get golden brown, turn it over so both sides are nice and golden. About 4-5 min per side. Once the chicken is golden, take the pan off the heat so it cools down a little, turn off the stove and add the marinade. Mix it all together really well.

If you will be using another pan to put into the oven, have it ready. Add the chicken with the marinade into this pan. If your frypan can be placed in the oven then put it into the preheated oven.

It will take about 30-40 minutes for thighs and maybe 45-50 minutes for breasts to be fully cooked.
After about 15 minutes, turn the chicken over and spoon the sauce all over really well and leave it to continue cooking. After 30 minutes You can check to see if they're done by making a small but on the thickest part of the chicken and see if the juice that comes out are clear the chicken is done, but if the juices are red or pink, then cook 10 more minutes and check again.

Once they're done, take out of the oven and enjoy.... Hope you like it.

Friday, April 26, 2019

FREEFORM PIES O PASTEL DE FORMA LIBRE.- Facil y muy rico!


Yo tengo muchas maneras de hacer pasteles / pies / empanadas o algo asi.... a traves del tiempo y muchos pasteles han salido de mi cocina, de todos sabores y colores, con 1,2,3, cubiertas o "CRUSTS", dependiendo en lo deseado. He investigado pasteles de tiempos anteriores que hacian las abuelas, pasteles europeos, latinos del medio oriente, de donde fuera con un solo requisito: que fueran muy ricos.

Los rellenos pueden ser de fruta fresca, fruta congelada, enlatada, cruda o cocida, rellenos de crema, pudin, jocoque, queso, carne, pollo, los limites no existen pues cada quien decide de que seran los pasteles o sea, de lo que sea, ok?.

El primer obstaculo que encuentro cuando hago un pastel o llevo uno a una reunion es que las personas piensan que son muy deficiles hacerlos y que solo porque soy Chef lo hago. NO! Es un projecto sencillo, si le dan la oportunidad y aceptan el reto. Es facil pero el caso es que super vale la pena, no solo por la satisfaccion personal que esto conyeva sino por los resultados YUM!

Otra cosa, NO SE NECESITA NINGUN EQUIPO SOFISTICADO, claro que usando una procesadora de alimentos el asunto tarda como 2 minutos pero hoy lo haremos sin equipo, ok? Solo se necesita un rodillo, un tazon, una mesa para elaborarlo y una charola para el horno plana. Quizas papel pergamino para que no se pegue. Yo uso una pesa de cocina siempre que hago reposteria pues es la mejor manera de medir ingredientes, pero doy medidas alternativas tambien...

OK, primer obstaculo - LA CORTEZA O CRUST..... (Uy que meyo!!)....
Para nada, si sigues estos pasos el exito esta garantizado, ok?

Esto producira 2 cortezas, se puede congelar una para el futuro y solo usar una o hacer dos:

8 onzas de harina o 1 2/3 tazas o 225 g de harina y poquitin mas para espolvorear
1/2 onza de azucar o 1 cucharada sopera o 15 g
1 cucharadita de Sal Kosher o 1/2 de cucharadita si es Sal de Mesa o 4 g
8 onzas de mantequilla o 2 barritas o 225 g del estilo Americana, fria
4 oz agua fria o 1/2 taza o 115 g

1- PARA LA MASA: Se cierne el harina, azucar y sal juntos en un tazon. Se corta la mantequilla en cubitos pequenos de 1/2 pulgada, se sacude, mezcla la mantequilla con el harina para que se cubran y con los dedos, se aplasta cada cubito hasta que queden aplastados, eso es todo! No se le tiene que hacer nada mas. Se le agrega el agua y se amasa para que se incorpore contra los lados del tazon, una y otra vez, hasta que se convierte en una esfera irregular. Si la masa se calienta al tener contacto con las manos a mas de 65 y 70 grados F (de 18 a 21 C) entonces se refrigera la masa por un ratito antes de empezar a usar el rodillo y comenzar a doblarla.

2- PARA CREAR CAPAS: Se cubre la mesa con bastante harina para que no se peque y se va a usar el rodillo para conseguir un rectangulo de 10 pulgadas por 15 pulgadas. Se doblan los lados de las 10 pulgadas hacia el centro y se cierran los lados para hacer un libro mas o menos. Ahora se dobla en mitad una vez mas, uniendo los lados cortos juntos para crear un bloque grueso. Se corta por la mitad con un cuchillo filoso o un raspador de panaderia. Se debe mantener la temperatura de la masa igual que la de antes y si se calienta se mete en el refrigerados por un ratito antes de seguir.

3- LA CORTEZA: Usando el rodillo se hace un circulo de 14 pulgadas que se ha refrigerado por al menos 2 horas o hasta un dia antes de usarse.

RECETA DE RELLENO:

4 Duraznos grandes o lo que se elija usar - o 24 onzas o 680 g
1 onza de Almidon de Tapioca o 1/4 taza o 28 g (ver nota de abajo para sustituto)
3 1/2 onzas de azucar o 1/2 taza o 100 g
1 pizca de de Sal Kosher

4- EL RELLENO: La fruta que se va a usar, como duraznos, ciruelas, manzanas, cerezas, etc., se debe lavar muy bien toda la fruta pero no se tienen que pelar pues la cascara se cocinara junto con la fruta solo se le tiene que quitar el hueso y hacerse rebanadas del mismo tamano que se mezclan con Almidon de Tapioca para que se pongan dorados y crujientes. Tambien se puede usar Arrowroot o maizena. Para cada cucharada sopera de Almidon de Tapioca se usa 1 1/2 cucharada de Maizena o harina si es que se substituye.

Se precalienta el horno a 400 F o 200 C y se coloca la reja a la mitad del horno mientras se ensambla el pastel.

Ya teniendo la fruta bien cubierta con el almidon como se describio anteriormente, se acomodan las rebanadas de fruta segun la foto que esta aqui (gracias a Serious Eats un recurso muy bueno) y se siguen los pasos aqui mostrados. No hay que poner mas fruta de la descrita pues sera demasiada y los resultados no seran los mismos. Si se tiene mas fruta, aprovechela en Triffles o con el resto de la masa (pues esta receta solo usa la mitad de masa que produce) se pueden hacer DOS pasteles o tartaletas si se quiere, ok?  Una vez acomodada la fruta se termina espolvoreandola con azucar y una pizca de sal. Usando un cuchillo muy filoso se hace una serie de cortadas, utilizando el area entre el borde de la pasta a donde esta la fruta acomodada con espacio de 5 pulgadas entre corte y corte.

Ahora se terminara el pastel doblando las orillas sobre la fruta, jalando un poco para ponerlo en su lugar y empalmando un poco una seccion sobre la previa, haciendo dobleces para quedar en su lugar y se asemeje a las fotos que muestro aqui.  Una vez terminado con el pastel se debe refrigerar mientras se prepara el huevo pero no debe refrigerarse mas de 15 minutos.

HUEVO PARA TERMINAR EL PASTEL:

1 Huevo grande
1 Yema de Huevo
1/2 onza de Crema para Batir o 1 cucharada sopera o 15 g
1/8 cucharadita de Sal Kosher o 1/2 g
1/2 onza de Ron Plateado o 1 cucharada sopera o 15 g

Se ponen los ingredientes del huevo, exepto el Ron, en un tazon pequeno con un globo para que se incorpore muy bien. Usando una brocha y sacando el pastel del refrigerador, se cubre o pinta muy bien toda la corteza, pero muy ligeramente teniendo cuidado de cubrir los dobleces tambien pero teniendo cuidado para no remojar la masa pero que quede bien cubierto. Esto sera para producir un pastel dorado, brillante y servira para que todo quede bien adherido.

Se hornea el pastel unos 20 minutos y luego se unta, con la brocha, con Ron, sobretodo si hay espacios donde hay azucar que no se haya disuelto, pero todo se cubre muy bien otra vez sin remojar demasiado el pastel, con mano ligera, ok? Se continua horneando hasta que el pastel este bien dorado y la fruta este burbujeando, como 15 minutos mas. Hay que permitir que repose como 15 minutos para poderlo entonces cortar y servir, calientito, y terminar el servicio con crema batida o nieve si asi se desea.

Espero que practiquen esta manera de hacer pastel de forma libre porque veran que requiere menos tecnica y hace mas facil el proyecto mientras nos da resultados increibles. No olviden que pueden hacerlo tipo "quiche" pero sin el liquido o sea por ejemplo espinaca con queso de cabra o feta, ricota, pimienta, sal, cebolla verde y aceite de olivo (mismo relleno para Spanakopita) y se sigue igual, lo mismo si se quiere otro rellenos, ok? Solo no hay que exagerar para que no se remoje y quede muy bien. Experimenten y se daran cuenta lo facil que es y lo facil que sera adaptar tus recetas.

Buena Suerte y que lo disfruten. Provecho!


Sunday, December 23, 2018

TIRAMISU...... FOR XMAS, OF COURSE!

TIRAMISU.-  I don't know about you but we've got lovely memories of this dessert, sunny afternoons in Florence having great Espresso with a piece of Tiramisu from "Il Porscospino", directly across from Il Duomo.... what could be more perfect than that, right? We also had the opportunity of seeing World Cup Games there along with 6 other nationalities which made it a real party. Mexico was cheered by all... YAY!

Anyway, getting back to Tiramisu. I have an old recipe which requires a great deal of work and takes a while to make and this year, under tropical conditions which turned surprisingly warm (84 F) much to all of our surprise since it's supposed to be in the seventies but this year I'm afraid Climate Change has made an appearance and it really has been hotter than usual, the summer was a scorcher! If you add almost 90% humidity, well, kind of puts a damper on baking or much cooking.... :-(

Getting back to this version of Tiramisu, it's shorter and easier to make- anyone can make it really, even if you're not very adept at cooking or baking. I had to be flexible with the cookies needed, Lady Fingers, because they didn't have them at my local Chedraui Selecto so I had to make so with some Italian cookies that seemed to be able to work.

To make this dessert, you will need: You might want to have your ingredients at room temperature, it will make mixing easier

1/2 cup espresso or very strong coffee, room temperature
1/4 cup Marsala Wine, or your choice I've used Sherry before
2 tsp Vanilla Extract
3 large egg yolks
3 Tblsp sugar + extra
8 oz Mascarpone Cheese
3/4 cup heavy Cream or Whipping Cream
Lady Fingers package, or about 20-30 cookies, or something comparable
Dutch processed chocolate for dusting

Make the espresso and add the wine, vanilla and sugar. Mix well at room temperature.

For the cream filling you'll need a stainless steel bowl that will fit over a sauce pan since this is made over a Bain Marie, over gently simmering water. Don't allow the bowl to touch the water. Add the egg yolks, 3 Tbls sugar and 2 Tbls Wine and begin mixing (I recommend a hand mixer or immersion blender with a whisk) and beat without stopping for 5 - 8 minutes or until tripled in volume.

Take it off the heat and beat once more to insure it's really well blended. Beat the mascarpone so it's easier to mix in to the yolk mixture.

In another bowl, beat the heavy cream (you can add sugar if you like it sweet and some Vanilla, your choice) and beat at high speed until stiff peak stage. It's good to make this after the cream filling since it's best if the cream filling is allowed to cool. Add half the whipped cream to the filling mixture and combine, then add the rest and mix well. Mix with care to not deflate the cream.

Now take your cookies and begin dipping them into the Espresso liquid, turning and covering them well. Place into a square baking dish, or whatever dish you like, and cover the bottom of the dish fully. You might have to break some of them to make them fit well.

Now place half of the Mascarpone cream filling on top of the cookies and spread to make it as even as you can. Now you can put the chocolate powder on top. I use Dutch Processed and use a sieve to make it powdery. You can also grate, on a Microplane, a solid piece of chocolate or use whatever you like best. Dark chocolate is best.

Now arrange a second layer of cookies, then top with the last half of the Mascarpone Cream filling, even it out and once again top with chocolate. TA DA! You're done!

Cover with plastic wrap and refrigerate at least 6 hours. I leave mine in the fridge overnight since this is the same thought like when you make Flan, overnight chill is best.

When you serve, you can sprinkle some additional chocolate over top. Amazing!!

If you practice and get it down right, this can be a showstopper dessert for any gathering. People love it and it will be gone in no time flat, promise! Great for Office, Church or Club events, Pot Lucks or just to spoil your family, basically anytime is great.

Hope you will try it and see, but most of all Enjoy!!! Merry Christmas Everyone!!!


Friday, September 7, 2018

CASSOULET MEXICAN STYLE BUT JUST AS WONDERFUL!

CASSOULET.- A rich, slow cooked dish from the South of France that contains meat, pork skin and white beans, many variations can be made with this recipe based on the meat at hand, your diet and the addition or not of vegetables. I have a basic recipe which I make but many times I will go and make changes as I mentioned before and today I made a Mexican Style Cassoulet with Chicken and Chicken Stock, Chorizo, Ham, Swiss Chard, Pico de Gallo, Carrots and any other veggie I happen to run across and feels right.

Another very acceptable version can be made for vegetarians or vegans without any animal products quite easily using vegetable stock after cooking the hard vegetables (I cooked some chicken backs I had saved specially to have fresh stock and shredded some of the meat they had or if you have cooked chicken or take out chicken, leave some meat on the bones and save them in the freezer to use later) and use your favorite beans, large or small white beans and your choice of vegetables. Of course, there's also Soy Chorizo, Tempe, etc. which can also be incorporated. This recipe freezes well so you can make it ahead and keep it until needed.

For the basic Cassoulet Mexican Style you will need:

1/2 K Swiss Chard, hard stalks removed the rest cut in small pieces and the leaves cut in strips
1/4 Cup Olive Oil
1 medium Onion, chopped fine
2 Roma Tomatoes, chopped fine
2 Tbl Cilantro Leaves, chopped fine
5-6 Garlic cloves, chopped fine
Salt and Fresh Ground Pepper to taste
450 g of White Beans, your choice (can use canned), cooked
1/4 Cup Carrots, cooked, chopped in small cubes
1 1/2 Cup Stock, chicken / vegetable, beef, your choice
2 Tbl Parsley Leaves, finely chopped for topping at service
1-2 Tbl White Wine Vinegar

First put the olive oil into a hot pan over medium-high heat and add the Swiss Chard stalks (reserve the leaves), onion, garlic, salt and pepper, stir until the vegetables soften some, stirring.

Now add the Swiss Chard leaves, the beans, the stock and stir until the leaves wilt. Lower the heat and allow to cook for a couple of minutes to allow the flavors to marry and the Swiss Chard is tender and the stock starts to thicken, about 5 more minutes, it should thicken a little but still remain juicy.

Remove from the heat and add the Parsley and vinegar and stir. Taste and adjust seasonings as needed. Enjoy!

NOTE: As I said I also added some Chorizo and Ham and these I added at the beginning so they would enjoy the onions and garlic flavors.

Hope you will try this dish which is both satisfying and can be made very economically or to follow the type of diet that you desire.

Saturday, September 24, 2016

Tonight it's a trip down memory lane.... Ile Flottante!

A long time ago when I was a French Chef in Chicago it was nothing out of the ordinary to produce classic French dishes on a daily basis. I've always been a Francophile so it was right down my alley and my job allowed me to practice, practice, practice..... Souffles, Confit de Canard, Canard a l' Orange, Salad Nicoise, Cheeses, Moules, Escargots, etc.... but after a while you begin to experiment, to try different flavors and mix it up and on many occasion I would introduce a Mexican dish which no one associated with our beloved Mexico due to my employer's limited knowledge of our cuisine, yet on a dinner for a Mexican dignitary where I served a mix of French and Mexican Classical Dishes, it was the Mexican ones that stole the evening. Bravo!

The other day my husband commented I had not made Ile Flottante for a long time and this took me back to those days. This is a very classic dessert yet not very popular anymore.... yet if you have the interest and time it would reward you with some amazing textures and flavors to enjoy..... Not a very hard dish, several steps to do yet nothing super technical, pretty basic preparations but yield a very lovely presentation that is sure to impress. Here goes:

ILE FLOTTANTE.-

FOR THE ILE FLOTTANTE:
6 large egg yolks
2/3 cups sugar
1 1/2 cups very hot milk
a pinch of salt
1 tsp vanilla extract
3 Tbs butter (optional)
2 Tbs Rum or liquor of your choice

FOR THE MERINGUE:
1 Tbs butter, soft
1/4 cup powdered sugar (or cane sugar)
1 2/3 cups eggs whites (a dozen or so)
1 1/2 cups cane sugar
1/2 tsp Cream of Tartar
Pinch of salt

FOR CARAMEL SAUCE:
1 cup cane sugar
1/3 cup water
2 or 3 Tbs heavy cream
1 Tbs butter

TO MAKE THE CREME ANGLAISE:
Whisk the egg yolks in a 2 Qt saucepan, add the sugar a little at a time so the eggs don't turn grainy.
Continue beating for about 2-3 minutes or until the mix is pale yellow and thick. Stir in the hot milk, little at a time while stirring, do not beat because you don't want the sauce to develop bubbles.

Now set the pan over moderate low heat, stirring with a wooden spoon, reaching all over the pan. The sauce will almost simmer but don't overheat and scramble the yolks, but be sure to cook the sauce enough so that it will thicken. You will notice the bubbles begin to subside, some steam will escape so watch for this point and notice if the sauce coats the back of a wooden spoon so you can draw a line through it and it remains.
Once the sauce reaches this point, beat in the vanilla and the optional rum and butter. This sauce can be served warm, room temp or cold. You can also make it in advance, refrigerate, cover and it will keep for several days.

FOR THE MERINGUE:
You can use a 4 Qt straight sided baking dish or individual ramekins, butter the inside and dust with the sugar, knock out the excess. Preheat the oven to 250F.
Start beating the egg whites at moderate speed, add the salt and cream of tartar, then gradually increase the speed until soft peaks form. Beat in the sugar by big spoonfuls and continue until stiff peaks are formed. Beat in the vanilla and put the meringue into the prepared pans.
Bake for 30-45 min at 250F set in the lower part of the oven and set the baking pans in a deep dish and fill with very hot water up to the middle of the baking dishes. Cover with aluminum foil and bake in the oven until the meringue has risen to about 3-4 inches.
You can test to see if it's done by using a skewer and it comes out clean. Set the baking dishes on a rack to cool. The meringue will sink to its original level as it cools.
If you make these ahead of time, place in airtight contained and refrigerate, they will keep several days or several weeks in the freezer.

FOR THE CARAMEL SAUCE:
Blend the sugar and water in a saucepan and bring to a simmer. Remove from the heat and swirl the pan by the handle to insure the sugar has dissolved and the liquid is clear.
Cover the pan tightly and boil the syrup for several minutes over moderate-high heat, keep watching it, after a little while, a minute or so the bubbles will be thick and boiling. Uncover the pan and continue boiling, swirl the pan by the handle. Be careful because in a couple of seconds the syrup will begin to change color and can burn easily. As soon as a light caramel color is present remove from the heat, stir the butter and cream into the liquid. Put back on the heat and cook over low heat and stir with a fork to insure there are no hard pieces left and the sauce is smooth. Set the pan in a bowl with ice water to stop the cooking and cool.

TO PLATE:
Pour the Creme Anglaise on a dessert plate or serving platter. Run a knife along the sides of the meringues to allow them to be removed easily, you can push them out with a spatula and loosen them. You can unmold the large meringue onto a cookie sheet and cut into individual pieces, put some cream on the plate and set the meringue on the sauce.
When you are ready to serve, heat the caramel until you are able to dribble the caramel over the meringues in thick strands. Decorate as you wish and enjoy.

Friday, September 16, 2011

Chicken Nicoise..... You'll love it!

Here is a lovely dish inspired by France (so you know it will be amazing...) and it gives you the flavors of the Mediterranean while keeping your budget and nutrition in check. It still delivers incredible flavor or it wouldn't be worth it, n'est ce pas?    It's either amazing or not worth the bother if you ask me..... kind of like having a diet dessert.... are you kidding? If you're going to sin, it better be worth it and take you all the way! lol

Anyway, here is an economical and nutritional dish that is easy to make and packs a punch. Easy enough to serve on a weekday or make it to impress company. You'll see and it will become part of your culinary repertoire.....

Chicken Nicoise.- You can use a cut-up whole chicken but I prefer to use all chicken thighs for this one since it makes it easier to prepare and serve, but you can choose.... good for any type of poultry too.

5 tablespoons olive oil
8 oz bacon, chopped
1 whole chicken or 3 lbs chicken thighs or parts, rinsed and patted dry
2 lemons or Persian limes, the juice of
1 whole sprig of Thyme, off the stems, chopped
2 medium onions, sliced fine and thin
3-4 garlic cloves, chopped
6 tomatoes, chopped in good sized pieces
Bouquet Garni (wrap in cheesecloth bundle Herbes de Provence: 2 tablespoons of dried oregano, dried thyme, dried savory and crushed lavender) or just buy the spice mix.
3 Bay Leaves
1/2 cup dry white wine
3/4 cup black olives, pitted (or you could use green if that's your choice)

In a large, heavy bottomed pot or Dutch Oven, heat the olive oil over medium heat. Add the bacon and stir for about 4-5 minutes so it's nice and golden and renders its fat. If it begins to get too brown remove it from the pan and save it, you'll be adding it back in a moment. Add the chicken skin side down. Add salt, pepper and some thyme. Cook the chicken until it's golden brown on both sides and then remove from the pan and set aside.

Add the sliced onions and lower the stove temperature. Stir fry the onions for about 5 minutes. Now add the garlic, the tomatoes, the Bouquet Garni, Bay Leaves and the white wine. Mix it all well and allow to cook for about 10 minutes over medium low heat. Now return the chicken pieces to the pot, covering well with the liquids and cook 30 more minutes, insuring the chicken gets either covered in liquid or you bathe it in the liquid quite often.

Remove the Bouquet Garni and Bay Leaves and 5 minutes before it's done add the black olives and more wine if needed. Turn up the heat and finish cooking for the last 5 minutes.

Serve and enjoy. Traditionally served with a White Rice. Pour the juices over the chicken and include plenty of olives too.
**********************************

This is a simple dish to prepare and one that everyone will enjoy. It's also a practical one to make since it can be easily made in advance and refrigerated which means that even more flavor will be the result once you reheat. You can also make a double portion, freeze one to keep for another day when you're too busy to cook and then just pop into the oven to reheat and you've got dinner ready..... and enjoy the rest. You can also add more vegetables to this if you like, asparagus, cooked artichokes, carrots, mushrooms, etc. to make an even heartier dish.

So go ahead and bring the Mediterranean into your kitchen and savor the great flavors of France!

Saturday, November 13, 2010

Ahhhhh...... Chocolate Anything!

It's the weekend and I've got a couple of days off from culinary school (Le Cordon Bleu) and I am enjoying being able to sleep in a little and not to be rushing out the door. It's also nice to not have to stand all day long while I work on new skills, especially knife skills which are quite something. But I sit drinking some coffee while I have brunch (fried eggs topped with Hollandaise and a side of cottage fried potatoes, very yum...) as I begin to ponder on wonderful desserts to make for the upcoming holiday.

I've posted some great ideas for holiday food on my sister blog http://belinadventures.blogspot.com where you can find the main points of holiday food, turkey done several ways, side dishes and even a lovely sweet potato pie, but it just doesn't seem enough somehow and I'm now thinking that something chocolate might be just the ticket. So I'm dreaming up something smooth and decadent to top off a wonderful holiday (or any meal for that matter, because after all when is chocolate not appropriate, yes?)

One of the easiest and most delectable desserts is Chocolate Mousse. It's also very flexible in that you can serve it alone in a nice martini glass or ramekin, use it as filling for a cookie crust pie and top with whipped cream, or you can turn it into filling for a wonderful dark chocolate cake (look in belinadventures for this too, I have a fantastic no fail recipe for double chocolate cake here that you will love) or you can fancy it up and put in metal rings (the kind where the bottom is separate) so the body is mousse and you can top with chocolate ganache (hard chocolate covering, yum!) and it looks super elegant when you serve it. But even if you put it in a jelly glass it will still be amazing, requires little ingredients and is fast to make (which means you will eat it much faster too if you can withstand the temptation).

Basic Chocolate Mousse.- If you want a heavy-duty dark chocolate taste make as is or if you need some sugar, adjust as you like, just make and enjoy!

1 3/4 cups whipping cream
12 ounces quality semi-sweet chocolate chips (or heavy duty dark)
3 ounces espresso or strong coffee
1 tablespoon dark rum
4 tablespoons butter
1 teaspoon flavorless, granulated gelatin

Chill 1 1/2 cups whipping cream in refrigerator. Chill metal mixing bowl and mixer beaters in freezer.

In top of a double boiler, combine chocolate chips, coffee, rum and butter. Melt over barely simmering water, stirring constantly. Remove from heat while a couple of chunks are still visible. Cool, stirring occasionally to just above body temperature. If you can be really gentle, you might use a microwave, but go easy!

Pour remaining 1/4 cup whipping cream into a metal measuring cup and sprinkle in the gelatin. Allow gelatin to bloom for 10 minutes. Then carefully heat by swirling the measuring cup over a low gas flame or candle. Do not boil or gelatin will be damaged. Stir mixture into the cooled chocolate and set aside.

In the chilled mixing bowl, beat cream to medium peaks. Stir 1/4 of the whipped cream into the chocolate mixture to lighten it. Fold in the remaining whipped cream in two doses. There may be streaks of whipped cream in the chocolate and that is fine. Do not over work the mousse. Spoon into bowls or martini glasses and chill for at least 1 hour. Garnish with fruit and serve.
******************************************

Here's a sweeter version:

1 teaspoon unflavored gelatin
1 tablespoon cold water
2 tablespoons boiling water
1/2 cup sugar
1/4 cup cocoa
1 cup whipping cream
1 teaspoon vanilla extract
chocolate curls

In a small bowl sprinkle unflavored gelatin over the cold water; let stand 1 minute. Add the boiling water, stirring, until gelatin is dissolved.

In a separate bowl combine the sugar, cocoa, whipping cream, and vanilla; stir to blend. Beat on medium speed of electric mixer, scraping the bottom of the bowl a few times, until the mixture is stiff.

Add the gelatin mixture and beat until well blended. Spoon the chocolate mousse into dessert dishes or glasses. Sprinkle mousse with chocolate curls, if desired. Chill for at least 1 hour before serving.
****************************************

Hard Chocolate Ganache Topping.- Makes a lovely topping for mousse, cake, candies or just about anything else...

Makes about 4 cups

2 pounds dark chocolate, finely chopped
2 cups heavy cream

Place the chocolate in a stainless steel bowl. Bring the heavy cream just to a simmer. Pour the hot cream over the chocolate, and allow to stand for 1 minute, stirring until the chocolate is thoroughly melted.

The ganache can be used immediately, or it can be covered and stored under refrigeration, then warmed prior to use.

Pour it over the mousse (the one in the ring or dish with a rim) and allow to harden in the fridge. Pop it out gently and smooth the sides before serving.
*****************************************

To completely cover a cake with ganache (like in bakeries):

Keep in mind a cake's height when you are ready to glaze (so double the recipe above). A shorter cake will need less ganache to cover the top and sides than a taller cake. The ganache should feel slightly warm to the touch, between 100 and 110 degrees F, for glazing. This temperature ensures that the ganache will be fluid enough to flow over the cake, but it will not lose its shine or melt the buttercream coating underneath. For a professional appearance, make some buttercream frosting and frost the cake with a nice thin and very even layer using a spatula, this is a "crumb topping" and will insure a smooth finish and no crumbs.

Place the cake on a cardboard circle that is the exact size of the cake. If necessary, trim the cake circle to fit the cake. Place an inverted cake pan, or similar object that is slightly smaller than the cake itself, on a baking sheet. Position the cake on top of the inverted pan. If you have a cooling rack, use this so the ganache can drip past it (you can save the excess for later use and the cake won't sit in it).

Prepare a hard ganache (see above). Once all the chocolate has melted into the cream, allow the ganache to cool to between 100 and 110 degrees F.

Using a ladle or a 1-cup measure, pour 2 cups of chocolate ganache onto the center of the top of the cake; 2 cups is enough to cover a short 6-inch cake. When covering larger cakes, it is better to use more ganache than you think you will need because excess ganache will drip onto the baking sheet and can be reused.

Using a large offset palette knife or spatula without ridges, push the ganache from the center of the cake over the sides. Make sure the top of the cake has a thin and even coating.

If the ganache does not cover all of the sides of the cake, use a small knife or offset palette knife or spatula to spread some ganache onto those areas.

Allow the ganache to drip off the cake onto the baking sheet. Once the ganache has set, hold the cake from the bottom (remember, there is a cake board that you can hold onto) and trim any excess ganache with a small offset palette knife or spatula to insure you have a nice even edge all around, don't forget that presentation is a BIG deal.
******************************************

There you have it, some professional looking desserts which anyone can make and are perfect for the holidays to come. So go ahead and tackle these, you'll be proud of your results and will want to perfect these basic techniques, but whatever the results, they will taste amazing!!!!!